Insert single and multi-level terminals.
There are four types of schematic terminal behavior that you can select from. The terminal block name controls the type of terminal behavior.
|
|
Non-intelligent terminals. They do not show up in reports. |
|
|
Terminals that take on a terminal number that matches the wire number passing through or connected to the terminal. |
|
|
Terminals that carry a user-defined terminal number. |
|
|
Terminals that force a new wire number to generate as a wire passes through the terminal. |
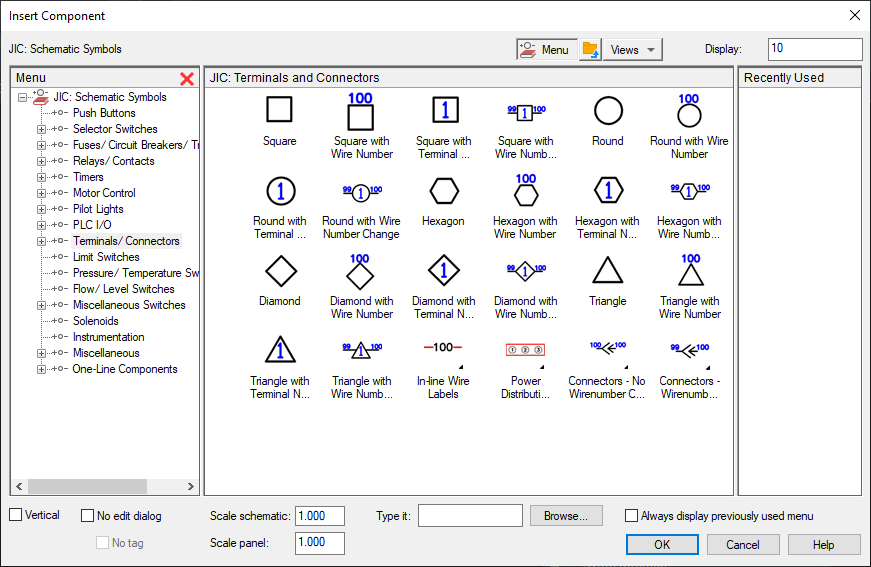
There are five main terminal styles: square, round, hexagon, diamond, and triangle.
Insert
Insert terminals like other schematic symbols, from the catalog browser or the icon menu. When inserting from the Catalog Browser, select the TRMS (Terminals) category.

When inserting terminals from the icon menu, make sure to select the appropriate behavior type and terminal style.

Use the Installation, Location, and Tagstrip properties to group terminals together into the same terminal strip.

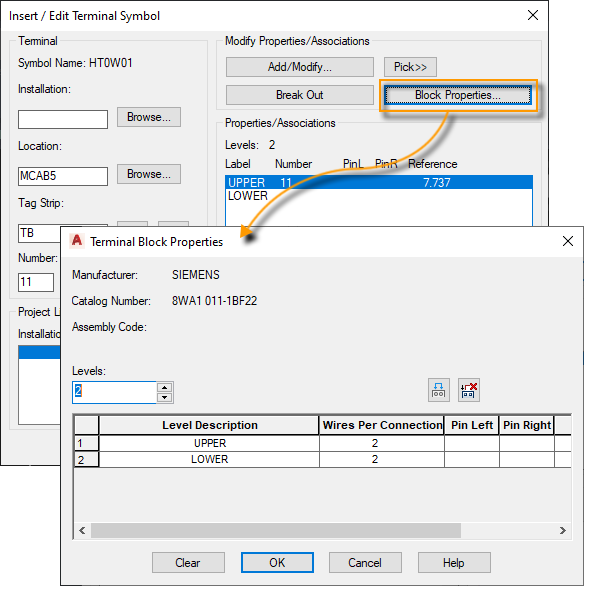
Terminal Block Properties
A schematic terminal symbol can represent a single level terminal or one level of a multi-level terminal. The number of levels for the terminal is defined as a block property. Each level carries certain characteristics, such as a label, wires per connection, left pin, and right pin. Each schematic terminal symbol carries all the block properties for each level so that removing one terminal symbol does not remove the block properties. If a block property is modified, all the terminal symbols update. A symbol without any level properties is treated as a single level terminal. Terminal properties can be part of a catalog assignment and applied automatically when the catalog is assigned.
You can view and edit the properties of a terminal on the Insert\Edit Terminal Symbol dialog box. Find

If a terminal is defined as multi-level in the properties, you can associate schematic terminals together, each terminal representing a level. If the schematic terminals are on the same drawing you can use the Associate Terminals command to relate them. Find
Watch the command prompt so you push each terminal into the correct level.
If the terminals are not on the same drawing, edit the terminal that you want to push into an association with another terminal. Select the Add\Modify button to open the Add\Modify Association dialog box. From here, you can push the terminal into an open level on another terminal.

Terminal Strip Editor
Use the Terminals Strip Editor to manage an entire terminal strip. You can change catalog assignments, add jumpers, associate terminals, add spare and accessories, insert the panel terminal strip, and more. Later on, in the Panel Layout topic you will see how to work with the Terminal Strip Editor. Find