Selecting UVs, UV components, and UV shells is critical to editing the layout of UVs in the UV Editor. You can select UVs in either the scene view or in the UV Editor, but you can only view and edit the 2D representation of UVs using the UV Editor.
Note: You can use soft selection to smoothly transform textures on your models without transforming each UV one at a time. Soft selection works by transforming a falloff region around your selected region. See
Soft Select components.
To select UVs in the scene
- Right-click a mesh in your scene and select
UV, or turn on the
UV selection mask (
 ) in the
UV Toolkit.
) in the
UV Toolkit.
UVs for the surface mesh display in exactly the same location as vertices, so you can select them in the scene view.
- Click individual UVs or drag a marquee to select multiple UVs at once.
The UVs are selected in the scene view. To view a 2D representation of the UVs you must open the UV Editor (UV > UV Editor).
- Ctrl + right-click and select Grow Selection or Shrink Selection to expand or contract the current UV selection.
To select UVs and UV shell components in the UV Editor
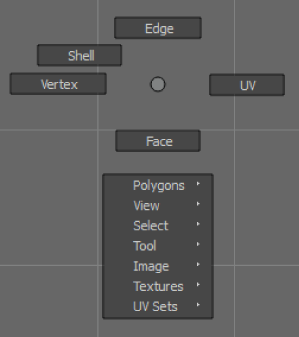
- Right-click in the
UV Editor's 2D view and select a component mode from the marking menu.
 Tip: Press f in the UV Editor to frame any selected items in the 2D view.
 - Select components in the 2D view.
You can also quick select all UVs that share a specific quality (such as those with a specific winding order, or those that overlap other parts of the UV Shell) via the buttons in the
UV Toolkit's
Select By Type section. For more information on all the these options, see
UV Editor Overview.
Note: On meshes that are symmetrical (even if only partially), you can use the various
Symmetry modes to select corresponding UVs on the other side of the mesh when necessary. For more information on symmetry, see
Symmetrical editing.