A walkthrough that gets parts into and out of Lattice Commander
In this walkthrough, you'll learn how to get a part into Lattice Commander, generate a lattice and a thin, enveloping wall, and merge the generated parts into single one.
Jump to:
- Step one: Load a part into Lattice Commander
- Step two: Generate a lattice
- Step three: Generate a skin
- Step four: Generate the merged part
Step one: Load a part into Lattice Commander
- Begin with a part loaded on a build platform.
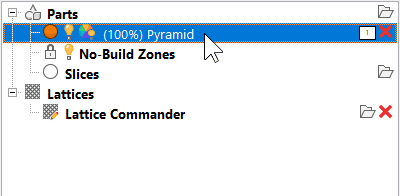
- In the project tree, click and hold the part to drag & drop it under
 Lattice Commander.
Lattice Commander is not available in your
project tree, activate it by selecting
 Lattices in the project tree, then click
Lattice Commander in the
context view.
Lattices in the project tree, then click
Lattice Commander in the
context view.
Dragging a part into
Lattice Commander creates a new
 component with the part loaded as a
 mesh body.
Step two: Generate a lattice
This function effectively reuses the entire mesh body as a template, permitting lattice structures to be generated within the volume that the mesh body encloses.
- Select the mesh body.
- From the
menu, choose
Create >
 Volume Lattice.
- In the context view, make the desired adjustments. For example, choose the desired Unit topology.
- Click Generate.

The
 lattice is generated as a new body. The original mesh body is still there, but it has automatically been switched to be
 invisible and
 ignored.
Step three: Generate a skin
This function takes the original mesh body and assigns a thickness to each of its triangles.
- Select the mesh body.
- From the
menu, choose
Create >
 Hollow.
- In the context view, make the desired adjustments. For example, choose the desired Thickness.
- Click Generate.

The
 skin has been generated.
Step four: Generate the merged part
Parts are generated from the whole
component, and the result is sent to the platform that was selected last before starting the part generation. Generating parts rasterizes the entire component and compares the roles of all present parts to determine where the generated part should be solid.
Use the roles for each body in a component to determine the outcome of part generation,
 solid,
 trim,
trim,
 void, and
ignore.
void, and
ignore.
- Select the
component.
- Adjust the roles as desired: In the context view, click the role icon of a body to cycle through the two or four roles. (Lattices cannot be used for trimming or voiding; so, there are only two roles to choose from.)
- From the menu, choose
Generate >
 Generate Component.

A component being previewed, with all the available roles in use. Trim volumes are shown in green, void volumes in red. Solid bodies appear in pale pink, ignored ones are hidden.

The result of generating a part from the example above.