You can edit a hatch pattern to add extra hatch boundaries to create islands or completely separate areas. All the hatch areas remain part of a single hatch object. Any edit performed on one area affects all the areas that are part of that hatching.
To add hatch boundaries to separate areas:
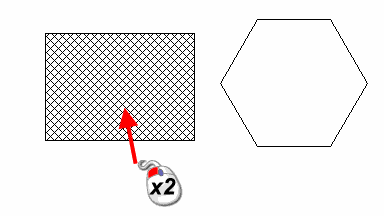
- Double-click the hatch of the pattern you wish to copy. This displays the Hatch dialog.
Suppose we have the following:
- If required, change the pattern of the hatch using the Hatch dialog. Do not click OK on the dialog.
-
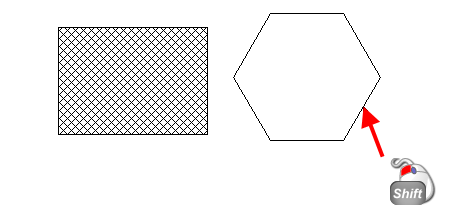
Shift+Click a wireframe object as the start of the new boundary. The Create Hatch toolbar is displayed.
- Use the Create Hatch toolbar to select the boundary.
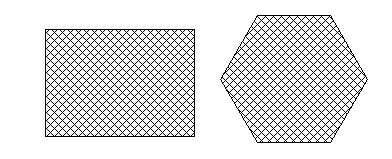
The new composite curve is added as an additional boundary of the original hatch and has the same pattern and spacing:
- Click OK on the Hatch dialog to save the changes.
Note: If you select a composite curve, the Create Hatch toolbar is not displayed and the composite curve is selected as the boundary.
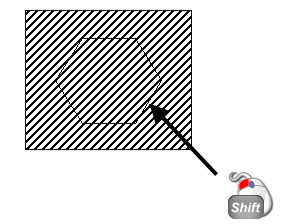
To add hatch boundaries to create an island:
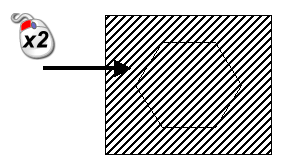
- Double-click the hatch of the pattern as shown in the image below to display the Hatch dialog:
- If required, change the pattern of the hatch using the Hatch dialog. Do not click OK.
-
Shift+Click the wireframe object that forms the boundary of the new island. The Create Hatch toolbar is displayed.
 Note: If a composite curve is selected, then the Create Hatch toolbar is not displayed and the composite curve is selected as the boundary.
 - Use the Create Hatch toolbar to select the boundary:

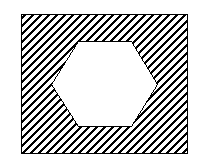
In this example, the hatch is removed from the area enclosed by the composite curve, creating an island:
- Click OK on the Hatch dialog to save the changes.
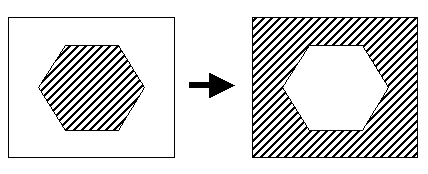
You can also extend the hatch from an island to an outer boundary, and remove the existing hatch:
Note: The boundary within or enclosing the existing hatch must be a composite curve.