You can create a limited view, which is a view of a portion of an existing view:

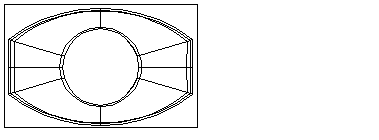
To create a limited view of the drawing view shown below:
- Make sure you have a drawing with at least one view on it.
If you do not have a drawing open, create a drawing or open an existing drawing.
If you have no views on your drawing, create a single view.
- Click Draft tab > View panel > Limited.
- Use the left mouse button to drag a box in an existing view to select the portion you want in the limited view:

When you select part of the view, the Scale dialog is displayed:
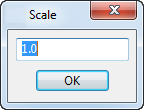
- Change the value in the dialog to set the scale of the model in the limited view.
- Click
OK.
The outline of the new view is attached to the cursor.
- Click a position to place the new view.

The new view is added to the drawing with markings indicating where it originally came from.
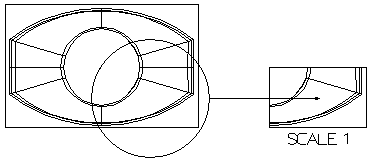
The scale of the limited view is displayed below the view, and updates if you change the scale. For further details, see Edit View dialog.