A trim boundary must form an enclosed region on a surface, otherwise the trim region is not defined.
When you generate a trim boundary, you may end up with one as shown below:
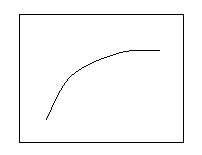
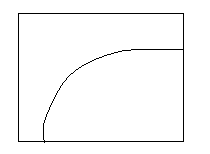
From this boundary, it is difficult to define the trim region. For example, it could be the following:

or the following:
PowerShape provides tools to help you define your trim region accurately. Sometimes, the pcurves may cause spikes or even loops in the trim boundaries. These tools can also be used to remove spikes and loops.
- Select the surfaces on which the trim boundary lies.
- Click Surface Tools tab > Mode panel > Trim Region On/Off.
The Trim Region toolbar is displayed.
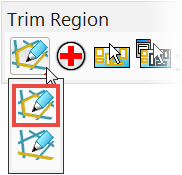
- Select Boundary edit mode from the mode flyout:
- Use the boundary edit options to edit the trim boundary:
-
 — Generates diagnostics on boundaries.
-
 — Selects all the boundaries on the selected surface.
-
 — Displays/removes the boundary selector.
-
 — Removes one-point spikes from the selected boundary.
-
 — Removes loops from the selected boundary.
-
 — Closes a boundary.
-
 — Recreates boundaries. Deletes any selected boundary and enters boundary creation mode.
-
 — Automatically creates boundaries from the pcurves on the surface. Any existing boundaries are deleted.
-
 — Swaps the trim region defined by a set of trim boundaries (for example, it converts a "hole" into an "island").
-
 — Deletes the selected boundary (without deleting its pcurves).
Note: Most operations are available when multiple surfaces are selected. -