To edit an electrode:
- Double-click the electrode or right-click the electrode and choose Modify from the context menu.
- Use the options on the
Edit Electrode dialog to edit the non-geometric properties of the electrode.
Changing these values does not affect the physical shape of the electrode.
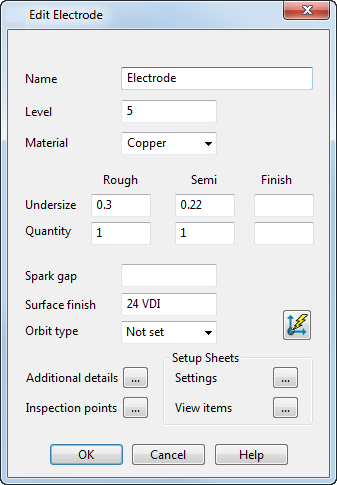
- Name — Enter a name for the electrode.
- Level — Enter the level of the electrode.
- Material — Select the electrode material.
- Undersize — Enter the Undersize values for the Rough, Semi, and Finish electrodes.
- Quantity — Enter the number of Rough, Semi, and Finish electrodes in the electrode family.
- Spark Gap — Enter a spark gap.
- Surface Finish — Enter the surface finish of the electrode.
- Orbit Type — Select the orbit pattern from the list to control the movement of the machine head during EDM.
-
Define burn vector
— Click the
Define burn vector
 button to display the
Vector Burn dialog. Use the dialog to edit the type of vector burn, the extraction direction, burn depth and vector clearance. You can also run a simulation of the electrode extraction.
button to display the
Vector Burn dialog. Use the dialog to edit the type of vector burn, the extraction direction, burn depth and vector clearance. You can also run a simulation of the electrode extraction.
-
Additional Details
— Click
 to display the existing
Additional Electrode Details dialog. You can use this to update the additional information that is displayed on the setup sheet.
to display the existing
Additional Electrode Details dialog. You can use this to update the additional information that is displayed on the setup sheet.
-
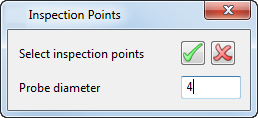
Inspection Points — Click
to display the
Inspection Points
dialog. Use this dialog to edit inspection points on an existing electrode.
-
Setup sheets — Click
to display the
Electrode Setup Sheet Control dialog. Use the options on this dialog to modify the setup sheets.
-
View Items — Click
to display the
Electrode Setup Sheet Items dialog. Use the options on this dialog to add other items to an existing electrode drawing view.
Note: If you have several copies of the same electrode, changes made to an original electrode are also applied to the copies. Similarly, any change made to an electrode copy is reflected in the original.