Adjust the analytical wall element in relation to other analytical elements.
Use the Wall Adjustment tool to adjust the analytical wall to:
- Another analytical wall
- Analytical column
- Analytical beam
- Analytical node of an analytical floor or an analytical foundation slab.
- Click Analyze tab
 Analytical Model Tools panel
  (Adjust).
 - Click Edit Analytical Model panel
 (Wall Adjustment).
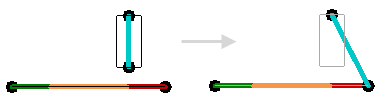
 - Select an end edge of the analytical wall to adjust as the source analytical element. You can select only wall vertical end edges as the source analytical element.
- Select the target analytical element. Elements that you can select as target analytical elements highlight when you place the cursor over them.
- Click Select panel
 (Modify) to accept changes and finish the Wall Adjustment tool. You are still in the Analytical Edit mode. You can continue adjusting analytical elements.
 - Click
 (Finish Edit Mode) to save changes and exit the Analytical Edit mode. To exit the Analytical Edit mode without saving changes, click
  (Cancel).
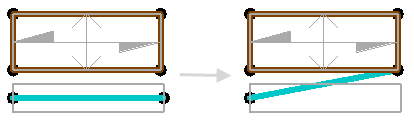
Adjusting the analytical wall to another wall
- To adjust the analytical wall so its end edge corresponds with another analytical wall, select a vertical end edge of the other wall as the target element
- To adjust the analytical wall so its end edge extends to the surface of another analytical wall, select the top edge of the other wall as the target element.
- To adjust an analytical wall to a common intersection, such as this wall that slightly extends beyond two others, select either of the other walls.
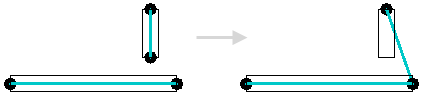
Adjusting the analytical wall to a column

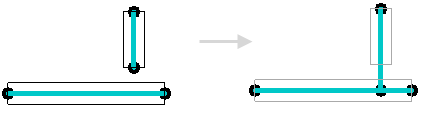
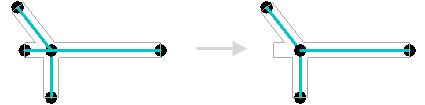
Adjusting the analytical wall to a beam
- To adjust the analytical wall so its end edge corresponds with the beam end node, select the beam end node as the target element.
- To adjust the analytical wall so its end edge extends to the beam, select the analytical beam as the target element.

Adjusting the analytical wall to the node of a floor or foundation slab