Use common sketch tools to define the boundaries for a system of rebar covering an area.
Sketch area reinforcement in floors, walls or foundation slabs for large areas that need reinforcement.
- Click Structure tab
 Reinforcement panel
 (Area). Note: The tool is also available on the selection Contextual Tab for elements that are valid reinforcement hosts.
 - Select the floor, wall or foundation slab to receive area reinforcement.
- Click Modify | Create Reinforcement Boundary tabDraw panel
 (Rebar Line).
 - Click once to select a starting point for the area reinforcement sketch.
- Continue to select points until you form a closed loop.
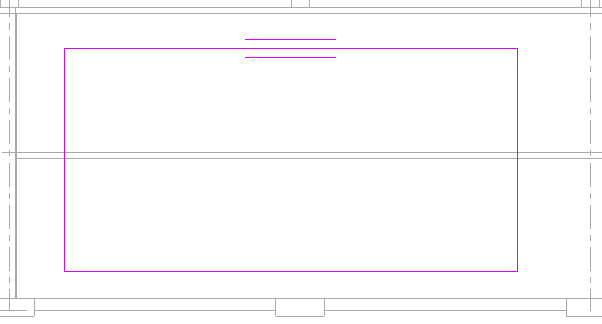
A parallel line symbol indicates the major direction edge of the area reinforcement.
- Click Modify | Create Reinforcement Boundary tabMode panel
 (Finish Edit Mode).
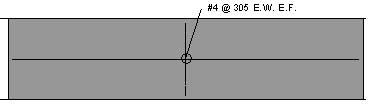
Revit places an area reinforcement symbol and tag on the completed sketch at the center of the area reinforcement.
Note: When you place area reinforcement, the rebar elements are not visible. If you want to display them you can specify the visibility of rebar elements in the Graphics section of the Area Reinforcement Properties palette. The visibility setting is available only when hosting rebar in area reinforcement.