Select objects with Scene Explorer:
- Bright blue indicates an object is selected and Scene Explorer has focus.
- Gray indicates an object is selected and Scene Explorer does not have focus.
- Dark blue indicates the parent (object or layer) of a selected object.
- Optionally, set the object-type filters on the Display toolbar to show only object types you’re interested in; by default, this is the vertical toolbar on the left side of the dialog. The same filters are also available from the Display menu
 Object Types submenu.
- Next, do any of the following:
-
- Click in the text field at the top of the explorer, then use the keyboard to enter enough characters to distinguish the object or objects you want to select from the rest. For example, if the scene contains several spheres and several boxes, you can list all the spheres simply by typing
s (assuming the spheres still have their default names).
Tip: For more flexible matching, use wildcards. For example, typing ?y shows only objects whose names' second letter is "y," and typing *d shows objects whose names contain the letter "d" after the first character. In this example, either wildcard input would match all objects whose names begin with "cylinder," and possibly others as well.
As you type, the list shows only the names of matching items and hides the rest. To remove this filter, delete the text or click
 .
.
- Press Enter to highlight/select only the matching objects while restoring the full list.
- Click in the text field at the top of the explorer, then use the keyboard to enter enough characters to distinguish the object or objects you want to select from the rest. For example, if the scene contains several spheres and several boxes, you can list all the spheres simply by typing
s (assuming the spheres still have their default names).
- Use the mouse:
- To select a single item, click its name. To select an object and its children, double-click its entry.
- To select multiple contiguous list entries, click the first item and then Shift+click the last.
- To select noncontiguous items, hold down
Ctrl as you click.
To deselect an item, Ctrl+click it. To deselect all items, click in an empty area of the Scene Explorer list, such as below the items.
- On the Selection toolbar, click Select All, Select None, or, after making a selection, Select Invert.
- If any named selection sets exist, choose one from the Selection Set drop-down list on the Selection toolbar.
- Use the Advanced Search Dialog: From the Scene Explorer Select Menu, choose Search, set any number of Boolean search terms, and then click Select.
-
Delete objects from the scene:
- Select one or more objects in Scene Explorer, then press the
Delete key or right-click the list and choose Delete.
The objects are deleted from Scene Explorer and the scene.
Hide or show objects and layers:
- Click the light-bulb icon of the object or layer whose visibility you want to toggle:
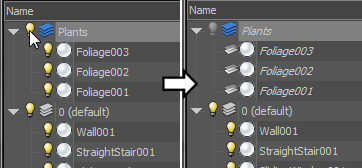
When you turn off visibility for a layer or object explicitly, the light-bulb icon turns gray. The icon for objects belonging to a layer whose visibility is off is a layers icon, showing that their visibility is determined by the layer they belong to.
Common Parameters rollout.
Edit hierarchies with Scene Explorer in Sort By Hierarchy mode:
- To link object to another (child to parent), drag an object’s icon or name to another object. When the mouse cursor resembles two overlapping rectangles, release the mouse button. The dragged object becomes a child of the object it's dragged onto.

- To link multiple objects to a parent, first select them and then drag to another object.
- To remove any number of child objects from their parent, restoring them to top level, first select them, then drag to an empty area below the list or to its left. At this point, the cursor image changes from two overlapping rectangles to a single rectangle, and you can release the mouse button to complete the unlinking process.
Alternatively, after selecting the objects, right-click and choose Unlink from the bottom-right quadrant of the context menu.
You can use similar techniques to edit layer contents.
Dock and float the Scene Explorer dialog:
- To dock a floating Scene Explorer dialog, drag the dialog to the left or right side of the
3ds Max interface, or right-click the top edge and choose Dock Left or Dock Right.
Tip: To close a docked Scene Explorer, first float it, then click the Close (X) box in the top-right corner.
- To float the docked Scene Explorer, drag its top edge away from the current location, or right-click the top edge and choosing Float from the right-click menu.
Edit multiple objects:
- Make sure the value or values you want to change are visible in the Scene Explorer interface. If they aren't, add them with Configure Columns.
- Select multiple objects.
- Change a value for one of the objects.
Scene Explorer sets the same value for all of the selected objects.
Expand or collapse a hierarchy, layer, container, or group:
- Click the arrow to the left of the hierarchy level, layer, container, or group name:
- If the arrow points to the right, indicating a collapsed structure, then clicking it expands the structure to show its contents, indented.
- If the arrow points downward, indicating an expanded structure, then clicking it collapses the structure, afterward showing only the top level.
- Expand or collapse all levels of a hierarchy or layer, Ctrl+click the arrow of the top-level entity.
Viewing hierarchy, container, and group structure is available only in Sort By Hierarchy mode. Viewing layer structure is available only in Sort By Layer mode.
To open the Object Properties dialog for an object selection:
- Open Scene Explorer or Layer Explorer.
- In the dialog list, select the objects or layers whose properties you want to examine or change.
- Right-click and, from the quad menu, choose Properties.
Rename an object or objects:
- Select the object in the list by clicking its name. Alternatively, select multiple objects. The editing is applied to all selected objects.
- Slowly double-click the name of a single selected object, or right-click and choose Rename.
Note: It is possible to rename multiple objects only with the right-click menu using the Rename Objects dialog.