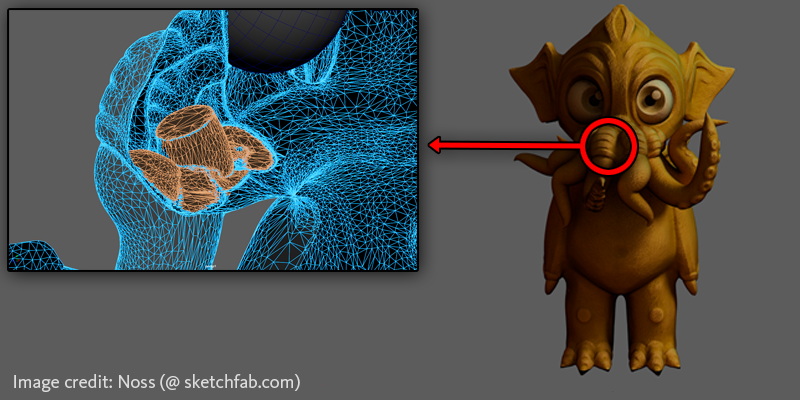
In order for Retopologize to do its job quickly and efficiently, you'll want to ensure you provide it with a base mesh and settings that are as clean as possible. In general, Retopologize works best on high-poly, organic objects with roughly even face distribution. If you encounter problems retopologizing your mesh, try the following:
To prepare a mesh for Retopologize:
- Configure your settings for Retopologize under and enable Preprocess Mesh. Especially in the case that you have a very dense input mesh, enabling preprocessing will speed up and increase the success of your final Retopologize operation. Test the output of Retopologize with preprocessing.
If your input mesh is not very dense or preprocessing is not viable for your mesh, try the following:
- Separate the mesh into disconnected components (via ).
- Soften as many edges as possible (). Limit hard edges only to areas where distinct features need to be maintained, and only to full edge loops.
Note: You can view the current hard edges on your model by selecting it and going to .
- Run
on your mesh with the following options enabled:
- Faces with more than 4 sides
- Concave faces
- Faces with holes
- Non-planar faces
- Lamina geometry
- Nonmanifold geometry
- Edges with zero length
- Faces with zero geometry area
- Invalid Components
- Split any faces with non-consecutive duplicate vertices into 2 faces.
- Run on all the vertices with a very small threshold to merge all very short edges.
- Run on the mesh to evenly spread components out.
- Delete history on the mesh (especially if your scene file includes a Retopo node prior to Maya 2020).
- Set
Retopologize settings appropriately based on whether your model is a hard surface or organic mesh. In particular,
- For organic surfaces: The default settings are ideally tuned for organic surfaces.
- For hard surfaces: Set high Topology Regularity and Face Uniformity values (i.e. 1) with a low Anisotropy value (i.e. 0).
- Run Retopologize.
Tips for working with scan data
- Internal faces can result in many nonmanifold vertices. The
Cleanup command can remove simple instances of this, but in complex cases its solution may be to split the vertex. Unfortunately, this will result in a hole, which is also problematic for
Retopology. Using the
Merge command to recombine these vertices will again lead to non-manifold vertices (thus getting into an endless loop).
If this happens, we recommend setting the Cleanup command to Selecting matching polygons mode, then run it with the Nonmanifold geometry option turned on. This will select all non-manifold geometry without fixing them, at which point you can inspect them and perform a manual fix by removing the internal geometry associated with the problem areas.
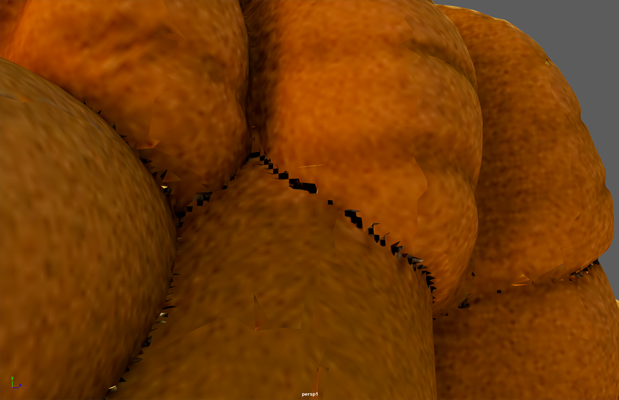
- Holes in faces will also cause problems for
Retopology. Your mesh must be watertight for the algorithm to perform properly. Unfortunately, running the
Fill Hole command on a mesh with nonmanifold geometry will often result in even more nonmanifold geometry, so you will need to weld these vertices manually.
- Frequently, scanners will set all edges on a model to be hard. This can cause
Retopologize to fail when the
Preserve Hard Edges option is turned on. To determine if you have this problem, select the model and go to
. This will display all hard edges in purple. You can then manually soften everything except for edges that run along features you want to maintain.
