The PArray (Particle Array) particle system can distribute particles on a geometric object. You can also use it to create sophisticated object explosions.
When you use PArray to emit particles using a selected geometric object as the emitter template (or pattern) for the emission, the object is referred to as the distribution object.

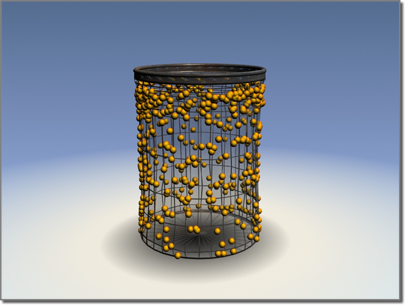
Basket used as a distribution object for random particles over its surface

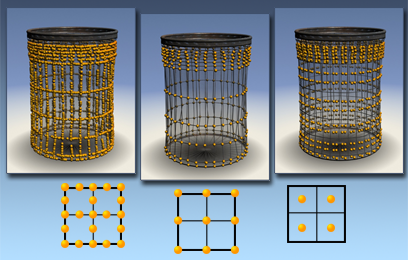
How particles can be distributed on an object:
.
Left: Edges
Center: Vertices
Right: Faces
Procedures
To set up a particle array:
- Create an object that will become the distribution object, providing the emitter pattern (or exploded object) for the particle array.
- On the
 Create panel, make sure
  (Geometry) is active and Particle Systems is chosen in the object category list, then click PArray.
 - Drag anywhere in a viewport to create the particle-system object; see Creating a Particle Emitter.
- On the Basic Parameters rollout, click Pick Object, and then click the object to use as the distribution object.
- Adjust the various options in the Particle Array rollouts to achieve the effect you want.
The distribution object can be any object containing renderable faces.
The particle-system object does not appear in the rendered scene. Its placement, orientation or size in the scene has no influence on the particle effect. To access the Particle Array parameters after creation, open the Modify panel and select the particle-system object (or click any visible particles in the viewport). To transform or otherwise modify the distribution object, select the distribution object itself.
Also, you can share a single distribution object among more than one particle-system object. The distribution object merely provides the template for the particles, which are actually generated by the particle system.
Example: To assign three different mapped materials to fragments:
- Apply mapping coordinates to the distribution object, either by turning on Generate Mapping Coords, if necessary, or by applying a UVW Map modifier.
- Assign a Multi/Sub-Object material to the distribution object.
- Set up the first three sub-materials to be mapped materials.
 Select the PArray icon.
 - On the Particle Type rollout in the Mat'l Mapping And Source group, choose Picked Emitter.
- In the Particle Type rollout
 Particle Types group, turn on Object Fragments.
 - Make sure the three spinners in the Fragment Materials group are set to 1, 2, and 3, respectively (or match the numbers with the sub-materials you've assigned in your multi/sub-object material). Tip: Using a complex distribution object for object-fragment particles can really slow down viewport interaction. You can use a simple stand-in object as the distribution object, and then later use the File/Replace command to replace the distribution object with a more complex object of the same name.