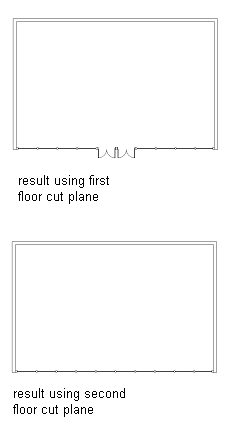
Use this procedure to display the cut plane for a specific level in a project.
Usually, you want to display the cut plane of the current level. However, in some cases, you might want to display a different level. For example, you may want to see how a curtain wall that spans several levels in a project will display at each level.

Specifying different cut planes results
- On the Project Navigator, open a construct with a curtain wall.
- If necessary, switch to a plan view.
- Access the cut plane controls using one of the following methods.
If you want to… Then… define the cut plane height for the current display configuration click the value for Cut Plane on the status bar. define the cut plane height for any display configuration click 
 .
. 
Then, select a display configuration in the left pane, and click the Cut Plane tab.
- Click Calculate.
This button is only available when the drawing is part of a project. It uses the level information you entered when you created the level.
- In the Cut Plane Worksheet, select the level whose plan view you want to display in the current drawing.
For example, if you have created a view of the first floor but want to display the plan view of the second floor, select 2.
- Select the cut plane height of the selected level.
For example, to display the second level at a cut height of 1.4 meters, enter 1.4 here.
- Click OK.
The display range is adapted to display the height of the selected level.
For example, perhaps you have a 3-story building with a floor height of 2.75 meters for each floor. You have created a view of the first floor but want to display the second floor in it at a cut height of 1.4 meters. In the Cut Plane dialog box, you enter 2 for level, and 1.4 for Cut Plane Height Above Level. When you click OK, the display range of the view now spans the second level. The following values are entered into the Cut Plane Tab of the display configuration:
Field Name Value Comment Display Below Range 2.75 meters This is where the second level starts. Cut Height 4.15 meters (2.75 meters + 1.4 meters) To display a cut height of 1.4 meters, add 1.4 meters to the start of the second level at 2.75 meters. Display Above Range 5.5 meters The second level starts at 2.75 meters, and has a base height of 2.75 meters. This results in an overall height of 5.5 meters. - Click OK.