When you reposition a part or device, PowerInspect matches measurements taken before and after the move, and uses them to create a transformation. This transformation is automatically applied to all measurements made after the repositioning, and enables you to continue the inspection in the original coordinate system.
To create a new position:
- Connect to the measuring device.
- In the
Co-ordinates dialog, click the
Reposition
 button. The
Device Reposition wizard is displayed.
button. The
Device Reposition wizard is displayed.
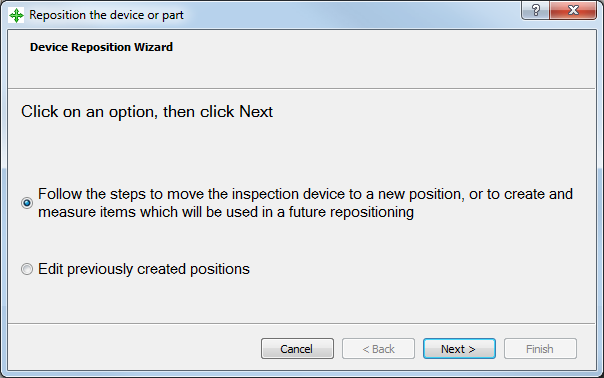
- Select
Follow the steps to move the inspection device to create a new position, then click
Next. Page 2 of the wizard is displayed.
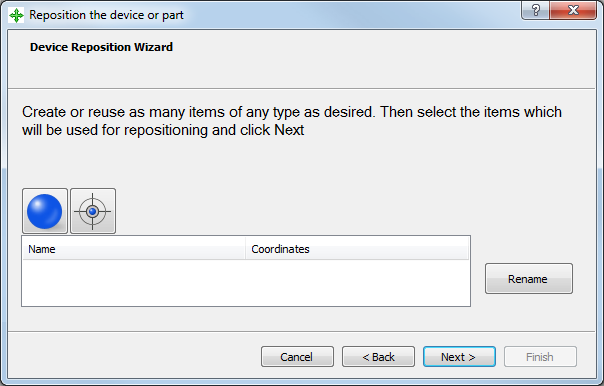
- Specify the features you want to measure:
 Sphere — Click this button to create a sphere item.
 Point — Click this button to create a point item. You must use a rigid probe to measure points.
By default, features are numbered sequentially, starting with Item 1. To rename an item, select its entry in the list, click Rename, and then type the new name.
To delete an item, right-click the entry, and then select Delete from the context menu. In the confirmation dialog, click OK.
- In the list, select the items you want to measure, then click
Next. Page 3 of the wizard is displayed.
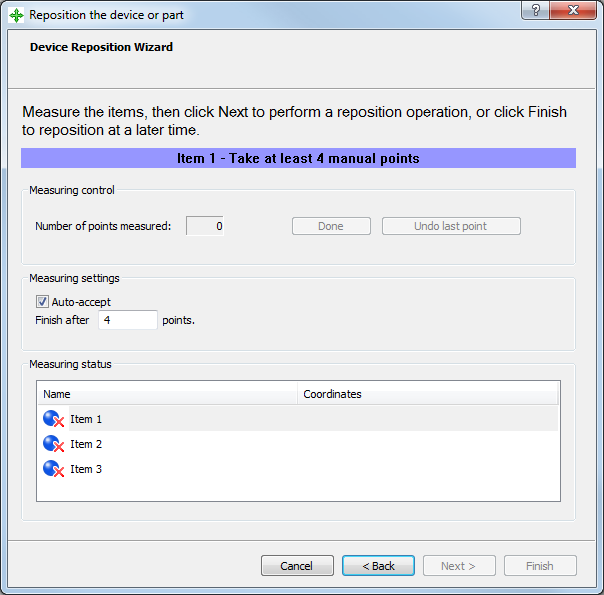
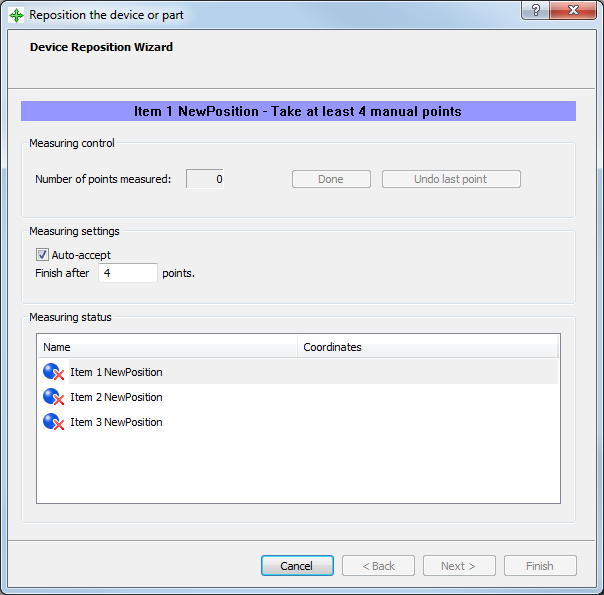
- Measure each item in the list. To measure a:
- point, select its entry in the list, and probe it.
- sphere, probe at least four points on the sphere, then click
Done.
Alternatively, select Auto-accept, enter the number of points required to measure a sphere, and probe the item. PowerInspect automatically saves the measurement when you have probed the specified number of points.
To reset the measurement status of an item, right-click its entry in the list and select Set unmeasured from the context menu.
- When you have measured all the items, click
Next. Page 4 of the wizard is displayed.
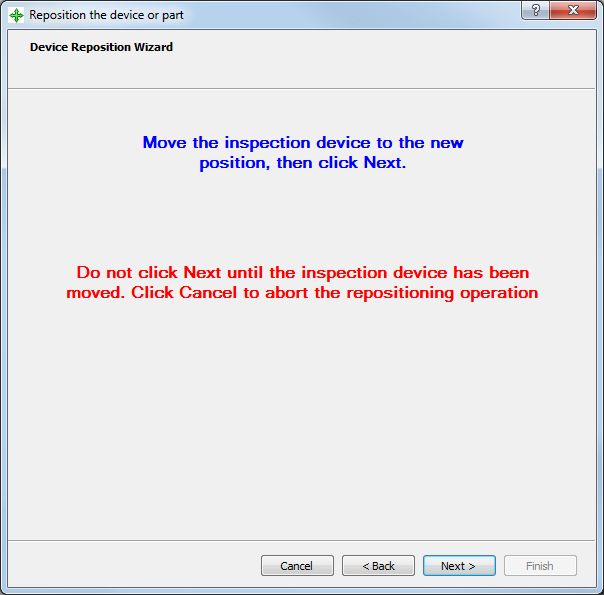
- Move the measuring device or part, then click
Next. Page 5 of the wizard is displayed.
- Remeasure all the items in the list, and then click
Next. Page 6 of the wizard is displayed.
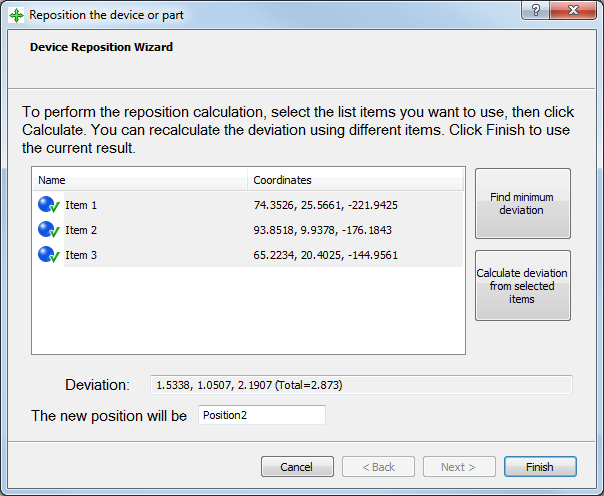
- Calculate the location of the new position. Click:
- Find Minimum Deviation to use only the items that produce the best result.
- Calculate Deviation from Selected Items to use all of the items.
The Deviation area displays the total deviation between the new and original positions of the selected items.
- To relabel the position, type the name in the new position box.
- Click Finish. A message confirms the new position has been activated, and saved. Click OK to close the message and the wizard.