The From Point-Cloud alignment enables you to align the part using a point-cloud. The point-cloud must resemble the CAD model and should include data from multiple surfaces.
To create a From Point-Cloud alignment:
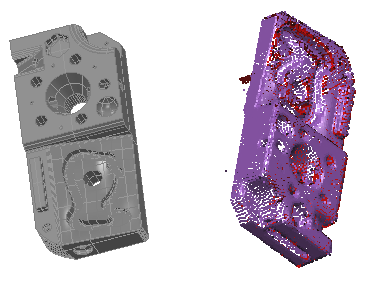
- Display the CAD model and the point-cloud in the CAD view. For example:
- Select the Definition level in the inspection sequence.
- Click Alignments & Datums tab > Alignments panel > From Point-Cloud. The Alignment from Point-Cloud dialog is displayed.
- Enter a Name for the alignment.
- To include the details of this item in the report, select the Output in report check box.
- If the inspection sequence contains constructed features that use measurements taken by different measuring devices or from different device positions, select the Use transformed data check box. This converts the device coordinates to CAD coordinates so that all calculations use a common reference system.
The check box has no effect when all coordinates in the inspection are collected with one measuring device in one position, or when the inspection sequence contains no constructed features.
- To use only part of the point cloud, select the Use selection check box. This can improve the accuracy of the alignment by excluding points that are not on the part.
- In the Reference Point-Cloud list, select the point cloud with which you want to create the alignment.
Alternatively, click
 to select the point cloud from the CAD view.
 - Click OK to close the dialog and create the Alignment from Point Cloud item.
- If you selected the Use selection check box, use the Point-Cloud tab > Select panel > Pick Mode menu to identify a group of points for the initial calculation of the alignment. You can select a group of points using an area selector, such as Rectangle, or you can select three individual points arranged as an equilateral triangle on a surface of the part.
- Play the Alignment from Point Cloud item. PowerInspect aligns the part to the CAD model, and superimposes the point cloud over the part.