When the Generate probe path button is deselected in the Features tab and you create or select an item that contains a probe path, the Features tab displays the Inspect dialog for the item. Use this dialog to view and change the probing details of the item, and to specify the type of probe path with which you want to measure it.
The dialog displayed depends on the type of item you select. The options available for an item depend on the type of machine you are creating the inspection for. This example shows the dialog displayed when you create or edit a circle item for inspection on a CNC machine.
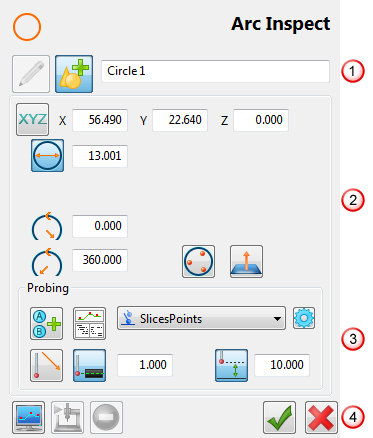
Each dialog contains the following sections:
 Name and mode — Specifies the name of the item.
 Parameters — Specifies selected parameters for the item, such as nominal values, start and end angles, and whether the feature is to be probed internally or externally. The parameters displayed depend on the type of item you select.
 Probing — Specifies how the probe path is created for the selected feature, and where the probe points are located in the path.
 Toolbar — Use these buttons to simulate a probe path, to remove points from the path, and to save or cancel changes to the item.
Click  to update the selected item; click
  to create a new item of the selected type.