Occasionally when you generate a pcurve, it may need adjusting slightly.
Note: Editing a pcurve also changes the boundary containing it.
To edit a pcurve:
- Select the surfaces on which the pcurve lies.
- Click Surface Tools tab > Mode panel > Trim Region On/Off.
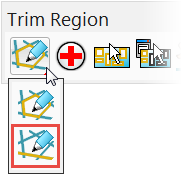
The Trim Region toolbar is displayed.
- Select
Pcurve edit mode from the mode flyout:

All pcurves on the selected surfaces are displayed.
- Use the pcurve editing options to edit the pcurves:
 — Generates diagnostics on pcurves.
 — Selects all pcurves on the selected surface.
 — Selects all unused pcurves on the selected surface.
 — Displays/removes the pcurve selector.
 — Removes one-point spikes from the selected pcurve.
 — Removes loops from the selected pcurve.
 — Removes surplus points to simplify the selected pcurve.
 — Labels the ppoints on pcurves.
 — Turn point labels off.
 — Makes pcurves from wireframe.
 — Copy pcurves.
 — Extends the selected pcurve.
 — Cuts the selected pcurve at the selected point into two pcurves.
 — Opens the pcurve.
 — Closes the pcurve.
 — Deletes the pcurve.
 — Displays/removes the ppoint selector.
 — Edits the parametric value at the selected ppoint.
 — Inserts ppoints into a pcurve.
 — Deletes the selected ppoint on a pcurve.
Note: Most operations are available when multiple surfaces are selected.