Once a system is operational, it is useful to apply themes which are associated with the alerts being generated. These themes support the textual information generated by alerts being issued, and are a powerful visual aid.
To be able to create an alert theme, an alert instance list (the results of applying an ADL to a simulation) must have been generated. This has been done in the previous step.
- Create a theme group to be used to store theme objects only. For this, create a model group within the Model group model group and give it a name of Themes.
- With the latest simulation still open in the GeoPlan (Live Data simulation of the Test TSDB - with rain gauges, Nowcast, Nimrod RADAR data and boundary conditions at outfall run), drop the ADL object generated earlier on top of the simulation.
- Open the GeoPlan Properties dialog by right-clicking the GeoPlan and selecting Properties & Themes from the context menu.
- On the Layers and Themes page, click the Edit button of the Theme column for the node object type.
- The node Layer Theme Editor is displayed.
- Add a new theme by clicking the
Add Theme button (
 ) of the Sub Theme Manager Pane.
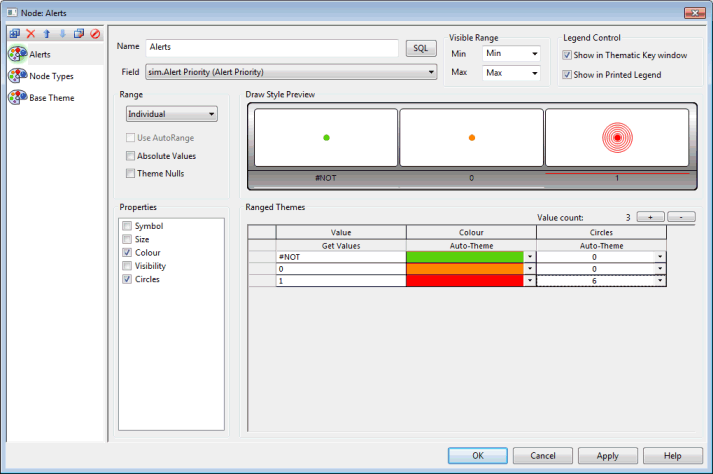
- Enter Alerts in the Name box of the blank Sub Theme Editor Pane that gets displayed.
- In the Field dropdown, select sim.Alert Priority.
- Then set the theme as shown in the screenshot below, remembering that the priority for this particular alert is 1:
- Set the range to Individual.
- Add a third value by clicking on the
 button of
Value Count and set that value to 1.
button of
Value Count and set that value to 1.
- Change the colours so that they match the ones shown in the screenshot below.
- Enable the Circles property.
- Set the number of concentric circles to 6 for the highest value (1).
- Click OK to save your changes.
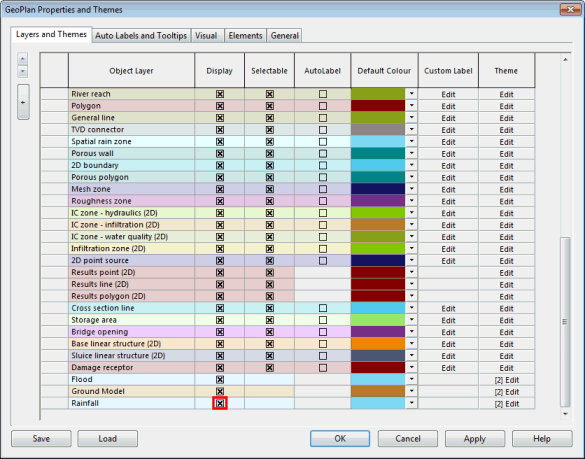
- Back on the Layers and Themes page of the GeoPlan Properties dialog, scroll down the list and ensure that the Display checkbox is enabled for the Rainfall Object Layer:
- Click Apply.
- Save the newly created theme:
- Click Save.
- In the Network editing properties - Save options dialog that gets displayed, select the Save to database object option and click OK.
- The Common Tree Selection dialog gets displayed. Navigate to the Themes model group, type in Alerts Tutorial in the box at the top and click Save.
- The Properties to save dialog is launched. Unselect the first entry (Properties and Themes) and enable the Alerts node theme.
- Click OK, the dialog closes.
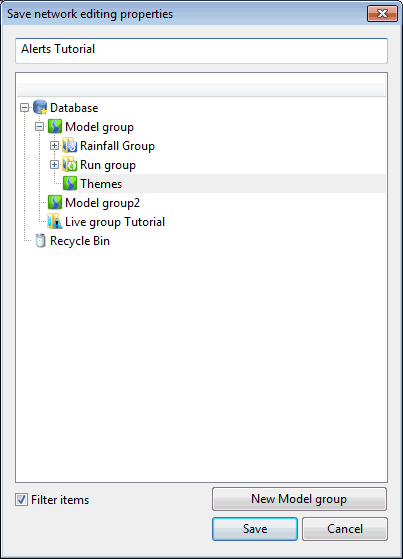
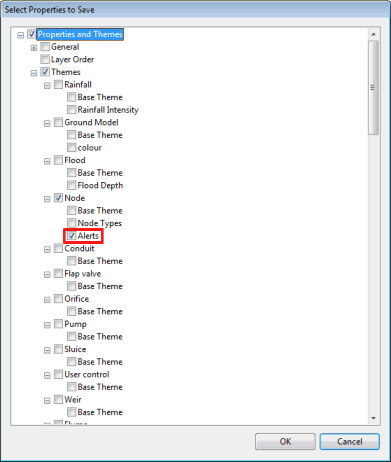
- Back in the GeoPlan Properties dialog, click OK to save the changes and close the dialog.
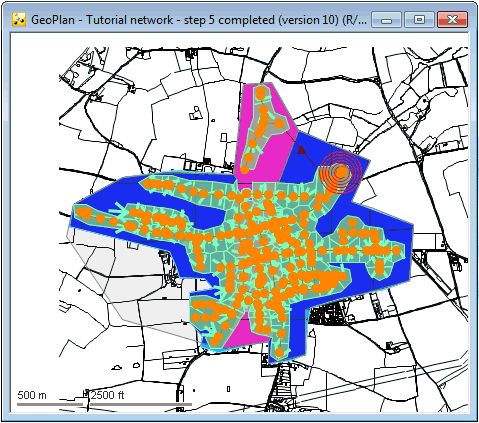
- The Alerts theme is applied to the GeoPlan. Click the
Show maxima button (
 ) of the
Replay toolbar to display the maximum results values:
) of the
Replay toolbar to display the maximum results values:
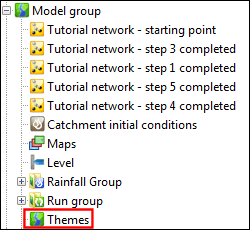
Tip: Until there actually are themes inside the Themes group, the icon used for the group will be the one of the Model group.
In order to specify how the live system operates (frequency of simulations, state saving etc.) and how the system will look in the control room, we now need to set up a manifest.