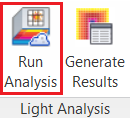
In order to run Lighting analysis:
- Go to
Analyze tab >
Light Analysis Ribbon > click the
Run Analysis button:

Clicking this button will initiate download of weather data for your site, authorization of your 360 account, and initiation of the analysis process.
- If not signed in to Autodesk 360, you will be prompted to sign in.
- For the LEED calculation, everything is pre-defined in the Daylighting Analysis in Cloud dialog window. This includes the following:
- Location of your Revit model is used. This determines the weather station that is retrieved from GBS Climate Server.
- Times of 9/21 at 9am and 3pm are used. Solar data for these hours are used from the GBS Climate Server weather station for the model location.
- Select Analysis type: LEED v4 EQc7 opt2, LEED 2009 IEQc8.1 or Custom.
Note: Illuminance thresholds for LEED v4 EQc7 opt2 or LEED 2009 IEQc8.1 are used to calculate the final percentages in the Room Schedule. For a Custom analysis, the user-defined thresholds are used.
- If doing a Custom Analysis, define custom analysis settings.
- Select the levels that contains floor to analyze.
- Select resolution for draft or final quality.
- "Check Price" each time analysis options are changed.
- Manage the cost of your analysis.
-
Click Start Analysis. Your analysis will run in the cloud on the 360 Rendering service. You may continue working on your Revit project while the analysis is running, but do not close the Revit project, or you will have to start the analysis again. Most analyses take 10 to 20 minutes.
Note: You can open and run an analysis on more than one project at a time. Results will be downloaded to the correct project and you will be notified which project analysis is done after complete.
- When you receive the message that the Analysis is Complete, your analysis data will have been downloaded to your Revit project and stored in the model in Extensible Storage.
- Generate and view results.