Activity 4: Rough the cavity
In this activity, we will use the Adaptive Clearing strategy to rough out the bulk of material from the cavity.
Adaptive clearing is a modern High Speed Machining (HSM) strategy designed for roughing. The important parameters in Adaptive Clearing are the Optimal Load and Stepdown settings. Traditional roughing strategies require you to set the load (or stepover) and stepdown for the worst case scenario. Adaptive clearing allows you to use the maximum values recommended by your tool vendor. The specified Maximum Load will not to be exceeded.
Prerequisites
- Activity 3 is complete.
Steps
Start a new 3D Adaptive operation and, from the Tutorial Tools (Metric) library, select the #11 - Ø10 mm R1 bullnose.
- On the Manufacture toolbar, Milling tab, select 3D > Adaptive Clearing
 .
. - On the Tool tab
 , click Select. This opens the tool library.
 - In the Library, select Fusion Library > Tutorial Tools (Metric)
- From the list, select #11 - Ø10 mm R1 (Bull nose end mill).
- Click Select.
- On the Manufacture toolbar, Milling tab, select 3D > Adaptive Clearing
Selection of the machinable stock.
- In the Adaptive Clearing command palette, click the Geometry tab
 .
. - Stock Contours should be enabled by default.
- Rest Machining should be enable by default. The toolpath is calculated based on the stock size, and any material already removed.
- From the Source drop-down list, select From previous operation(s). This will consider the material removed in the previous operation and eliminate cutting those same areas again.
- In the Adaptive Clearing command palette, click the Geometry tab
Depth cut settings, Optimal load and Stock to leave.
- Click the Passes tab
 .
. - Optimal Load controls the XY stepover. No change needed.
- Maxiumum Roughing Stepdown controls the depth cuts. No change needed.
- Set Stock to leave Radial and Axial, to .5 mm.
- Click OK to start the calculation.
- Click the Passes tab
Activity 4 summary
In this activity you selected a 3D Adaptive Clearing roughing operation, selected a library tool, set Rest Machining options, set the cut stepover, step depth and stock to leave.
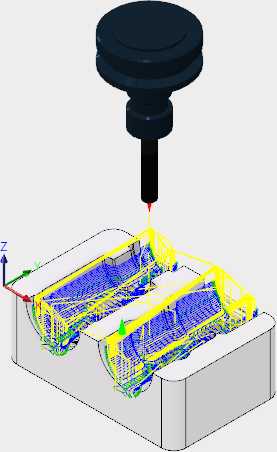
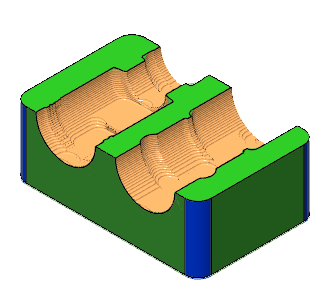
| The calculated toolpath is shown below. | The simulated toolpath is shown below. |
 |
 |
The toolpath is shown with a red arrow start, yellow rapid move, green lead in/out move, blue cutting moves and a green arrow at the end.