Use PMI tolerances for manual inspections
Open the Create Manual Inspection dialog.
On the canvas, click a surface.
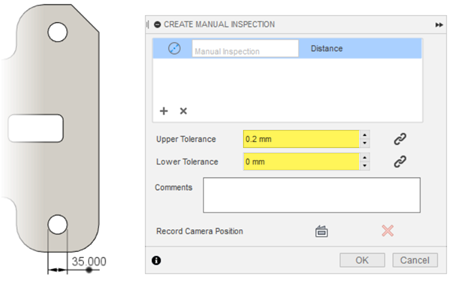
If the surface has a PMI size tolerance associated with it, the correct tolerance is automatically entered in the dialog. Link icons
 next to the tolerance in the dialog indicates that it comes from the PMI.
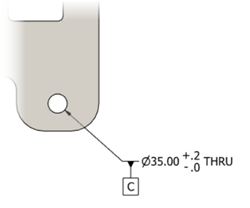
For example, when you select this 35-mm diameter hole with an asymmetrical size tolerance:

An upper tolerance of 0.2 mm and a lower tolerance of 0 mm is automatically entered in the dialog:

(Optional) If you want to change a tolerance, enter a different value in the box.
The link icon
 changes to a broken link icon
  to indicate that the tolerance no longer comes from the PMI.