Activity 3: Wiring the schematic
In this activity, you connect all the components with wires to make complete and appropriate circuits.
Creating nets between components in the Schematic design.
Prerequisites
- Activity 2 is complete.
Steps
Click Design > Connect > Net
 .
.Click the lower pin of resistor 1 (R1) to start a connection. A green circle will indicate you are at the pin connecting point.

Move the pointer, to the upper pin of resistor 2 (R2) and click when you see the green circle to create the connection. See that net is shown as a green line that is following pointer from the pin.

Add the remaining nets as shown in the image below. Confirm that at the four locations indicated by arrows there is a solid green circle indicating a junction in the nets. These are automatically created when you terminate a net on an existing net.
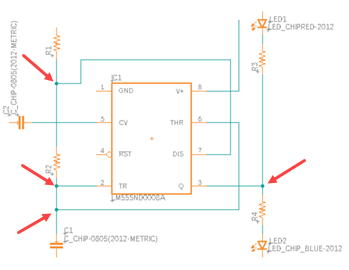 Note: The exact location of the nets is not critical, the start and end points are what is important.
Activity 3 summary
In this activity, you defined how the components on the circuit board are connected together.
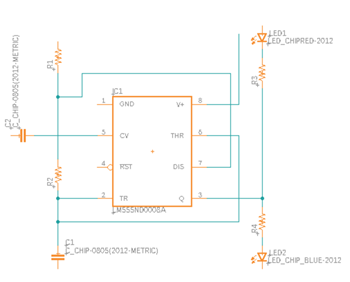
Circuit connected with wires in the Schematic design.