Activity 1: Prepare the model
Before you begin, you need to open a model in the Generative Design workspace and set the units.

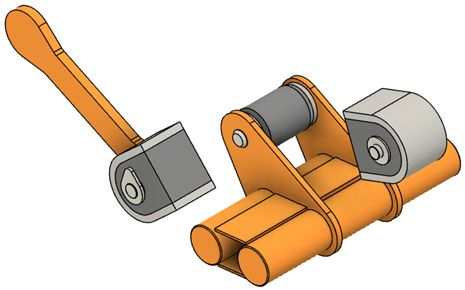
The Front Loader model opened in Fusion.
Prerequisites
- (Optional) Data file location: Generative Design Samples > Front Loader.
Steps
Depending on the model (GD Study or Front Loader) you want to use in the tutorial choose one of the approaches (1 or 2) and follow the steps.
Open a model created in Inventor.
Use this approach if you are continuing the Inventor portion of the tutorial, and you want to use your own model (GD Study) created in Inventor.
Note:Before you open the model in Fusion, make sure that the modeling orientation is the same as in Inventor. In Inventor, the original model had a Y up orientation. If you have not changed the orientation of your model in Inventor you can do so in Fusion. You can change the default modeling orientation in the Preferences dialog.
If you used the Open in Fusion option in Inventor, the file will automatically open in Fusion.
Alternatively, you can open your model from the Data Panel.
- If the Data Panel is not currently shown, on the Application bar, click Show Data Panel
 .
.
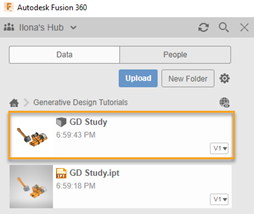
The Data Panel appears at the left side of the program window. - Identify the personal project on the Fusion web client in which you saved your model in Inventor.
Note: In the Fusion web client, you should see the Inventor .IPT file and the associated .F3D file automatically generated during the upload process. - Double-click the GD Study.F3D model, or right-click it, and then select Open from the context menu.

- Skip step 2 and go to step 3.
- If the Data Panel is not currently shown, on the Application bar, click Show Data Panel
Open a sample file from the Data Panel.
If you want to start only the Fusion portion of the tutorial and use the previously defined model, open the Front Loader model from the Data Panel.
Note: The Front Loader model is read-only, and you must save a copy of it to a personal project.- If the Data Panel is not currently shown, on the Application bar, click Show Data Panel
 .
.
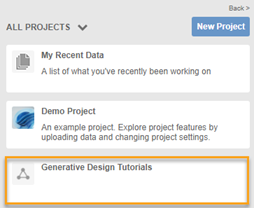
The Data Panel appears at the left side of the program window. - In the Data Panel, click New Project.
Note: If you can't see it, return to the home view in the Data panel. - Enter Generative Design Tutorials in the name field.
- Double-click the Generative Design Tutorials project to make it the current file saving location.

- The top level (home view) of the Data Panel is divided into three subsections: PROJECTS, LIBRARIES, and SAMPLES. Scroll to the bottom of the PROJECTS list, if necessary, to see the SAMPLES list.
- Locate the Generative Design Samples entry under SAMPLES and double-click it.
The Data Panel now displays a list of the folders containing the training lesson models. - Double-click the Front Loader model, or right-click it, and then select Open from the context menu.
- On the Application bar, click
 File > Save as.
 - Enter Front Loader Tutorial in the name field.
- Expand the arrow button next to the Location field and select Generative Design Tutorials.
- Click Save and then click OK
- If the Data Panel is not currently shown, on the Application bar, click Show Data Panel
Switch to the Generative Design workspace and choose Metric (SI) for the generative study.
Note: If you used the Open in Fusion option in Inventor, the file will automatically open in the Generative Design workspace, so please skip steps a-b and go to step c.- On the toolbar, click Design to change workspace.
- Select the Generative Design workspace from the drop-down list.

The New Generative Study dialog opens. - In the dialog, select Structural Component and click Create Study.
Note: In the Browser, the Study 1 - Structural Component study appears. - In the browser, mouse over Units, and then click
 .
. - In the Units Settings dialog, select Metric (SI) from the Default Unit Set drop-down list.
- Click OK.
- On the Application bar, click
 File > Save.
Activity 1 summary
In this activity, you opened the model in the Generative Design workspace and set the units.