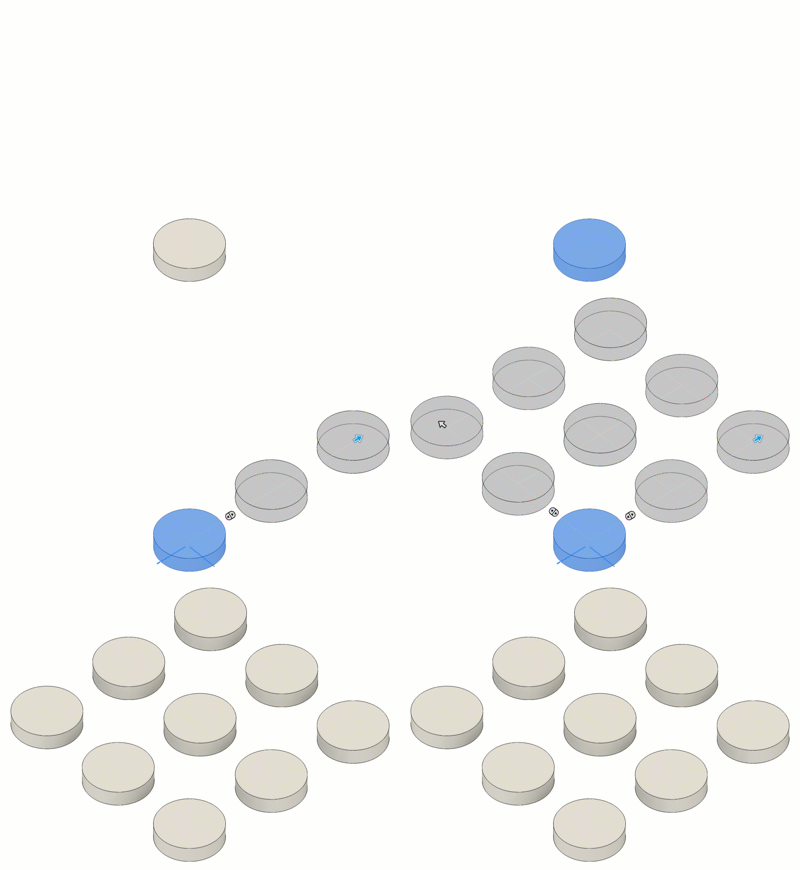
Create a rectangular pattern
Learn how to use the Rectangular Pattern tool to duplicate faces, bodies, features, or components in a design and distribute them along linear axes in rows and columns to create a rectangular pattern in Fusion.

Click Design > Solid > Create > Pattern > Rectangular Pattern

The Rectangular Pattern dialog displays, and Type is set to Rectangular Pattern.
Select the Object Type:
 Faces: Duplicates faces on solid or surface bodies and distributes them according to the pattern settings.
 Bodies: Duplicates solid or surface bodies and distributes them according to the pattern settings.
 Features: Duplicates features in the timeline and distributes them according to the pattern settings.
 Components: Duplicates components in an assembly and distributes them according to the pattern settings.
In the canvas, Browser, or Timeline, select Objects to pattern.
Select one or more linear objects to define the Axes to distribute pattern instances along.
You can select edges, axes, or sketch curves.
After you select directions, two perpendicular quantity manipulators display in the canvas.
Select a second edge to change the angle of the second direction.
Select the Distribution:
 Extent: Distributes pattern instances evenly along the full extent of the distance value that you specify.
 Spacing: Distributes pattern instances so that they are spaced at the distance value that you specify.
For Axis 1, adjust the Quantity, Distance, and Direction:
Drag the Quantity manipulator handle in the canvas, or enter an exact value.
Drag the Distance manipulator handles in the canvas, or enter an exact value.
Select a Direction:
 One Direction: Distributes pattern instances in one direction from the source object along this axis.
 Symmetric: Distributes pattern instances symmetrically in two directions from the source object along this axis.
For Axis 2, adjust the Quantity, Distance, and Direction:
Specify the Quantity value.
Specify the Distance value.
Select a Direction:
 One Direction
 Symmetric
If Object Type is set to
 Features, select a Compute Type:
Optimized: Creates identical copies by patterning feature faces. (Fastest)
Identical: Creates identical copies by replicating results of original features. Use when Optimized is not possible.
Adjust: Creates potentially different copies by patterning features and calculating extents or terminations of each instance individually. (Slowest)
Note: The Optimized setting may cause errors when patterning split features.
Optional: Check Suppression to display a suppression checkbox over each pattern instance in the canvas. Uncheck instances to remove them from the pattern.
Click OK.
The Rectangular Pattern displays in the canvas.
Tips
- To create a
 Rectangular Pattern in only one direction, set the Quantity value for Axis 2 to 1.
 - Select a different pattern Type on the fly to switch from a
 Rectangular Pattern to a
  Circular Pattern or
  Pattern On Path.