Activity 3: Lengthen the prongs and rerun the analysis
In this activity, because the tuning fork prongs definitely need to be lengthened to lower its vibrating frequency, you increase the length by 5 mm on the production model. Changes made on the simulation model do not affect the production model, so you need to change workspaces. To accomplish this, you
- Switch to the Design workspace
- Use the Press Pull command to increase the length of the production model prongs by 5mm
- Check the natural frequency of the modified tuning fork for the fundamental vibration mode

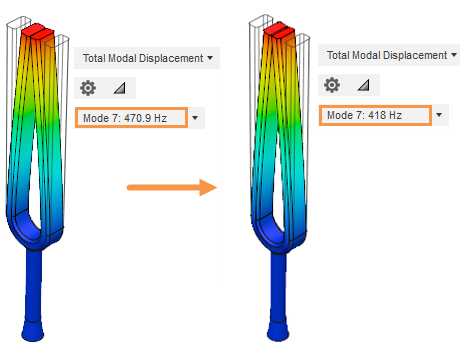
Original tuning fork vibrating frequency (left) and Modified tuning fork vibrating frequency (right).
Prerequisties
- Activity 2 is complete.
Steps
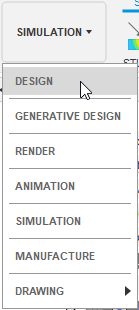
Access the Design Workspace from the Change Workspace drop-down menu at the top left end of the toolbar.

Lengthen the tuning fork prongs by 5 mm.
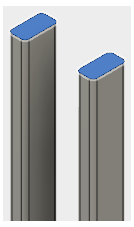
- Click the end face of one of the prongs to select it.
- Hold down the Ctrl key and click the end face of the other prong to select it too.

- Right-click in the modeling canvas and select
 Press Pull from the Marking Menu.
An arrow appears on the model, and a numeric input field appears in the model canvas. The arrow should be pointing outward. A positive distance lengthens the prongs, and a negative distance shortens them). - Type 5 mm in the numeric input field and press Enter, to accept the command and close the dialog.
Confirm the tuning fork prongs are now 75 mm long, and save the study.
- Click
 (Design workspace > Solid tab > Inspect panel > Measure) to open the Measure dialog.
 - Click one of the long edges of one of the prongs, and check its length.
In the Measure dialog, the Length in Selection 1 should equal 75.00 mm. The centerline of the bend in the tuning fork is at Y=0. The original length of the prongs from the centerline of the bend was 70.00 mm. Since we added 5 mm to the length, 75.00 mm is the correct measurement. - In the Measure dialog, click Close.
- Click the
 Save in the Quick Access Toolbar to save the modified model.
 - Enter a descriptive name and click OK to save the changes.
Note: Changes you make to the base production model are replicated through all existing simulation models.
- Click
Rerun the simulation for the new tuning fork length.
- Select Simulation from the Change Workspace drop-down menu at the left end of the toolbar.
Notice you have warnings, indicating that the existing results no longer reflect the model settings, because the tuning fork prongs are now 75 mm long. - Click
 (Simulation workspace > Setup tab > Solve panel > Solve) to open the Solve dialog.
 - Click Solve.
- Select Simulation from the Change Workspace drop-down menu at the left end of the toolbar.
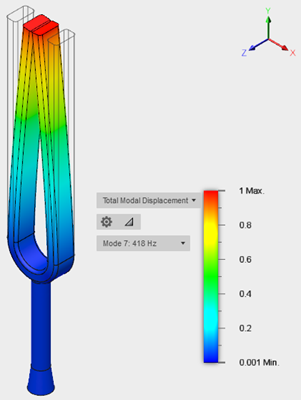
Confirm that the natural frequency of the modified tuning fork for the fundamental vibration mode is 418 Hz.
- From the Mode drop-down list next to the plot legend, select Mode 7.

- In the Mode drop-down list next to the plot legend, note the frequency next to Mode 7.
The frequency for this mode is 418 HZ, which is precisely the frequency we were targeting. - Click
 (Simulation workspace > Results tab > Finish Results panel > Finish Results) to return to the Setup tab.
- From the Mode drop-down list next to the plot legend, select Mode 7.
Activity 3 summary
In this activity, you lengthened the tuning fork prongs on the production model to decrease its vibrating frequency. To lengthen the prongs, you
- Switched to the Design workspace
- Increased the prongs of the production model by 5mm
- Confirmed that the natural frequency for the modified tuning fork is 418 Hz