Component Tags let you create named groups of components to deform geometry. In a Retopologize workflow, you can use edge Component Tags to explicitly define areas of your mesh to preserve mesh detail.
Feature preservation with Edge Component Tags can be useful for guiding the edge flow of the result mesh in specific areas. When used in conjunction with the Keep Original option, you can add and remove edges from the Component Tags on the input mesh and see updates appear dynamically on the retopologized result mesh.
To preserve an area of a mesh using Component Tags
- Select the object you want to retopologize.
- Select
Mesh > Retopologize and ensure the following is set:
- Keep Original: On
- Click
Retopologize.
After Retopologize runs, the input mesh and the retopologized mesh are placed at the same location in the scene. Once we move the retopologized mesh over, we can see the results.
 Overall, the retopologized mesh has been smoothed:The divet and the bottom edge of the model have been rounded.
Since the input mesh has hard edges explicitly defined, we can use them to guide the edge flow and preserve some of the edges on the retopologized mesh.
- Select the input mesh.
- In the
Attribute Editor, turn on
Pause in the
polyRetopo node.
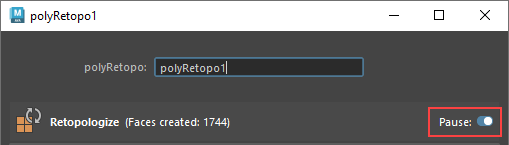
Now that the Retopologize algorithm is paused, it won't run again until Pause is turned off. This step makes it faster and easier to work with your meshes.
- In the
Feature Preservation section of the polyRetopo node, turn on
Preserve >
Hard Edges.
In the following example, the bright blue edges on the input mesh are marked hard. Once Preserve > Hard Edges is turned on, the retopologized mesh becomes sharper.
Now let's add Component Tags on the input mesh to further influence the edge flow of the retopologized mesh.
- Start defining Component Tags. See
Assign Component Tags for Geometry for a full list of detailed steps.
In this example, we've selected edges in the bottom left divet, along the bottom edge and along the centre of the input mesh:
 Tip: Click one edge and then Select > Continuous Edges to quickly select a group of edges.
In this example, the Component Tag names correspond to the location of the selected edges. For example, the edges in the divet are members of a Component Tag named Edges_Divet.
You can edit the membership of Component Tags in the Component Tags section of the input mesh's shape node in the Attribute Editor.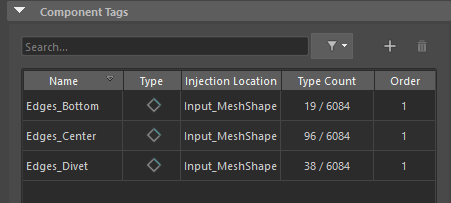
Now that Component Tags are defined, we need to tell the Retopologize algorithm to use them.
- In the Attribute Editor, select the polyRetopo node.
- In the Feature Preservation section, turn on Edge Component Tags.
- In the
Feature Tags field, enter the names of the Component Tags.
The field supports comma separated lists of edge Component Tags. It also supports wildcards in the format <name>*. In this example, all of the Component Tags start with the letter "E", so the wildcard "E*" is valid.
- In the
polyRetopo node, turn
Pause off.
The Retopologize algorithm automatically runs and the retopologized mesh's edge flow updates.
The improved edge flow is particularly evident in the area surrounding the divet.
Although you can define Component Tags before you run Retopologize, the following example illustrates how to apply Component Tags after Retopologize runs.