Learn how to modify some elements in the story.
- Continue working in your project, or open the project
Tutorial_Alpha_Stories.rstructure.
Note: To open the project, click Explore Tutorials from the Welcome Screen or navigate to the Tutorials folder C:\Users\Public\Public Documents\Autodesk React Structures Tech Preview\Tutorials.
- In the Object Inspector, click
Story 5.
Parameters of Story 5 display in the Properties Pane.
Note: For more information about the Object Inspector, see Object Inspector. - In the Properties Pane, enter
12.00 ft in the Height box.
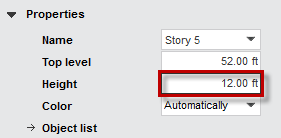 Note: For more information about the Properties Pane, see Properties Pane.
 - Press
Enter to accept the height of the story.
Note: The Top level value changes automatically in the Properties Pane.
- At the bottom of the drawing area, expand the list of stories, and then select
52.00 ft Story 5.

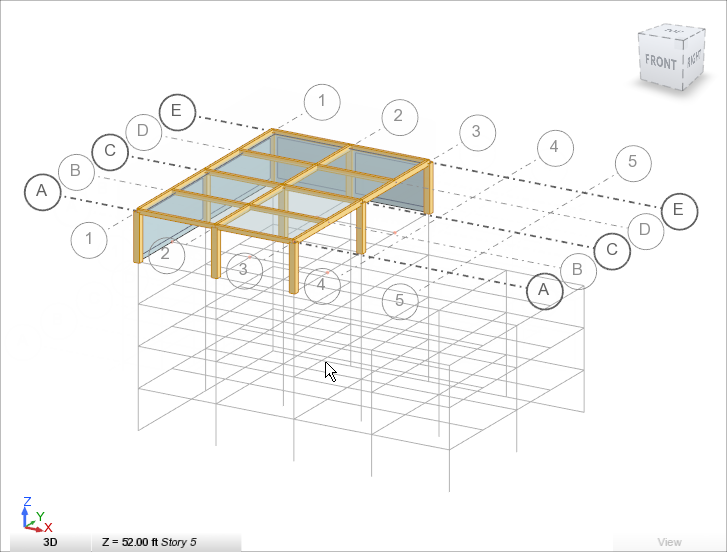
The Grid Axes move to the top story.
- In the Object Inspector, click
 next to
Stories to hide all the stories.
- In the Object Inspector, click
 next to
Story 5 to display the top story only.
The Story 5 displays in the drawing area.
- In the Object Inspector, click
 next to Story 5 to expand the list of elements located in the story.
- In the Object Inspector, click
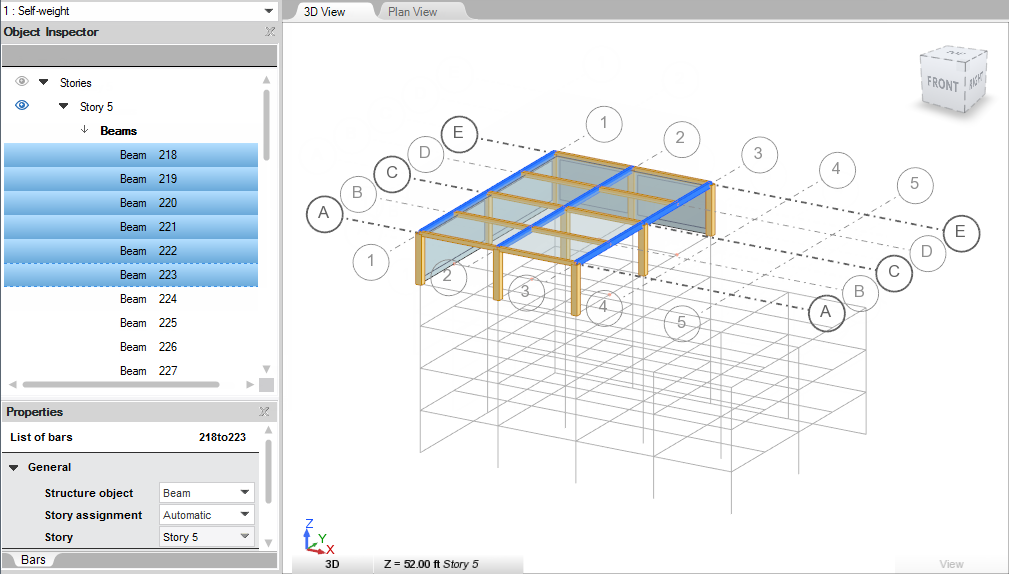
Beams to display the beam parameters in the Properties Pane.
The beams highlight in blue in the drawing area.
- In the Object Inspector, click
 next to
Beams to expand the list of beams located in the story.
- In the Object Inspector, click the first beam on the list.
The beam highlights in blue in the drawing area.
- Press and hold
Ctrl, and then in the Object Inspector select the first six beams to display the beams located in the Y direction.
The beams highlight in blue in the drawing area.
- Click
Model
 Attributes
 Section.
The Assignment and Section panels display in the ribbon.
- In the Assignment panel, ensure that
 the Selection assignment mode is selected.
- In the Section panel:
- Select the Steel material from the drop-down menu.
- Select the W 18x50 section from the drop-down menu.
Note: If you don't see the W 18x50 section in the drop-down menu, see Add Sections.The W 18x50 section is assigned to the selected beams.
- In the Assignment panel, select
 the Direct assignment mode.
- In the Section panel:
- Select the Steel material from the drop-down menu.
- Select the W 18x40 section from the drop-down menu.
- Click the Plan View tab to switch to a plan view of the model.
- At the bottom of the drawing area, expand the list of stories, and then select 52.00 ft Story 5.
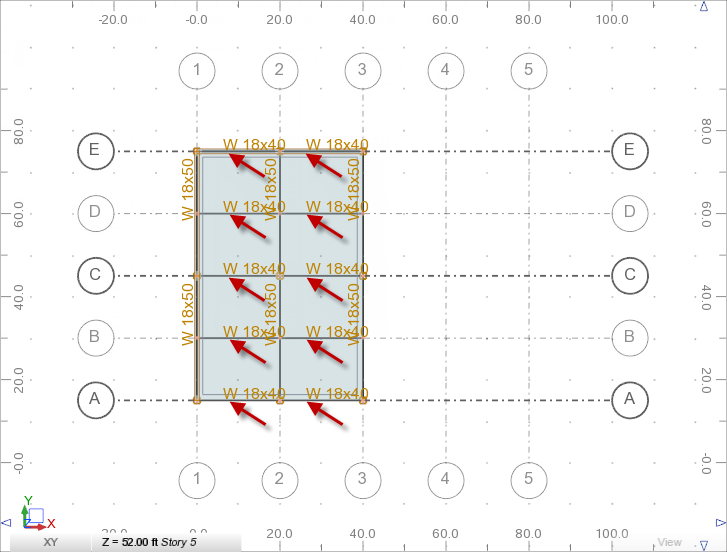
- In the drawing area, click all beams in the X direction to assign a new section.
The W 18x40 section names display in the drawing area.
- Click the 3D View tab to switch to a 3D view of the model.
- In the Object Inspector, click
Columns to display the column parameters in the Properties Pane.
The columns highlight in blue in the drawing area.
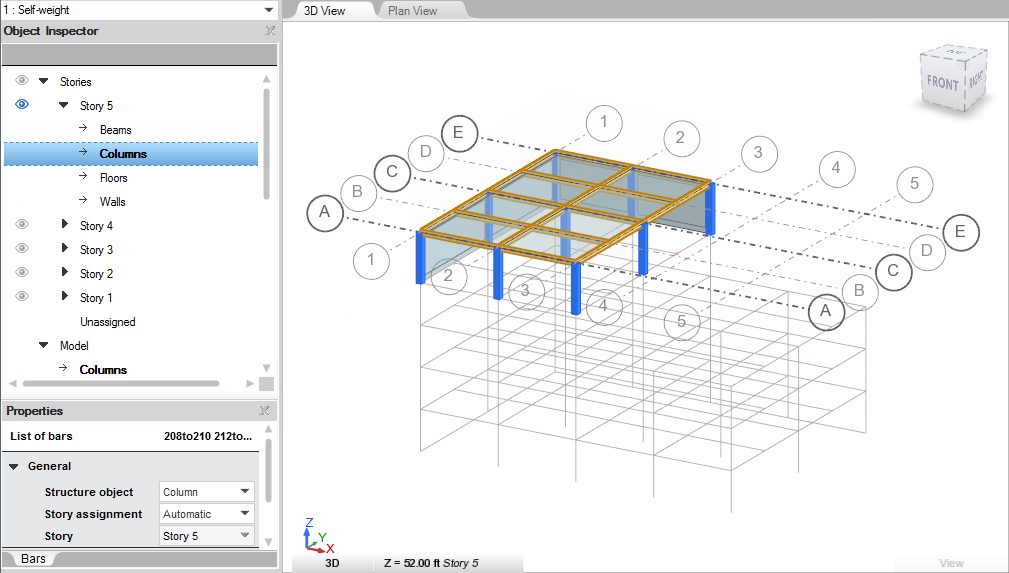
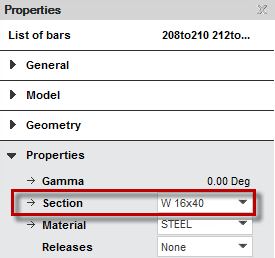
- In the Properties Pane, select
W16x40 from the Section drop-down menu.
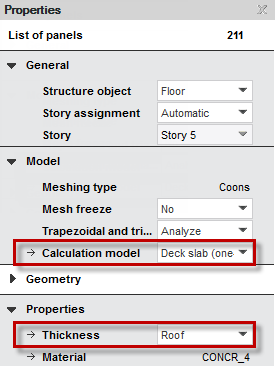
- In the Object Inspector, click
Floors to display the floor parameters in the Properties Pane.
The floor highlights in blue in the drawing area.
- In the Properties Pane, set the following parameters as follows:
- Calculation model: Deck slab (one-way),
- Thickness: Roof.
- In the drawing area, click anywhere to deselect the floor.
- In the Object Inspector, click
 next to
Stories to display all the stories.
- In the Object Inspector, click
 next to
Grid Axes to hide the structural axes.
The Simple building model looks as follows.

- In the status bar, click
 (Section shapes) to hide the section shapes in the drawing area.
Note: For more information about the status bar, see User Interface.
 - Save the project as Tutorial_Alpha_Model.rstructure.