
Quick Walkthrough of Bifrost-USD in Maya
Follow this tutorial to quickly get familiar with the basics of Bifrost-USD.
For more information about USD in general, see Pixar's USD documentation and in particular the glossary of terms and concepts. For information about USD in Maya, see the USD for Maya section of the documentation for your version of Maya.
Create the stage in the graph
In a new graph, add an add_to_stage node.
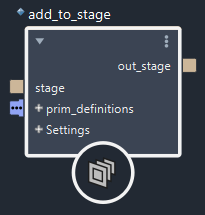
Hover your mouse pointer over the prim_definitions port — it requires one or more inputs of type Object.

Data of type Object is used for many things in Bifrost, such as geometry, collections of simulation settings, and so on. However for this node, only objects that contain a "recipe" for a USD prim make sense to use as inputs. Such objects can be output by many of the high-level Bifrost-USD nodes, for example, define_usd_prim.
Now hover the pointer over the out_stage port. It is an object of type BifrostUsd::Stage.

Types in the BifrostUsd namespace contain USD data in a Bifrost "wrapper" that allows them to be connected in the Bifrost graph. The low-level Bifrost-USD nodes use these types instead of Bifrost objects containing recipes.
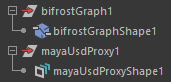
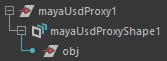
Now connect the out_stage port to the output node. A mayaUsdProxy node and shape are created in the scene. These are created automatically only when a new stage output is created, and represent Maya's version of the stage.
You can display shapes in Maya's outliner to see the hierarchy. The Maya USD proxy shape has no children because the stage is still empty.
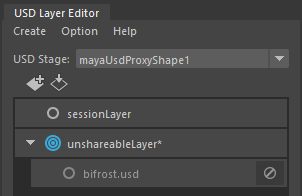
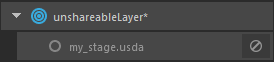
If you look at Maya's USD Layer Editor, you can see that the stage from Bifrost is named bifrost.usd, and it is included as a sublayer in an unshareable layer of Maya's stage. This preserves any modifications that you make in Maya, such as moving any of the contents of Bifrost's stage, whenever Bifrost rebuilds its stage procedurally — for more information about how shareable and unshareable layers work, see Sharing layers with USD for Maya.
Right-click on unshareableLayer and choose Print to Script Editor, then open Maya's Script Editor. The contents of the layer are listed at the bottom of the history pane, and look something like this example:
// USD Layer identifier: anon:0000014B314F2B60:unshareableLayer
// Real Path:
// #sdf 1.4.32
// (
//     customLayerData = {
//         string[] mayaSharedLayers = ["anon:0000014B1D7313D0:bifrost.usd"]
//     }
//     subLayers = [
//         @anon:0000014B1D7313D0:bifrost.usd@
//     ]
// )
//
In this example, the identifier of the layer is anon:0000014B314F2B60:unshareableLayer.
anonmeans that this is an anonymous layer — it exists in memory and not as a separate file on disk.- The number is a hash that is generated automatically at run-time and may change. It is used to differentiate between anonymous layers when there are multiple ones loaded.
- The final portion is a human-readable tag that is used for display in Maya's USD Layer Editor.
In the contents of the unshareable layer, you can see how the stage created in Bifrost is included as a sublayer. It is also anonymous — although you will later save the stage from Bifrost to disk, Bifrost-USD and USD for Maya always connect through copies in memory. The customLayerData is related to how USD for Maya and Bifrost-USD work together and can be ignored.
Add a prim to the stage
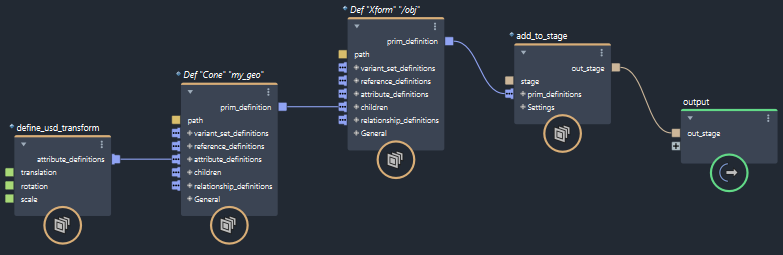
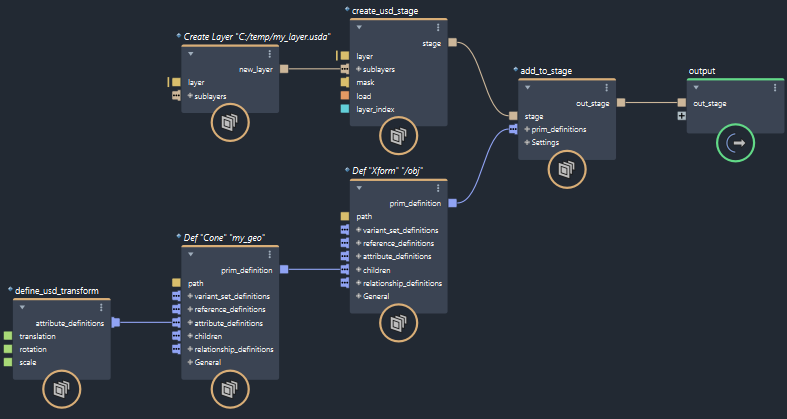
So far the Bifrost stage is empty, so add some prims to test how everything is working. Right-click on the prim_definitions port and choose Create Node > USD::Prim::define_usd_prim.
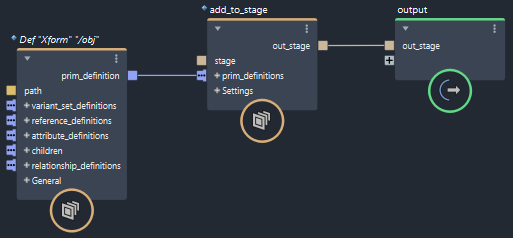
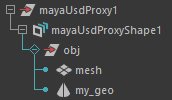
This creates a prim on the stage — by default, it is called obj and its type is Xform (transform).
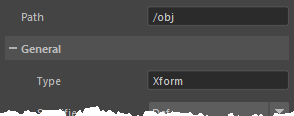
It is a common practice to group other prims under a transform so that they can be easily moved in the host scene or other layers. Expand the Maya USD proxy in the Outliner to the see transform in the hierarchy.
To add some geometry under the transform, right-click on the children port and choose Create Node > USD::Prim::define_usd_prim again. This time, change Path to something like "/my_geo". Note that you don't need a leading slash in this case because it is being added as a child and its path will be automatically appended to its parent's path. However, it's always safe to include the leading slash.
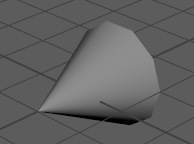
In addition, change Type to "Cone". Finally, there is some geometry on the stage.
Note that Cone is simply one of the implicit shape prim types available in USD. For a list of other basic USD types, look at the description in the Info tab. To see all types that have been registered for use with your version of USD for Maya, right-click on the Maya USD proxy shape in the Outliner and expand Add New Prim > All Registered.
Add an attribute
The cone is lying on its side. To turn it upright, you could select and rotate it in Maya's viewport but it is better to do this procedurally in the graph. Instead of modifying the obj transform, let's add an attribute to the cone.
Right-click on the attribute_definitions port of the second define_usd_prim node and choose Create Node > Usd::Attribute::define_usd_transform. Enter an X rotation of -90 to make the cone stand upright.
Work in layers
So far, you've created a stage, added a couple of prims, and defined an attribute. However, the main point of USD is to use layers for better asset management and efficient collaboration.
Right-click on the stage port of the add_to_stage node, and choose Create Node > Usd::Stage::create_usd_stage. Click on the Layer folder icon in the node's parameters, navigate to a directory where you have write permission, and enter a name for the file, such as "my_stage.usda". Note that the file won't be saved right away, but the name will be used by a save_usd_stage node downstream (unless you override the file name in that node). This simple example uses the ASCII file format (.usda) so that you can easily inspect the contents in a text editor, but for real work it is better to use the binary crate format (.usd or .usdc) for performance and efficiency.
In Maya's USD Layer Editor, the default name bifrost.usd has been replaced by the name of your file.
If you had USD files that you wanted to use, you could add them as sublayers of your stage. For example if you are working on character effects, you might need to load layers for the set, layout, props, characters, animation, and so on. However if you are working on environmental effects only, you might only need the layers for the set and layout.
For this example, create a new layer from scratch. Right-click on the sublayers port, and choose Create Node > Usd::Layer::create_usd_layer. Here again, click the Layer folder icon, navigate to the desired folder, and enter a file name such as "my_layer.usda".
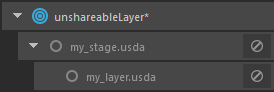
Notice that my_layer now appears as a sublayer of my_stage in Maya's USD Layer Editor.
Add prims to a sublayer
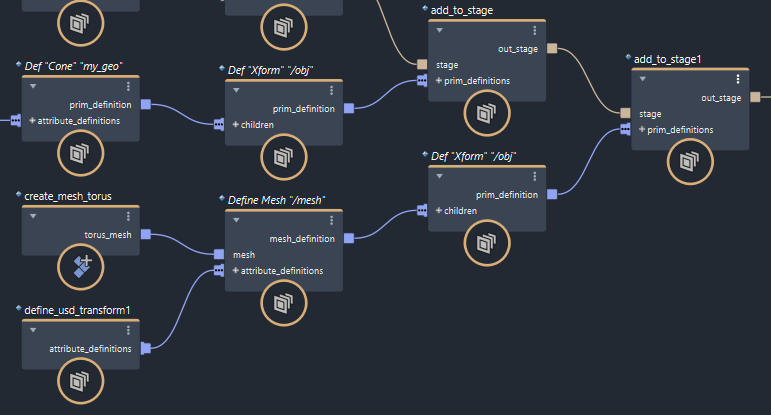
Daisy-chain another add_to_stage node between the first one and the output node. Right-click on its prim_definitions port and choose Create Node > USD::Prim::define_usd_prim to add another transform. Right-click on its children node and this time, choose Create Node > USD::Prim::define_usd_mesh.
For the mesh data, you could drag a Maya mesh into the graph in the usual way. For this example, add a create_mesh_torus to the graph and connect its output to the mesh input of the define_usd_mesh node. If desired, use an attribute to move it so that it does not overlap with the cone.
Right-click on my_layer.usda in Maya's USD Layer Editor and select Print to Script Editor again. In Maya's Script Editor, you can see that my_layer is empty. This is because the mesh was added to the root layer of my_stage by default.
To fix that, click on the second add_to_stage node. In the Parameter Editor, change layer index from -1 to 0. Use the Script Editor to confirm that the mesh is now in my_layer.
Layers are ordered, where -1 represents the root layer, 0 is the bottom sublayer, and so on. Note that in Bifrost-USD, the first sublayer (index 0) holds the weakest opinions, which is the opposite of how sublayers are indexed when using the USD Python or C++ API. The identifier strings of the layers cannot be used because the hash number may change.
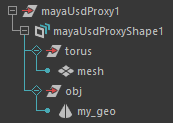
In Maya's Outliner, you can see that the cone and the mesh share the same transform. This is because you did not change the default path of the mesh's parent Xform. The hierarchy is the composed USD stage, and the data in it can come from any layer and refer to data in another layer.
Select the Xform definition downstream of the Mesh definition and change its Path to "/torus". In this case, the slash character is mandatory because it has no parent of its own.
Save the layers
To save your work so far, connect a save_usd_stage node between the last add_to_stage node and the output.
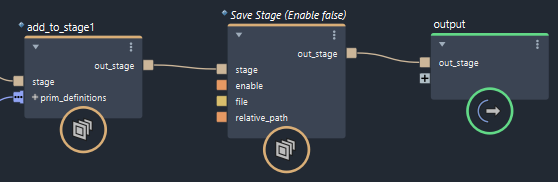
You can ignore its File parameter — that's a convenience for quick tests and diagnostics. When it's empty, the node will save all modified layers using the file names set upstream.
By default, the save_usd_stage node is not enabled. This avoids constant resaving as you modify the graph. When you are ready to save the layers, toggle Enable on and then off again.
Open the files in an external text editor to verify that they contain what they should. The file my_layer.usda has a transform and a child mesh, and my_stage.usda has a reference to the my_layer.usda file as well as a transform and its child cone.
Note also how the stage is actually a layer. Either file can be loaded as a layer or stage in another graph, or in any application that supports USD.