Create a Project and Activate Services
Account administrators can create projects, activate services, and assign project administrators to those services.
The following video demonstrates project creation and service activation:

Create a Project
In the Account Admin module, click the Projects tab.
Click Add.
In the Create Project Profile dialog box, specify the project name, and enter the project information. Required fields are marked with an asterisk. Some of the fields, such as the start and end dates, are used for company reporting and analytics to ensure all team members have access to consistent project information across workflows.
Select a language from the BIM 360 Field Project Language drop-down list.
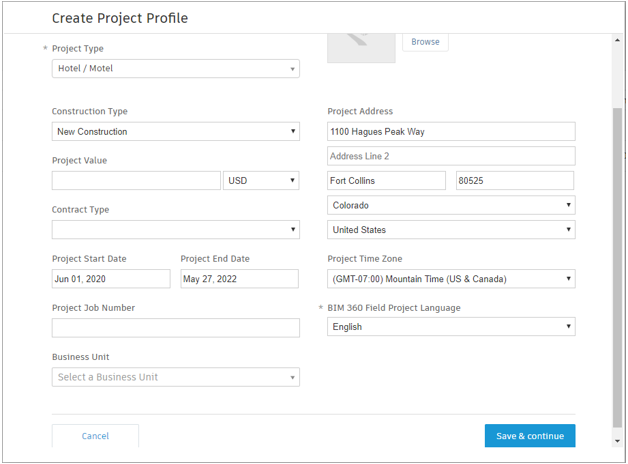
Click Save & continue to create the project and display the Project Services page.
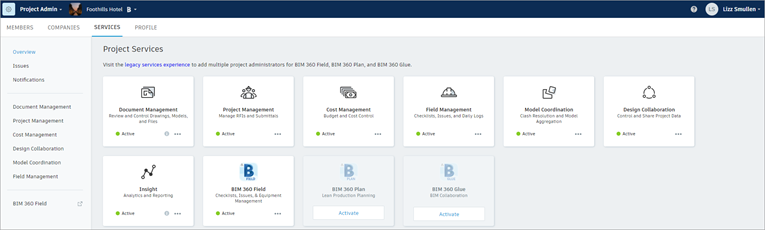
Activate a Service
In the Project Services list, click Activate for the service you want to add to the project.
If you are activating services for the first time on your project, you'll have the option to apply a project template. The project template allows you to use settings from an existing project as a template for your new project. To do so:
a. Enable the Apply a project template radio button.
b. Select the project to use as the template.If you don't want to use a project template:
c. Enable the Don't apply a project template radio button.
Click Activate.
In either case, you are added as the first project administrator when activating a service for the first time on your project. You must be a member of the project for this to be successful. You can add more project administrators later.
After you've activated at least one service, you can click Activate from the list of project services to activate other services.
Project template settings
If you are activating services for the first time on your project, you'll have the option to apply a project template. The project template allows you to use settings from an existing project as a template for your new project. Settings included in the project template include:
Document Management:
- Folder structure
- Role permissions
Issues:
Issue types
Root causes
Custom attributes
Role-based permissions
See Issues and Folder Permissions for more information.
Cost Management:
Budget code templates
Custom attributes
Document templates
Module-specific settings
Financial markup formulas
Refer to the Budgets and Budget Code Templates topics in the Cost Management help for more details.
Field Management:
Checklist templates
Issue templates
Role-based permissions
Refer to the Templates and Checklists and Permissions topics in the Field Management help for more details.
- Design Collaboration configuration:
- Custom shared folder path
- Team with name, team folder, color, and content folder selection
- Permission settings on teams by company, role, and user
- Schedule publishing with custom Revit Cloud worksharing user entitlement
- Enable/disable DWG file support
- Model Coordination configuration:
- Coordination spaces on Design Collaboration team and shared folders
- Document Management configuration:
- Assigned roles and/or companies to users
- Folder structure with permission settings by company, role, and user
See Project Templates for more information.