Create, Share, Schedule Reports
You can create, share, and schedule a report from the Recent or Saved tabs in Insight.
In this topic you can learn how to:
- Configure Report Settings
- Create a Report
- Share and Schedule a Report
- View, Download, and Share Reports on the Recent Tab
- Work with Reports on the Saved Tab
- Edit, Run, or Delete a Report
- Generate Reports in Other Modules
Report Settings
Before you create a report, check and edit your report settings in the top right corner of the page. To do so:
Click the Settings icon.
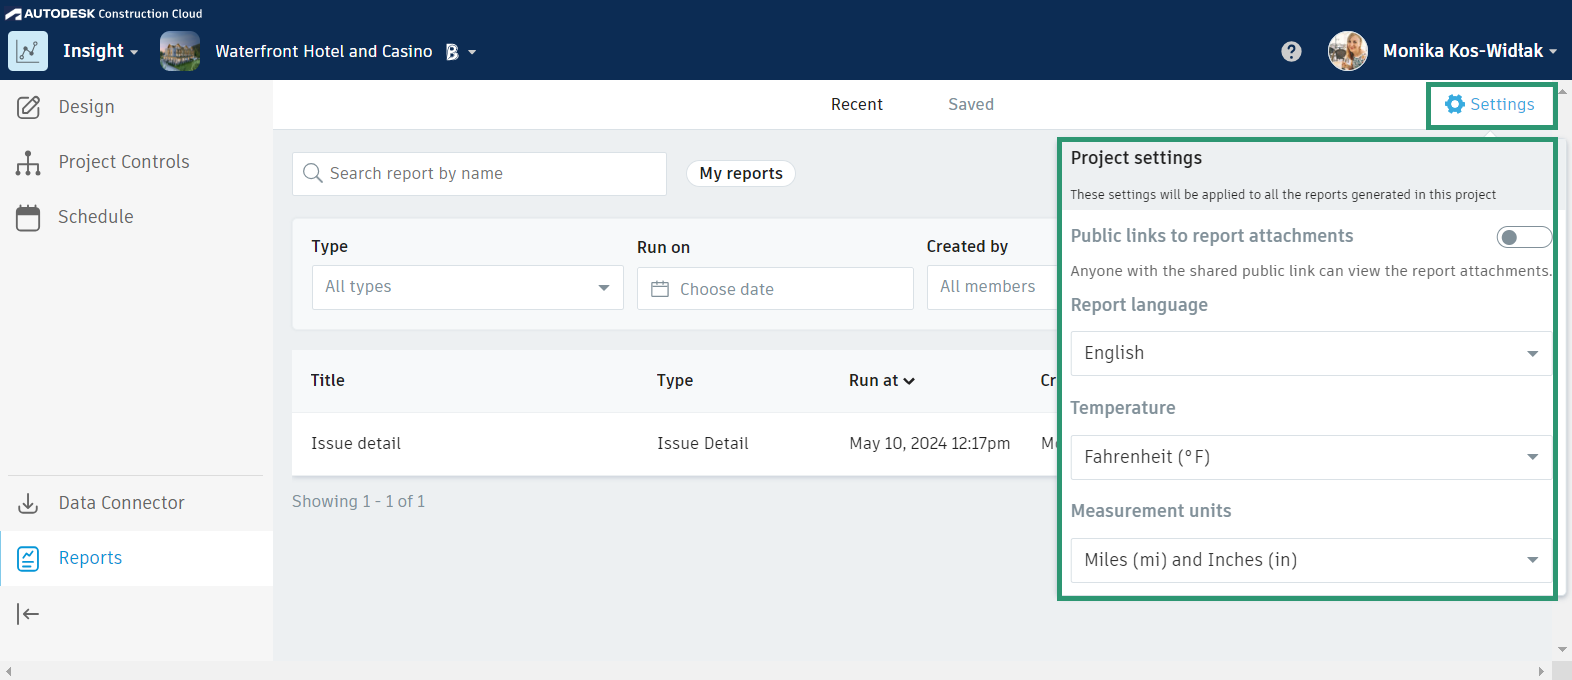
You can configure the following report-specific settings:
Public links to report attachments: Toggle on or off to disable or enable the sharing of public links to report attachments or references to non-project members.
Public links' considerations:
- Anyone receiving the link may access, download, or further share the link.
- Public links expire 30 days after they were generated.
- You should proceed with caution as public links carry the risk of sharing sensitive information with unauthorized individuals.
Report language: Select the language for your project reports.
The settings below are only relevant to Daily Log reports.
- Temperature: Select either Fahrenheit (°F) or Celsius (°C).
- Measurement units: Select either Kilometers (km) and Centimeters (cm) or Miles (mi) and Inches (in).
Create a Report
- Click Create Report.
- Select the relevant module from the left menu.
- Select a report type.
- Click Select.
![]()
You can now select a file type (if available), a sort order, and a selection of filters to apply to your report. The available filters vary depending on the report type. For example, you can create reports that include issues assigned to a specific company or reports that only contain RFIs with a certain status. Once filters have been applied, you can Share and schedule a report.
Share and Schedule a Report
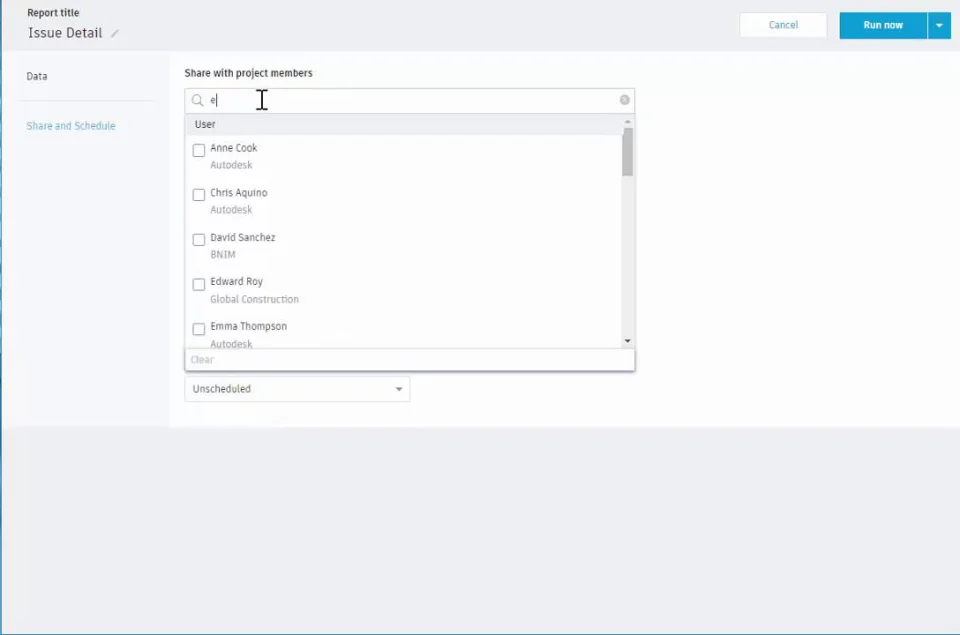
The Share and Schedule option enables you to email a report to project members or other users and to generate regularly scheduled reports.
Click Share and Schedule in the left menu.
On the Report generation schedule drop-down menu, select an option:
- Every week
- 2 weeks
- 3 weeks
- 4 weeks
- On the first of every month
You now have the option to select:
- Time of day to run the report at
- The day of the week to run the report on
- A particular date range within which to run the report
Click the Run now drop-down menu and select an option:
- Run now: This will run and generate a report based on the criteria you've selected.
- Save report: The report will display in the Saved tab.
- Save report and run: The report will display in the Saved tab and also generate based on the criteria you've selected.
The following animation walks through how to create, share, and schedule a report.
View, Download, and Share Reports on the Recent Tab
The Recent tab gives an overview of reports generated within the past 30 days and displays the following information:
- Report title
- Report type
- Date and time on which a report was last run
- Report creator
- Template from which a report was generated
- User, role, or company a report was shared with
Use Search Criteria and Filters to Find Reports
To search for a report by title, enter the report title in the Search field.
To search for a report using a filter, click the Type, Run on date, or Created by fields and select the relevant options.
To sort reports, click the:
- Title column header to sort reports alphabetically.
- Run at column header to sort reports by the date they were last run.
Download and Share Reports
Click the More menu (…) under the Recipients column header to:
Download: Downloads a PDF of the report to your downloads folder.
Tip: Issue reports include an image with a red push pin dot to provide context on the location of a project issue.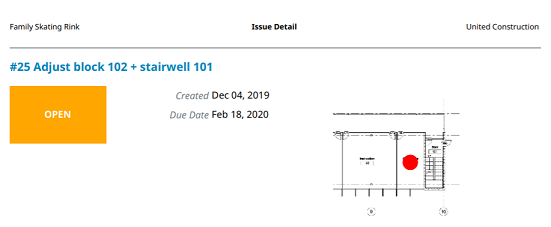
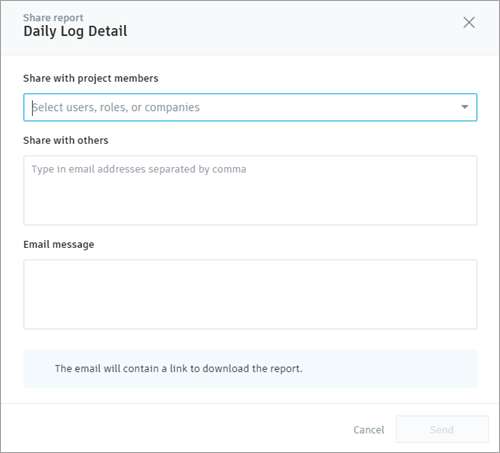
Share: Share a link to download the report with with project members or other users, and include an email message.
Work with Reports on the Saved Tab
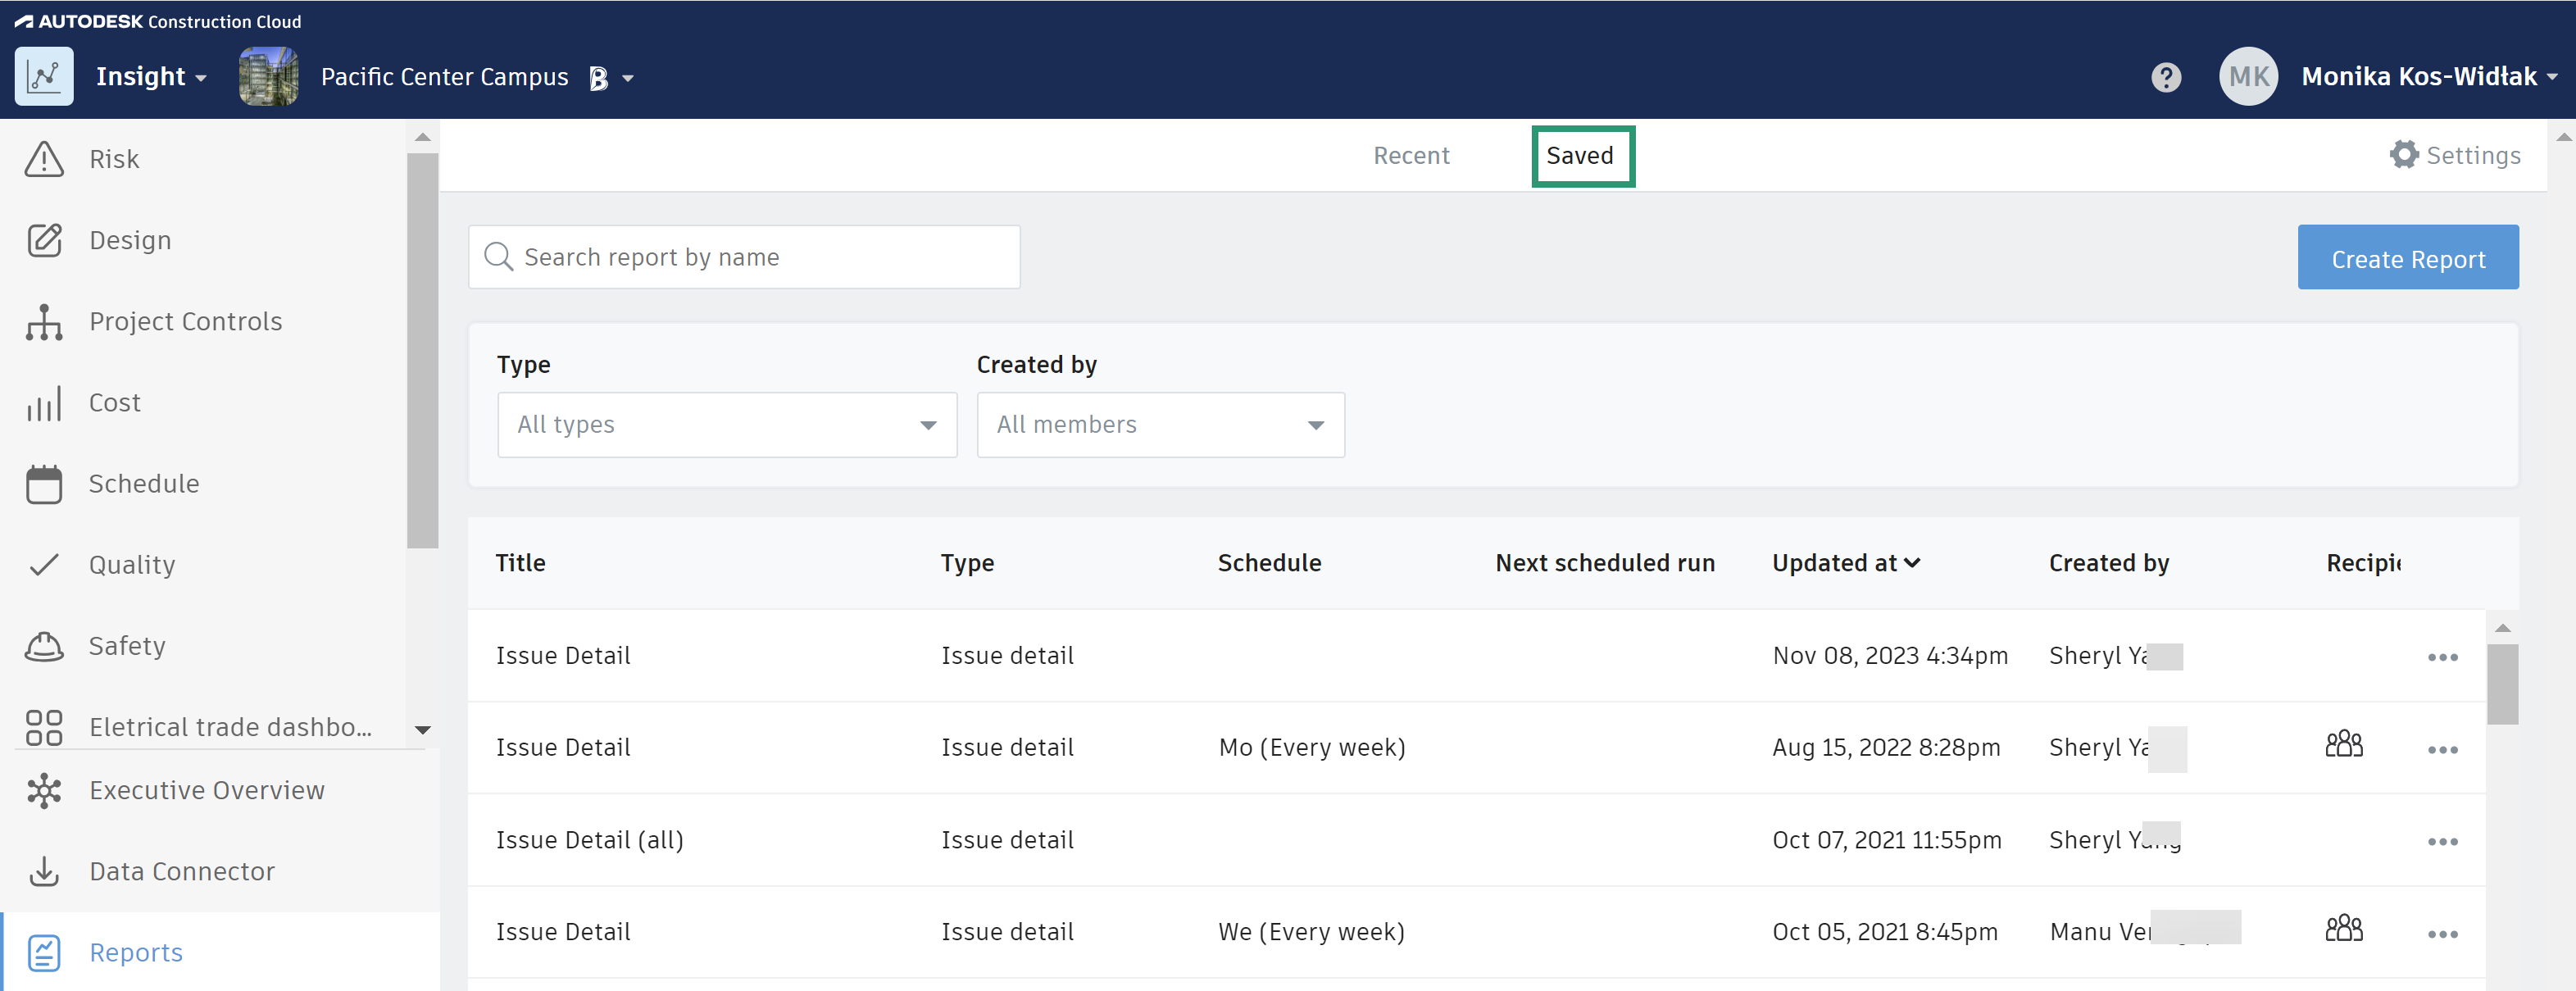
The Saved tab displays reports which have been saved during the report creation process. The overview displays:
Report title
Report type
Schedule: Displays the schedule frequency
Next scheduled run: Displays the next date and time the report will be run.
Updated at
Create by
Recipients
Edit, Run, or Delete a Report
You can edit, run or delete report templates from the Saved tab.
Use search and filter types if required to find your report.
Click the More (…) menu under the Recipients column.
Select one of the following options:
- Edit: This enables you to edit the file type, sort, filters, and share and schedule options.
- Run now: This will run and generate a report based on the saved criteria.
- Delete: This will delete the report and it can no longer be generated.
Generate Reports in Other Modules
Project members can also generate reports from other modules. Refer to the following topics to learn more:
- Reports in Field Management
- Issues in Document Management
- Project Activity Log
- Document Log
- Work with RFI Lists and Work with Submittal Reports

