Issue Categories and Types
Each issue on your project can be labeled with an issue type. Each type is organized under an issue category. This makes it easy for you to sort and filter your issues. It also allows you to differentiate between the same type of work that may exist on different parts of your project.
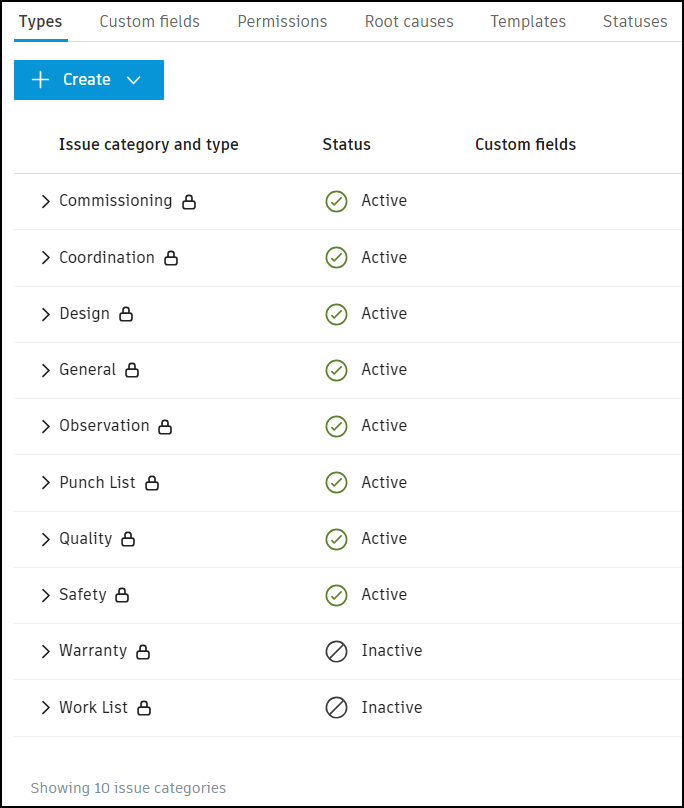
On a new project, the following default categories exist:

There is a set of default types nested underneath each category. To view the types, click the caret icon to expand the category and view its types.
You can use these default categories and types or create your own custom categories and types, depending on your project needs.
Create Issue Categories and Types
Navigate to the Issues settings page for categories and types by clicking Settings on the issues log and choosing Types.

Click Create and choose whether to create a category or type.

Issue Categories
Click Create.
Select Create category.
Complete the fields for your new category.

- Title: Each category title must be unique.
- Status: Setting an issue as active allows your project members to create issues using this category. You can set an issue as inactive at any time to hide a category from being used.
- Issue types: Click Add issue type to create issue types under this category.
- Custom fields: Select custom fields to add automatically on all issues types under this category. Custom fields must be created first to be added. Find detailed instructions in Custom fields.
Once you've completed all the fields, click Create to be able to use the new category.
Issue Types
Click Create and select Create type. Complete the fields for your new type.

- Issue category: Select the category associated with the type.
- Issue type title: Enter issue type title as desired.
- Pin label: Add up to three characters. Pin labels allow you to easily identify issue types on sheets.
- Status: Setting an issue as active allows your project members to create issues using this category. You can set an issue as inactive at any time to hide a category from being used.
- Custom fields: Select custom fields to add automatically on all issues types under this category. Custom fields must be created first to be added. Find detailed instructions in Custom fields.
Once you've completed all the fields, click Create to be able to use the new type.
You can edit categories and types after creation by selecting them from the types log.
Edit Issue Categories and Types
- Click the relevant category or type from Settings > Types.
- Edit the details in the flyout panel.
There are certain categories and types for which you cannot edit the title or status, deactivate, or delete. Learn more in Locked Categories and Types
Deactivating Issue Types with Templates
If you change the status of a type to "inactive", any templates using that type will become unavailable when creating issues. Learn more about templates in Issue Templates.
Delete Issue Categories and Types
- Click the relevant category or type from Settings > Types.
- Click Delete in the flyout panel.
Notes:
- If there are types associated with a category, that category can't be deleted. To delete these categories, first delete the associated types.
- If there are issues associated with a type, that type can't be deleted. To delete these types, first remove them from the issues that use them.
