
About Working with Culverts
Add culverts where streams cross a road or wherever you need one. Examine and modify a proposed culvert solution.
Add Culverts
There are two ways to add culverts to your design:
Select a component road, right-click, expand the Drainage menu and click Add Culverts. This will automatically add culverts to the selected component roads wherever streams cross it.
Click Create
 Drainage
  Culvert. You can use this tool to add culvert(s) to your model manually, one at a time.
This method is useful for adding a culvert where a watershed analysis does not return a watershed for a portion of a road, or for culverts not associated with a road.
Review and Modify a Culvert Solution
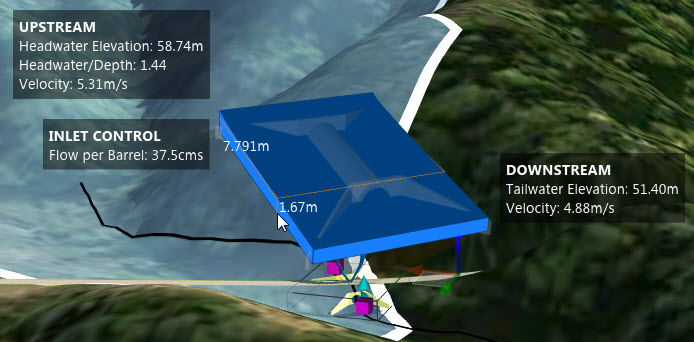
- Examine culvert analysis data in-canvas (shown above).
- Select a culvert to display its properties and attributes on the Stack Panel.
- Enter Edit mode to display editable fields.
- After making any changes to the solution, right-click and clcik Analyze Culver to re-analyze the solution:
Culvert Attributes in the Stack Panel
You can modify the culvert solution attributes in the Stack while in edit mode. You can change the culvert position or length, in canvas, using transform gizmos in the model. Changes affect length, entrance and exit invert elevation, and barrel skew angle. For more information, see To modify culvert size and placement.