
Tags Panel
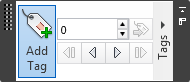
The Tags panel on the Review tab enables you to add and manage tags.
Tags combine the features of markups, viewpoints, and comments into a single, easy to use review tool. This allows you to tag anything you want to identify in the model scene. A viewpoint is automatically created for you, and you can add a comment and status to the tag.
For example, during a review session, you locate an item in the scene that is incorrectly sized or positioned. You can tag this item, stating the problem, save your review results as an NWF file, and pass the file to the design team. The design team can search the file, for any tags of status 'new', and locate your review comments. Once any necessary modifications are made to the drawing files, these can be reloaded into the *.nwf file, and the tag status can be changed accordingly. You can review this latest version of the NWF file, ensure all tags have been resolved and finally 'approve' them.
Add a Tag
Click Review tab > Tags panel > Add Tag
 .
.In the Scene View, click the object you want to tag.
Click the area where you want the tag label to be located. The tag is now added, and both points are joined by a leader line.
If the current viewpoint is not already saved, then it will be saved automatically and named “Tag View X”, where “X” is the tag ID.

In the Add Comments dialog box, enter the text to be associated with the tag, set the tag Status from the drop-down list, and click OK.
View Tags
- Click Viewpoint tab > Save, Load & Playback panel > Saved Viewpoints tool launcher
 .
. - Click the desired viewpoint in the Saved Viewpoints window. All attached tags (if any) are displayed in the Scene View.