
Comments Window
The Comments window is a dockable window that enables you to view and manage comments.
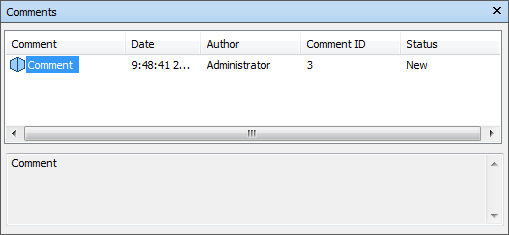
The Comments window shows the name, time and date, author, ID, status, and subject (or first line) of each comment. There are different icons helping you to identify the source of each comment at a glance.
The Comment context menu has the following options:
- Add Comment. Opens the Add Comment dialog box.
- Edit Comment. Opens the Edit Comment dialog box for the selected item.
- Delete Comment. Deletes the selected comment.
- Help. Launches the online Help system and displays the topic for comments.
You can add as many comments as you wish to a source, either from the Comments window, or from the source itself.
Tip: To add a comment to a specific object in the Scene View, use tags.
Toggle the Comments Window
- Click Review tab > Comments panel > View Comments
 .
.
Add a Comment to a Viewpoint
- Click Viewpoint tab > Save, Load & Playback panel > Saved Viewpoints tool launcher
 to open the Saved Viewpoints window.
 - Right-click the desired viewpoint in the Saved Viewpoints window, and click Add Comment.
- In the Comments window, type in your comment. By default, it is assigned New status.
- Click OK.
Add a Comment to a Viewpoint Animation
- Click Viewpoint tab > Save, Load & Playback panel > Saved Viewpoints tool launcher to open the Saved Viewpoints window.
- Right-click the desired viewpoint animation in the Saved Viewpoints window, and click Add Comment.
- In the Comments window, type in your comment. By default, it is assigned New status.
- Click OK.
Add a Comment to a Selection or Search Set
- Click Home tab > Select & Search panel > Sets drop-down > Manage Sets to open the Sets window.
- Right-click the desired selection or search set, and click Add Comment.
- In the Comments window, type in your comment. By default, it is assigned New status.
- Click OK.
Add a Comment to a Clash Result
Note: This feature is available to Autodesk Navisworks Manage users only.
Click Home tab > Tools panel > Clash Detective
 to open the Clash Detective window, and click the Results tab.
In the Results area, right-click the desired clash result, and click Add Comment.
In the Comments window, type in your comment. By default, it is assigned New status.
Click OK.
Note: Comments can also be assigned to a clash result when you assign a clash using the Assign Clash Dialog Box, and are automatically written when you unassign a clash, see Unassign a Clash.
Add a Comment to a TimeLiner Task
- Click Home tab > Tools panel > TimeLiner
 to open the TimeLiner window.
 - Click the Tasks tab.
- Right-click the desired task, and click Add Comment.
- In the Comments window, type in your comment. By default, it is assigned New status.
- Click OK.
View Comments
- Open the Comments window.
- Go the source of your comments. For example, open the Saved Viewpoints window.
- As you click the source items, for example, viewpoints, the associated comments are displayed in the Comments window.