Demonstrate how to work with 6-axis directed energy deposition (DED) and 6-axis laser (lsr) vector files.
Video length (3:27).
Video Player is loading.
Sample files for use with the tutorials are available from the Downloads page. Expand the downloaded ZIP archive into a convenient directory from which you can import files into Local Simulation as you need them.
- In Simulation Utility, click
, then in the
Simulation Utility dialog, click
DED and
Create Simulation.
The Import model dialog opens.
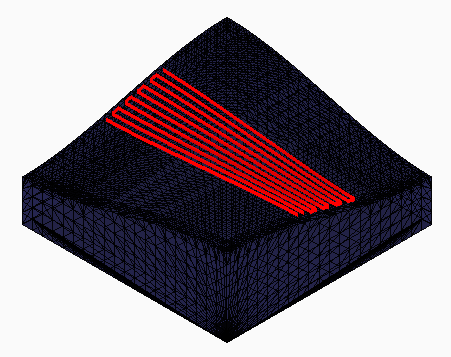
- Browse to where you saved the Examples files, and in the Example_24 folder, open the file
6AxisPath.lsr.
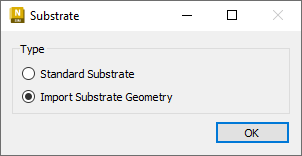
- In the Substrate dialog, select Import Substrate Geometry, and click OK.
- Browse again to the Example_24 folder, and open the file 6AxisSubstrate.stl.
- In the
Converted model units dialog, click
OK.
Upon import, observe the curved laser path on a double-curved substrate.
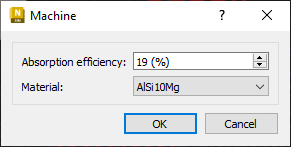
- On the
Home tab, click
Machine; set
Absorption efficiency to 19% and
Material to AlSi10Mg, then click
OK.
- Click
; deselect
Match part deposition material, and set
Material to SAE 304. Note that unlike standard DED simulations, with 6-axis DED simulations you can specify the substrate material.
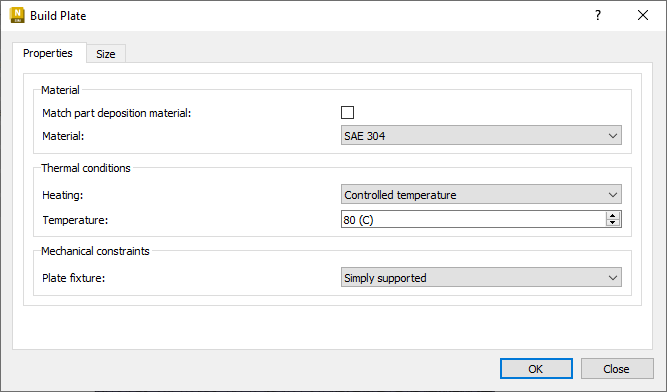
- Also on the Properties tab, under Thermal conditions, Heating, set a Controlled temperature of 80° C, then click OK.
- Click , and select von Mises stress to record this stress type during simulation, then click OK.
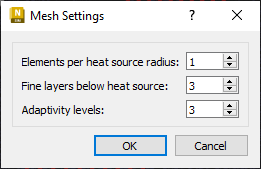
- Click
Mesh Settings, and set the values shown for
Elements per heat source radius (1),
Fine layers below heat source (3), and
Adaptivity levels (3).
- Click
Mesh Preview. If you have not already saved the project, you will be asked to do so.
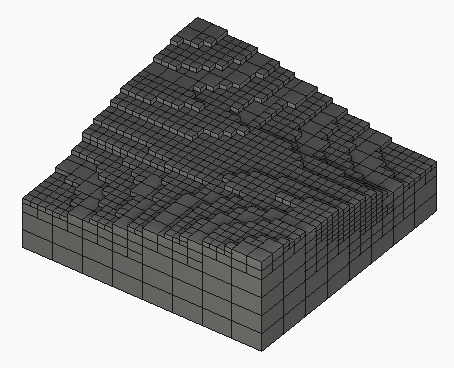
- Assured the mesh looks fine, click Solve to start the simulation. This will take about an hour to run on a 4-core computer.
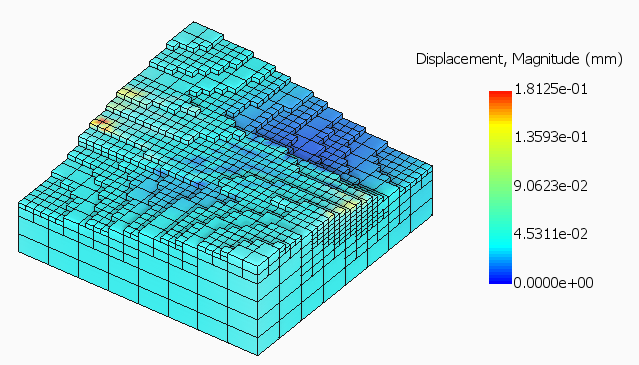
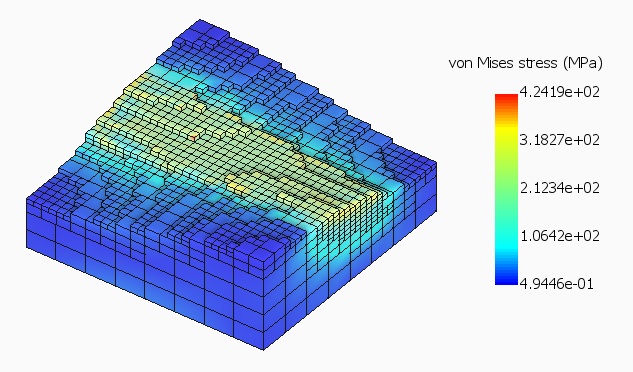
- When Results appear, examine the Displacement and von Mises stress results. Note the large number of increments in the simulation results.