• Help Home
  • English (US)
    1. English (US)
    2. 简体中文
    3. Deutsch
    4. Español
    5. Français
    6. Italiano
    7. 日本語
    8. Polski
    9. Português (Brasil)
    10. Русский
PowerShape
    • Release Notes
    • Subscription Benefits
    • Getting Started
    • Help
      • Introduction to PowerShape
      • Basic modelling concepts
      • Wireframe modelling
      • Cloud modelling
      • Mesh modelling
      • About surface modelling
      • About solid modelling
      • Direct modelling
        • Smart Feature Recognition
        • Smart Feature Selector
        • Applying a draft angle to a face of a solid
        • Healing a gap
        • Replace Faces
        • Feature recognition and editing
        • Using Edit options on faces
      • Assembly modelling
      • Drafting
      • About Electrode
      • About Toolmaker
      • Grading
    • Video Library
    • Using Macros with PowerShape
    • Administration Guide
    • Autodesk Installation
    Share
    • Email
    • Facebook
    • Twitter
    • LinkedIn


    Healing a gap

    Use the Remove option to remove the selected faces and close the resulting gap by modifying the surrounding faces.

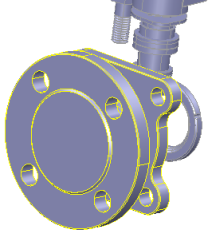
    1. Select the solid, for example:
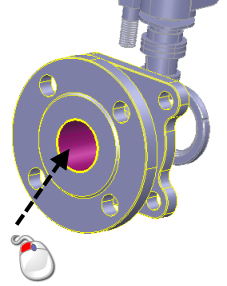
    2. Select the face:

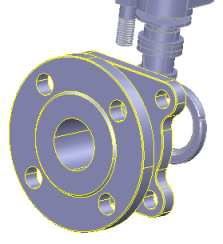
    3. Click Solid Tools tab >Modify Face panel > Remove to remove the face and heal the hole:

    Parent topic: Direct modelling

    Was this information helpful?

    Except where otherwise noted, this work is licensed under a Creative Commons Attribution-NonCommercial-ShareAlike 3.0 Unported License. Please see the Autodesk Creative Commons FAQ for more information.

    • Privacy Statement
    • Legal Notices & Trademarks
    • Report Noncompliance
    • © 2025 Autodesk Inc. All rights reserved