
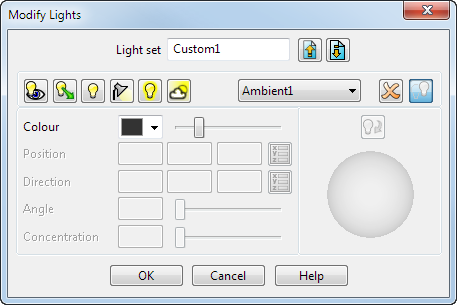
Use the Modify Lights dialog to customize the light set for your selected Light Studio.
An unused Custom light set contains a copy of the current light set. By default, this comprises:
- one ambient light
- three observer lights
You can add up to eight lights to each light set in any permutation, but you can have only one ambient light in a light set.
To create a customized light set:
- Enter a new name for the Light set.
- Alternatively, click the
Import
 button to import a pre-existing light set. The
Import dialog is displayed.
button to import a pre-existing light set. The
Import dialog is displayed.
- Add lights to your light set by clicking a light button.

The lights added to the light set are displayed in the list. To remove a selected light from the list, click the Delete
 button.

Create an observer light. This light points in a straight line to infinity. The light is fixed and does not move with the model when rotated. You can specify the following:
Colour
Direction of the light.
Enter the coordinates for the direction of the light or click
 to enter the coordinates using the
Direction dialog. You can also use the
tracker ball
on the dialog to move the light over the model.
to enter the coordinates using the
Direction dialog. You can also use the
tracker ball
on the dialog to move the light over the model.

Create a directional light (point). This light points in a straight line to infinity. The light is relative to the model and moves with the model when you rotate it. You can specify the following:
Colour
Direction of the light.
Enter the coordinates for the direction of the light or click
to enter the coordinates using the
Direction dialog. You can also use the
tracker ball
on the dialog to move the light over the model.


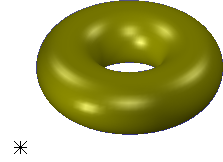
Create a positional light. This radiates light in all directions and is similar to a hanging light bulb. The light is relative to the model and moves with the model when rotated. You can specify the following:
Colour
Position of the light.
The position of the light is indicated by the star symbol. Drag the star to change the position of the light. Alternatively, enter the coordinates for the position of the light or click
to enter the coordinates using the
Position dialog.

Create a spotlight shines the light in a specified direction from a specified position. The light is relative to the model and moves with the model when you rotate it.
Specify the following options:
Colour.
Position of the spotlight.
Direction of the light.
Angle of the pool of light. You can use the instrumentation to change the angle of the pool of light.
 Drag this point to move the spotlight's point of origin
 Drag this point to change the angle of the pool of light
 Drag this point to move the spotlight's destination point
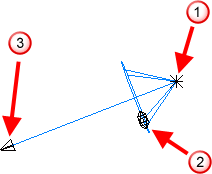
Concentration of the pool of light.
Click
 to toggle between rotating the direction of the light around its point of origin and rotating the light’s origin around its destination point.


Create an ambient light provides ambient lighting. You can only have one ambient light in a light set.

Create sky light provides lighting to simulate sky light.

Use the drop-down list to select the light to modify or remove.
Click to remove the selected light from the light set.


When selected, this option makes the light cast a shadow when the model is shaded. When deselected, no shadow is cast.
This button is inactive
 until a lighting method is selected.
- Change the following options for your selected lights:
Colour

Choose a colour for the selected light. Use the slider to vary the luminosity of the selected colour.
Position
Enter coordinates for the position of the following:
Positional light
Spotlight
Alternatively, click
to display the
Position dialog, where you enter the coordinates for the
Light point position.
Direction
This option is available when you are creating one of the following:
Directional light
Spotlight
Observer light
Alternatively, click
to display the
Direction dialog, where you enter the coordinates for the
Light point direction.
Angle
Specify the angle of the pool of light given by a spotlight, or use the slider to set the angle. The maximum angle is 90
 .
.
Concentration
Specify the concentration of the pool of light given by a spotlight, or use the slider to vary the concentration.
Low concentration gives a steady spread of colour.
High concentration fades the colour out towards the edge of the pool of light.
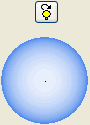
The tracker ball is used to move a selected light over the model.
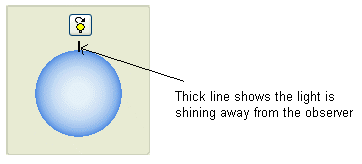
A thick line on the tracker ball indicates the light is shining away from the observer.
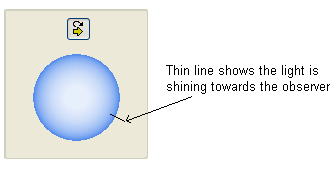
A thin line on the tracker ball indicates the light is shining towards the observer. For example, the light can be positioned behind the model to shine through it towards the front.
The tracker ball can be used with the following lights:
Directional light.
Observer light.
Spotlight.
Click this button and use the tracker ball to rotate the direction of the spotlight around its point of origin. When clicked, this toggles so you can rotate the origin of the spotlight around its destination point.
- Click the
Export
 button if you want to export this light set. The
Export dialog is displayed.
button if you want to export this light set. The
Export dialog is displayed.
- Click OK to accept the changes and close the dialog, or Cancel to cancel unapplied changes and close the dialog.