
Selection Tools
Window Selection
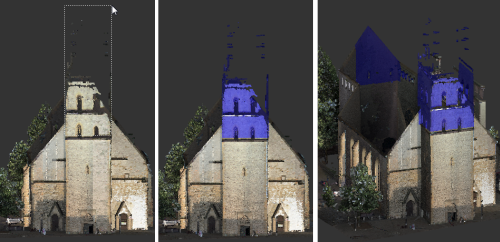
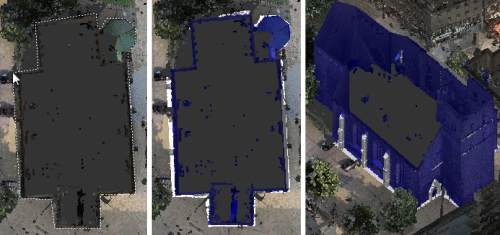
The Window selection tool selects a rectangular area within the diagonal corners that you specify, and is the default tool in ReCap. The selection area extrudes from the current view into 3D space to include points beyond those that fall within the 2D rectangle. In the example, the selection includes the back tower of the building, which might not have been the intended result.
This method is best used when defining a rectangular Scan Region or clipping area.
- Position the point cloud so several points on the plane you want to select are visible.
- On the Contextual tile menu, hover over the toolbar and click Window.
- In the point cloud, drag to define the diagonal corners of the rectangular selection area you want to define.
- To "remove" the entire area inside or outside the Window selection boundaries, click the Clip Inside or Clip Outside tool.
Fence Selection
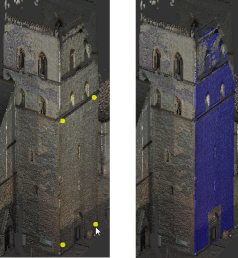
The Fence selection tool selects an area that is bounded by the points you select. This is a good way to select an irregular area. Like Window selection, the Fence selection area extrudes into 3D space to include points beyond those that fall within the 2D rectangle that you specify.
Use this method to define the boundaries of an irregular Scan Region or clipping area.
- Position the point cloud so several points on the plane you want to select are visible.
- On the Contextual tile menu, hover over the Selection Tool and click Fence.
- In the point cloud, click locations to define each corner of the boundary that you want to define.
- Continue clicking locations until all points that you want to select are enclosed.
- To remove the most recent click location, press Backspace.
- To complete the selection, double-click or press Enter.
- To remove the entire area inside or outside the Fence selection boundaries, click the Clip Inside or Clip Outside tool.
Note: Pressing Esc or clicking anywhere in the point cloud exits the tool.
Plane Selection
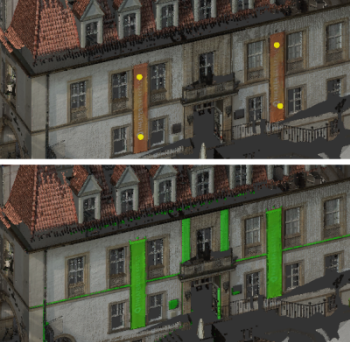
The Plane selection tool selects areas that are on the same plane. You click three or more locations. The selected area includes any points that are on the same plane as the points you selected.
| Plane selection examples | |
|---|---|
 |
 |
Use this method to define a planar Scan Region or clipping area.
Position the point cloud so several points on the plane you want to select are visible.
On the Contextual tile menu, hover over the Selection Tool and click Plane.
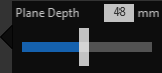
To set the depth of the planar selection, on the Contextual tile menu, drag the slider or enter a value.
In the point cloud, click three or more locations that lie on the plane you want to select.
To remove the most recent click location, press Backspace.
To complete the selection, double-click or press Enter.
To remove the entire area inside or outside the Plane selection boundaries, click the Clip Inside or Clip Outside tool.