
Use the synchronization process via Robot - Advance Steel Link to update the Robot model with changes made in Advance Steel.
Synchronization is a process that allows you to update your modifications using the SMLX format, without having to re-import the entire structure.
- Export your model from Robot to Advance Steel through the extension, using the SMLX format.
- If you make modifications to the model, re-export the modified model from Advance Steel to a different SMLX file.
- Go back to your model in Robot, and in the Integration with Autodesk Advance Steel dialog, select Synchronize from Advance to load the modified SMLX file.
- The modified SMLX file is compared to the already loaded model. All modifications between the two versions of the model are displayed. The modifications for each object will appear in a list which can be filtered.
- The synchronization marks all the new objects as appended, and the existing objects that had geometrical changes (sections, materials, position, and so on) as modified.
- You can apply the modifications partially or totally. To do it, after selecting modifications, click Synchronize.
Synchronization workflow:
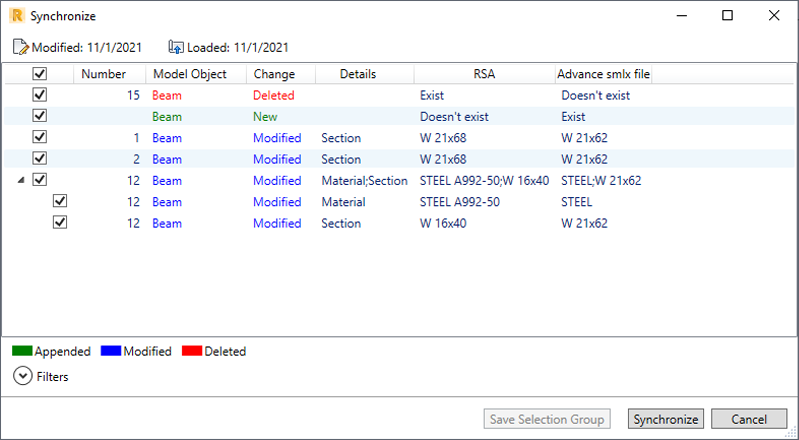
Synchronization dialog
In the Synchronization dialog, the main modification tick box is selected by default. You can deselect it and then select individual modifications to apply.
Modified objects display in blue. Information about the scope of modification displays in the Details column. If you select a modification line in the dialog, the corresponding modified element is highlighted in the drawing area.
If an object modification includes more changes than one, click
 at tick box in the modification line to expand the list of changes to the object. Each change has a tick box and can be accepted individually.
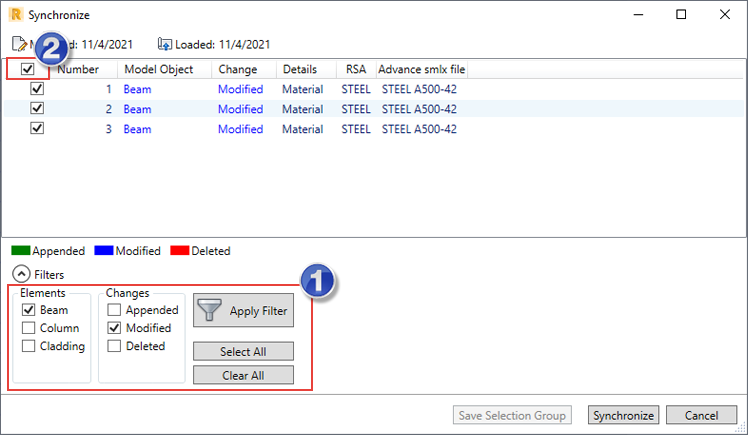
Click Save Selection Group to save modified objects that you selected as a group in Robot. After you synchronize modifications in your model, you can use this group to track modifications to objects in the group.
To save a selection group
- In the Synchronize dialog, select the modification lines that contain objects to be included in the group.
To select a single modification line, click the line. To multi select lines, click individual lines while holding the Ctrl key down.
After you select modification lines, the Save Selection Group button becomes active.
- Click Save Selection Group and enter the group name in the dialog that displays then. Click OK.
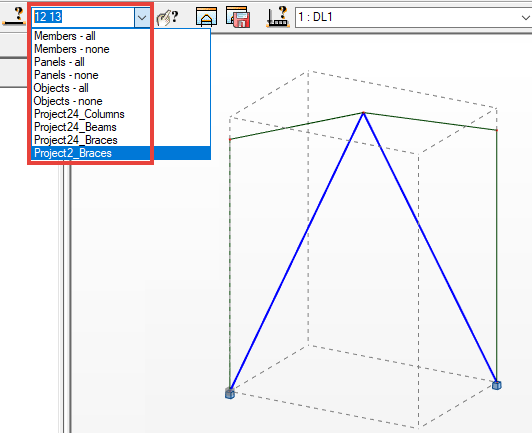
The selection group is saved. After you synchronize modifications in your model, you can select this group on the Selection toolbar. All objects in the group are highlighted in the drawing area then.
Main tick box with applied filters
The main tick box work with applied filters. If objects are selected using the filters and a main tick box is activated, only those lines will have the individual tick box selected. It is illustrated in the following images.
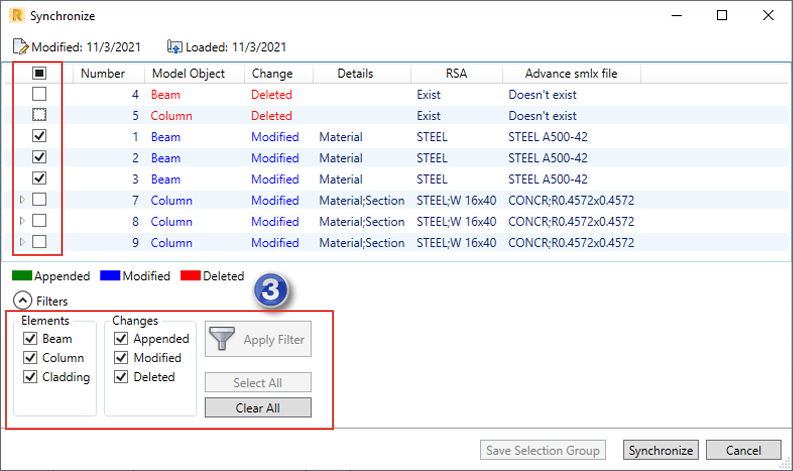
- You selected modified beams to be displayed.
- You selected the main tick box.
- You displayed all objects again.
Only the lines with modified beams have the individual tick boxes selected.