Variants and Variant Sets
Variants are key for product design reviews (PRDs). Core members from design, management, and engineering can get together to review a 3D product, such as their latest car. Using VRED variants/VSets, you can configure your car and its different parts, so it is easy to switch through them during the review.
Since a car can have many different versions, such as standard, sports, convertible, etc., as well as a variety of options, such as sports body pack, 100s of paint and interior material combinations, lights, etc., variants and VSets provide an easy way to step through these, in a packaged way.
Go one step further and create an HTML5 frontplate that links this functionality and allows your participants to change things to see what they want. See Using Python in VRED for how to do this.
For reference information, see Variants, Variant Sets, and Autodesk VRED App
For instructional content, see Tutorial 3: Where to Use Scripts in VRED with Typical Use Cases and How to Use Multiple Backplates
For Python scripts, see Module vrVariants and Module vrVariantSets
For geometry, combined, viewpoint, animation, and material variants videos, see Variants and Linking Scripts to Variants
The Kinds of Variants
You can create geometry, material, viewpoint, animation, and combined variants, and assign hotkeys for playing them in the render view. Videos for many of these are found here. These require the following:
For geometry variants, the Scenegraph and Geometry tab of the VSet module.
For material variants, the Material Editor and Material tab and General tab of the VSet module. Supported types of materials variants are switch, Substances, and X-Rite materials.
For viewpoint variants, the Camera Editor and Camera tab and General tab of the VSet module.
For animation variants, the Clip Maker and Animation tab and General tab of the VSet module.
For transform variants, the Transform module and Tranform tab and General tab of the VSet module.
For sceneplate variants, the Sceneplate Editor and Sceneplate tab and General tab of the VSet module.
For light variants, the Light Editor and Light tab and General tab of the VSet module.
For combined variants, any combination of the different editors and modules and their associated tabs in the VSet module and General tab.
How to Create a Variant
In the Menu Bar, select Scene > Scenegraph to open the Scenegraph.
Select Scene > Variants to open the Variants module.
In the Variants module, click the tab corresponding to the type of variant you want to create: Geometry Variants, Material Variants, or Light Variants.
Note:This doesn't apply to Transform Variants and Sceneplate Variants, which will be discussed in other sections.
Drag a node or switch node from the Scenegraph into the list view (left side) of the Variants module. The node name appears in the list view and its potential states and hotkey (if you create one) are displayed on the right.
How to Create a Geometry Variant Set
- In the Menu Bar, select Scene > Scenegraph.
- Click
 (the VSets Quick Access icon), right-click in the Variant Sets list view (left side), select New Set, and rename it.
 - Click the Geometry tab.
- Drag a node or switch node from the Scenegraph into the Geometry tab.
- Under State, click next to the node entry and select a state.
Now, set a hotkey to activate the variant.
How to Create a Material Variant Set
- In the Menu Bar, select Scene > Material Editor.
- Click
 (the VSets Quick Access icon), right-click in the Variant Sets list view (left side), select New Set, and rename it.
 - Click the Material tab.
- Drag a node or switch node from the Material Editor into the Material tab.
- Under State, click next to the node entry and select a state.
Now, set a hotkey to activate the variant.
How to Create a Viewpoint Variant Set
- In the Menu Bar, select Scene > Camera Editor.
- Click
 (the VSets Quick Access icon), right-click in the Variant Sets list view (left side), select New Set, and rename it.
 - Click the View tab.
- Drag a node or switch node from the Camera Editor into the View tab.
- Under State, click next to the node entry and select a state.
Now, set a hotkey to activate the variant.
How to Create an Animation Variant Set
Use animation created for geometry allocated as a clip for your animation variant.
- In the Menu Bar, select Animation > Clip Maker.
- Click
 (the VSets Quick Access icon), right-click in the Variant Sets list view (left side), select New Set, and rename it.
 - Click the Animation tab.
- Drag a clip from the Clip Maker into the Animation tab.
Now, set a hotkey to activate the variant.
How to Create a Light Variant Set
- In the Menu Bar, select Scene > Light Editor.
- Click
 (the VSets Quick Access icon), right-click in the Variant Sets list view (left side), select New Set, and rename it.
 - Click the Light tab.
- Drag a light from the Light Editor into the Light tab.
- Under State, click next to the node entry and select a state.
Now, set a hotkey to activate the variant.
How to Create a Combined Variant Set
A combined variant set contains multiple actions occurring when the variant seet is activated. Once a VSet is created, nodes, clips, materials, etc. are dragged and dropped onto their respective tabs in the VSets module, where they become part of the same VSet.
- Open the editors and modules needed.
- Click
 (the VSets Quick Access icon), right-click in the list view (left side), select New Set, and rename it Combined Variants.
 - For each action, click the tab associated with the editor or module. Drag the node, switch, material, light, or clip into the appropriate VSets tab. If applicable, click next to the entry and select a [state]. Repeat this process for others.
- Dbl-click the variant set to select and activate it.
Now, set a hotkey to activate the variant.
How to Create a Variant
In the Menu Bar, select Scene > Scenegraph to open the Scenegraph.
Select Scene > Variants to open the Variants module.
In the Variants module, click the tab corresponding to the type of variant you want to create: Geometry Variants, Material Variants, or Light Variants.
Note:This doesn't apply to Transform Variants and Sceneplate Variants, which will be discussed in other sections.
Drag a node or switch node from the Scenegraph into the list view (left side) of the Variants module. The node name appears in the list view and its potential states and hotkey (if you create one) are displayed on the right.
How to Set a Hotkey
To set a hotkey for a variant, from the list view (left side) of the Variants module, select a node or switch node.
In the section to the right, click the space to the right of the state to access its Hotkey drop-downs.
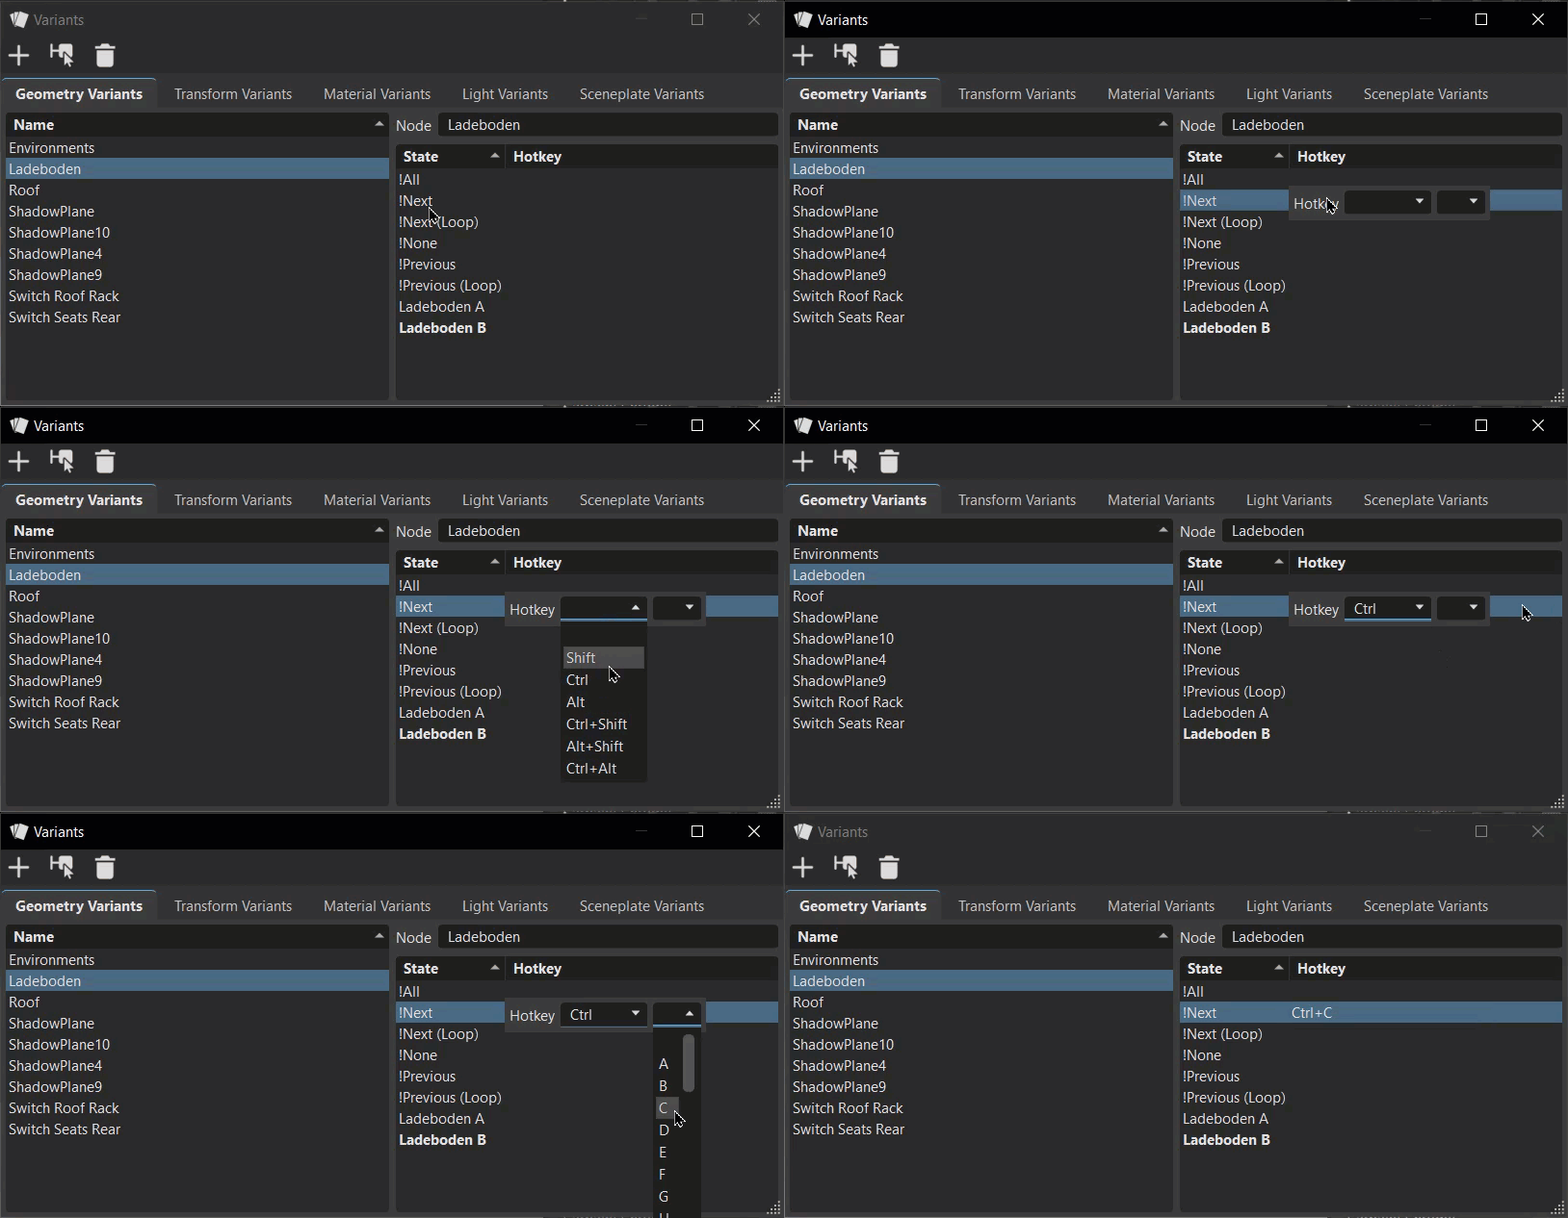
After entering the hotkey values, tap the blank space below it to set the hotkey.
To enable a state, double-click the state. The currently enabled state is bolded; the default state is highlighted.
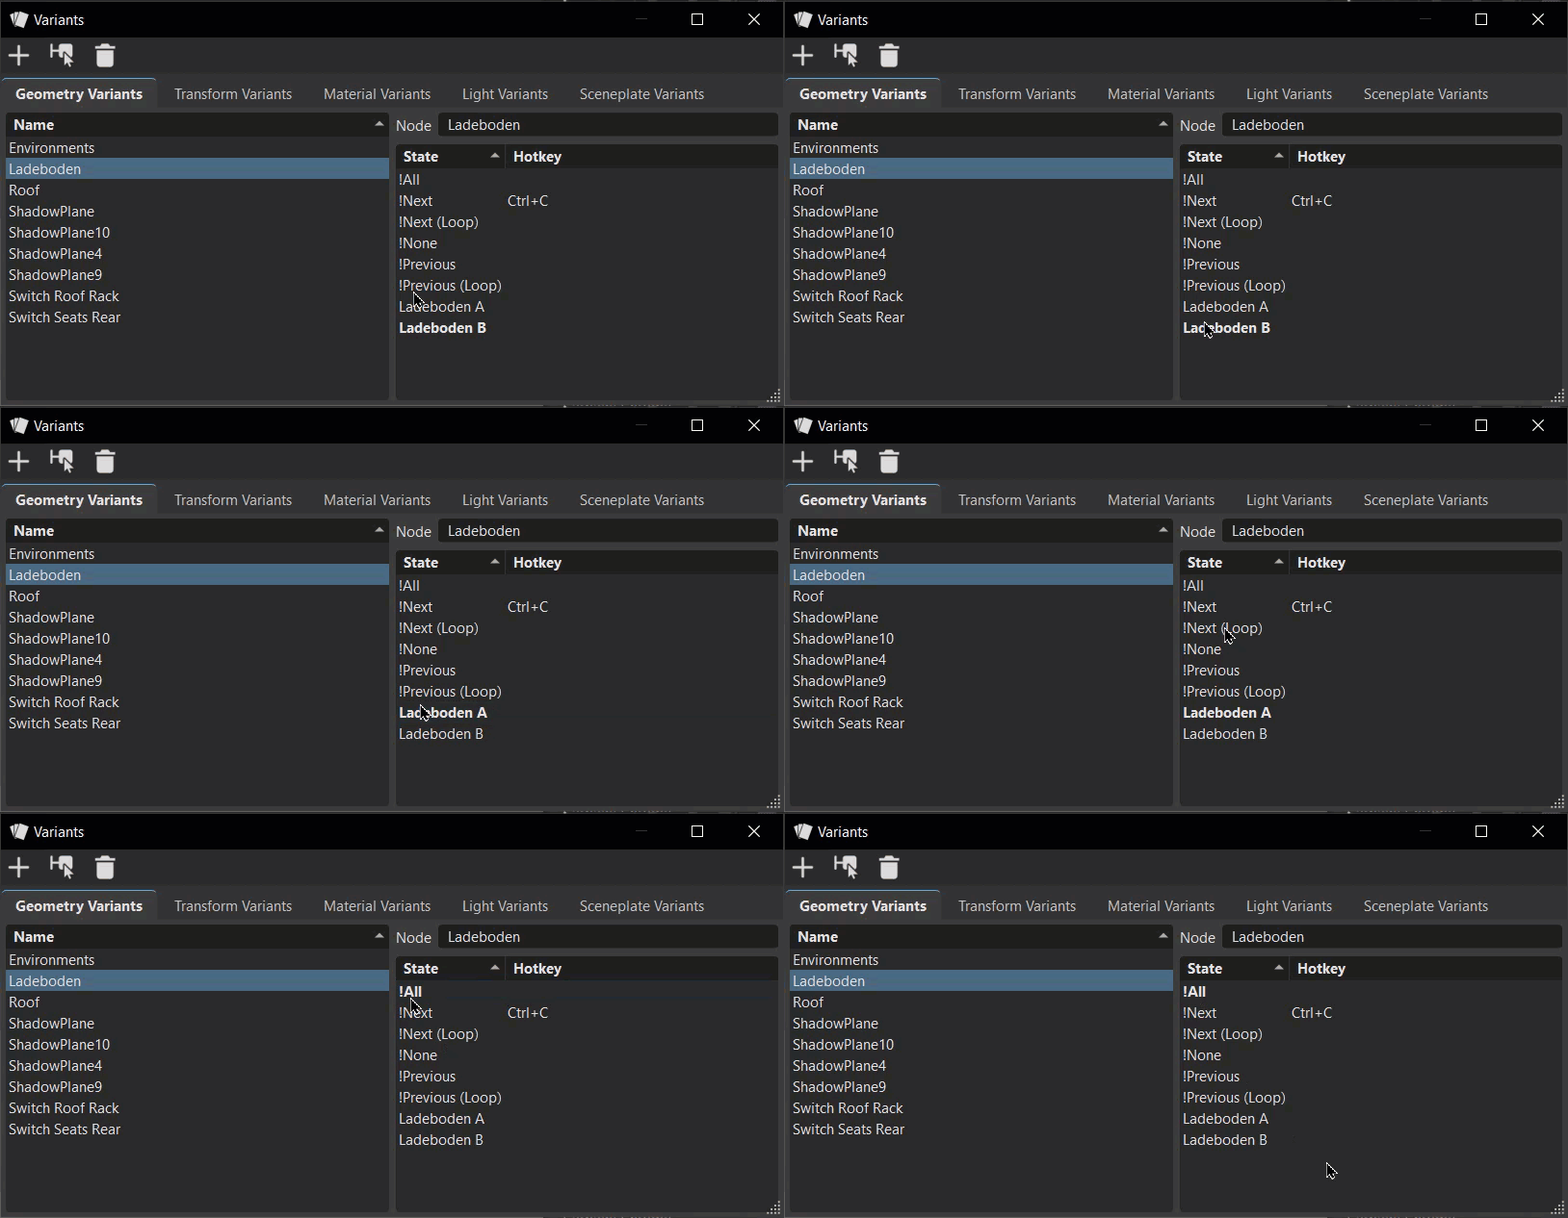
To test your hotkey, click the Render Window, then use your hotkey.
How to Create a Transform Variant
Transform variants are used to add multiple transforms as variants to Scenegraph nodes. All nodes currently supporting transforms allow transform variants to be created (Groups, Lights, Shells, Surfaces, Meshes, and Lines). For example, a steering wheel can be set to varying positions. Instead of having a geometry variant for each position, you can now have one geometry with multiple transform variants. Using a transform variant reduces scene size, Scenegraph nodes, and memory usage.
In the Menu Bar, click Edit > Preferences > Transform.
Select the Scenegraph node to add transform variants.
In the Quick Access Bar, select Transform to open the Transform module.
Just below the title in the Transform module, select Window > Transform Variants.
Note:To always show Transform Variants in the Transform module, in Preferences > Transform > Transform Editor, set Transform Variant Settings to Transform Variant Window.
In the Transform module, right-click the node and select Create Transform Variant or + in the Quick Icons Bar. The first variant is created from the current state of the geometry.
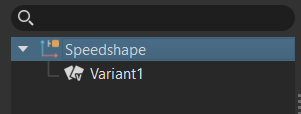
Adjust the geometry with any of the tools in the Basic tab. For example, Translation and Rotation. Right-click on the node and create a second variant.
Double-click a variant to display it in the Render Window.
How to Create a Variant Set
Use variant sets (VSets) to define multiple states for different properties at same time. In many cases, a variant alone is not enough for managing complex models. For example, many different switch nodes are needed to represent a specific version of the loaded model. Variant Sets provides more functionality for activating many states, simultaneously. For configurators, logical connections can be generated.
In the Menu Bar, click Scene > Scenegraph to open the Scenegraph.
In the Menu Bar, click Scene > Variant Sets to open the Variant Sets module.
In the Variant Sets module, right-click in the left side and select New Set.
Click the name of the new set to rename it.
In the Variant Sets module, click the tab corresponding to the type variant you want to create: Geometry, Material, or Light.
Note:The other types of variants will be discussed in other sections.
Drag a node or switch node from the Scenegraph under the appropriate tab of the Variant Sets module.
The node name is added to the tab, with supported states listed in a drop-down box.
To enable a state, select it from the drop-down box.
Optional: Create a hotkey for the variant set in the General tab.
In addition to hotkeys and the Variant Sets module, you can use VRED python scripting to switch between Variant Sets. Use the function selectVariantSet(name), where name is the name of the variant set.
How to Show or Hide Geometry in Variant Sets
Use this feature to show or hide Scenegraph nodes. This can be useful, for example, when using dissections in your scene.
- In the Variant Sets module, select a variant set.
- Go to the Show/Hide tab. You may need to repeatedly tap the last arrow to the right to access it.
- Drag nodes from the Scenegraph into the Show/Hide tab.
- Right-click in the list of variant sets.
- Select Show Geometry or Hide Geometry from the context menu.
Changing the Variant Sets Display
In the Variant Sets module, to change the display, either right-click and select Switch Display Mode or click ![]() in the QuickActions Bar.
in the QuickActions Bar.
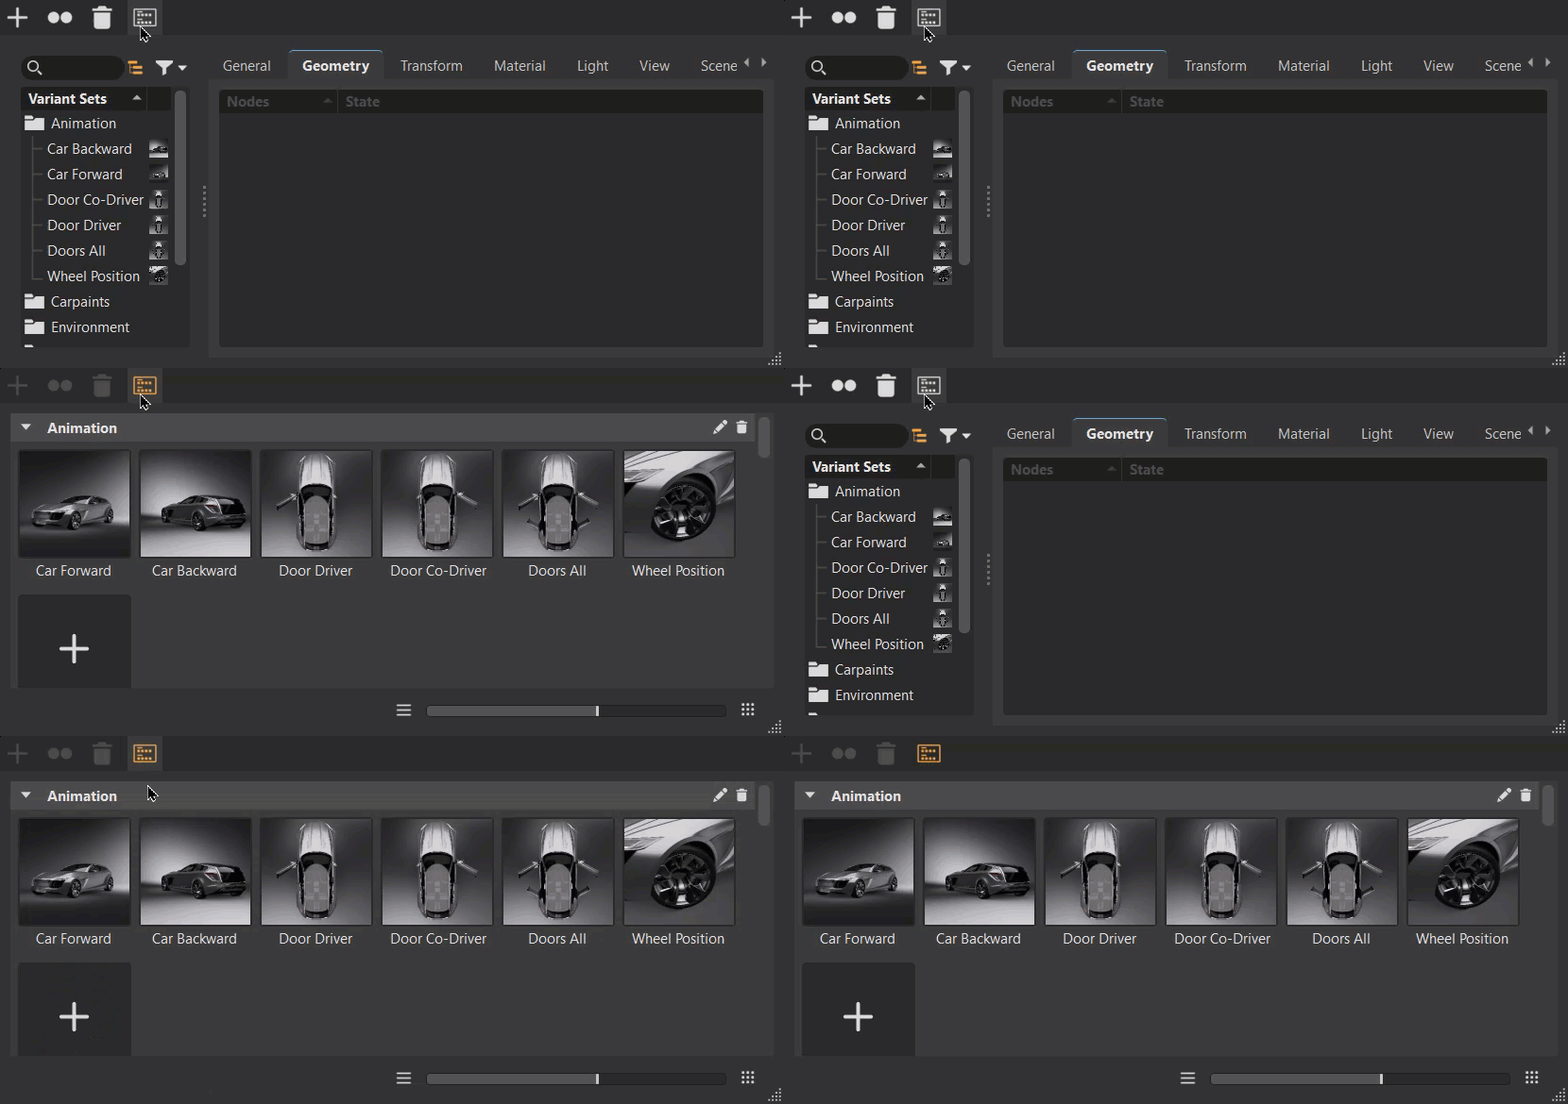
To return to the previous view, either right-click and select Switch Display Mode or click ![]() .
.
Creating a Custom Thumbnail Image
Since the preview generated from the viewport may not be representative of the action behind the variant set, use the Image From File option to the Variant Sets module for loading a custom thumbnail preview image.
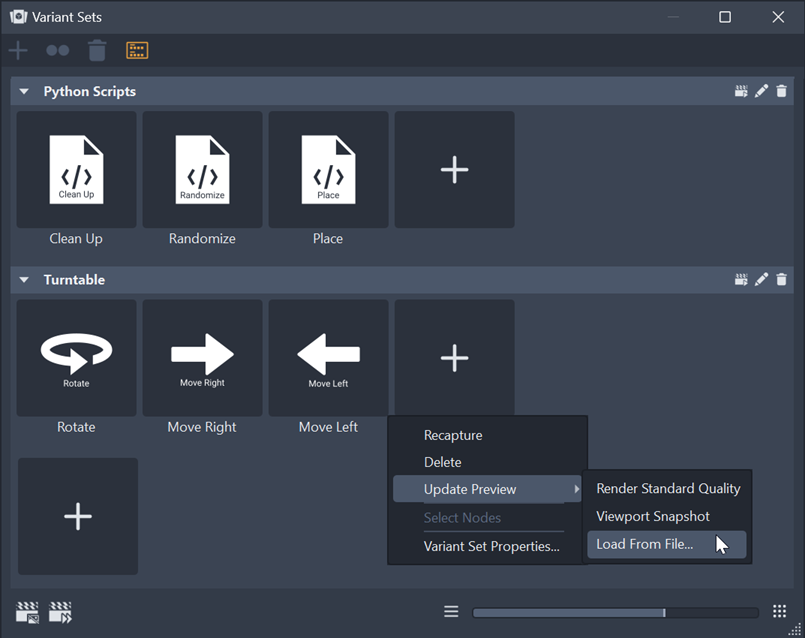
- In the Quick Access Bar, click
 to open the Variant Sets module.
 - Hover over a variant set without a thumbnail image to activate it, then right-click and select Update Preview > Image From File to locate and select a .jpg, .jpeg, or .png preview image from disc.
- Double-click the image to use it for the thumbnail preview.