
Revolve a T-Spline body
Learn how to use the Revolve tool to revolve a profile around an axis to create a circular T-Spline body in Fusion.
- In the Design workspace, Form contextual environment, select Create > Revolve
 .
The Revolve dialog displays.
.
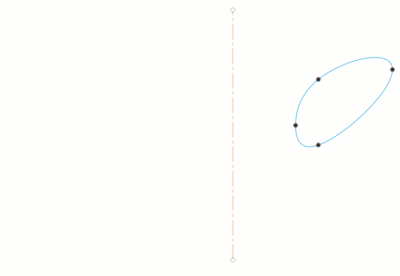
The Revolve dialog displays. - In the canvas, select the Profile to revolve.
- Select a linear or circular object to use as the Axis to revolve around.
- In the dialog, select a Type and adjust associated settings.
 Full: Revolves the profile 360 degrees around the axis.
 Angle: Revolves the profile around the axis to an angle value that you specify.
- Select a Direction setting and adjust associated settings.
 One Side: Creates a revolve in one direction.
 Two Sides: Creates a revolve in both directions. Each direction can have a different angle.
 Symmetric: Creates a symmetrical revolution in both directions.
- To specify the Angle value, drag the manipulator handle or type an exact value.
- Select a Direction setting and adjust associated settings.
- Specify the face Spacing:
 Uniform: Spaces faces evenly around the profile.
 Curvature: Spaces faces based on the curvature of the profile.
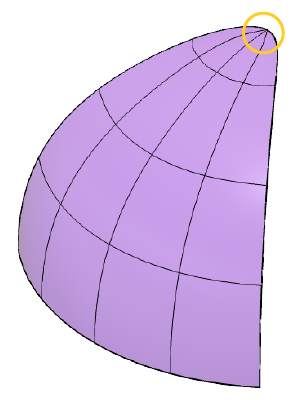
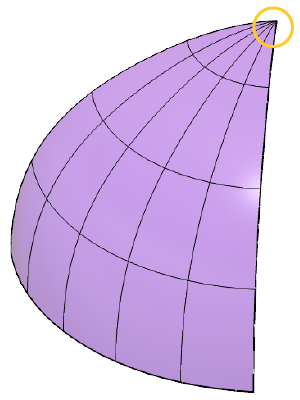
- Optionally, check Weld to merge all coincident vertices.
- Select a Symmetry setting and adjust associated settings:
 None
None Circular: Select to embed symmetry in the body.
- Symmetric Faces: Specifies the number of symmetric faces around the axis of the revolve.
- Click OK.
The revolved T-Spline body displays in the canvas.
 |
 |
| Left: Check Weld In this example, the four vertices at the top are welded into a single vertex. |
Right: Uncheck Weld |