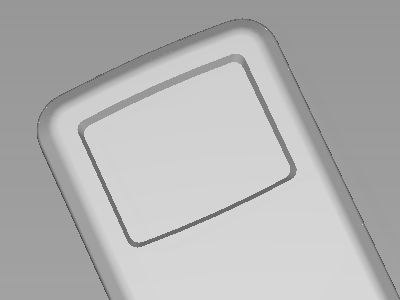
The screen is cut out of the front face of the MP3 player.
Offset the outline of the casing to create the screen curves. Then Project them onto the front face to create Curves-on-Surface. These curves-on-surface can then be used to Trim out the aperture for the display screen.
Open the tutorial file (optional)
If you successfully completed part 3, proceed to the next step, Create the screen surface.
If you were not successful in part 3, open the file called MP3Player_Part3.wire, located in the wire folder of the CourseWare project. This file contains the completed model from part 3.
Create the screen surface
Start by offsetting the top surface.
- Maximize the Top window.
- Turn off Symmetry on the Front Casing layer, and zoom into the top half of the casing.

- Choose Pick > Object
 and select the upper plane.
- Maximize the Left window.
- Choose Object Edit > Offset, type -2 and press Enter.
 Note: Alternatively, you could have dragged the pink arrow down to the desired location.
 - Click Offset to create the offset surface.
- Choose Pick > Nothing to deselect the plane.
Create Offset Curves
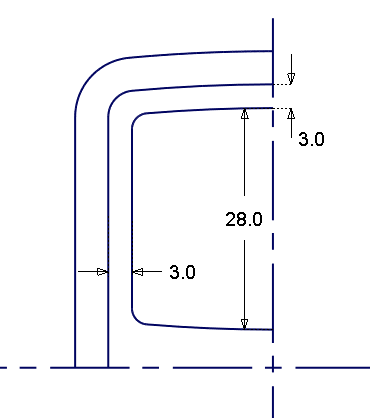
To keep the structured style of the design, make the shape of the screen echo the curve at the top of the MP3 player.
Start by duplicating the edge of the top surface to create a reference curve.
- Maximize the Top window.
- Choose Curve Edit > Create > Duplicate Curve
 and select the lower edge of the fillet surface at the top of the casing.
 -
When you click the edge, the pick chooser displays.
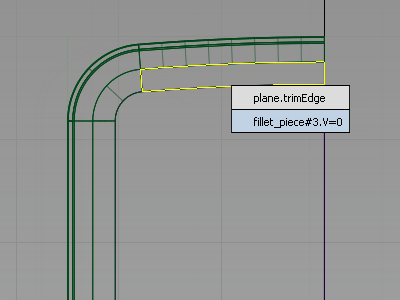
Select the fillet_piece edge to create a curve that is a duplicate of the surface edge.

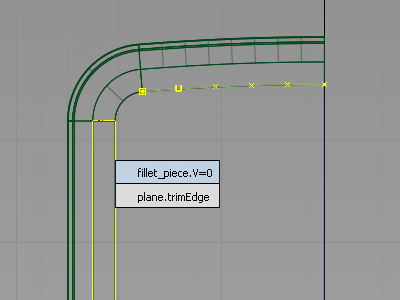
- With the Curve Edit > Create > Duplicate Curve tool already active, select the fillet surface at the left side.
-
Again, choose the fillet edge.
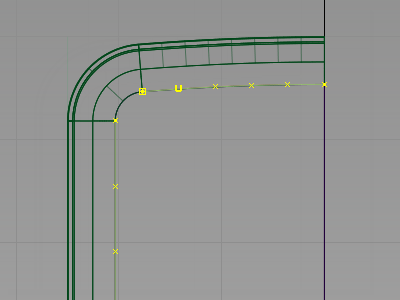
- With the curves still highlighted, choose Object Edit > Offset
 and type-3 and press Enter to preview the top and side curves for the screen.
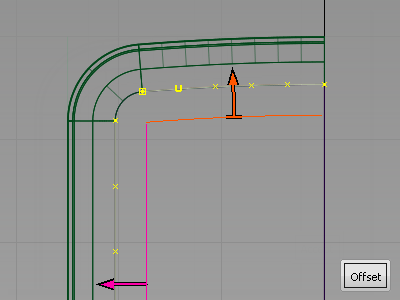
- Click Offset to create the offset curve.

- Choose Pick > Nothing to deselect the curves.
-
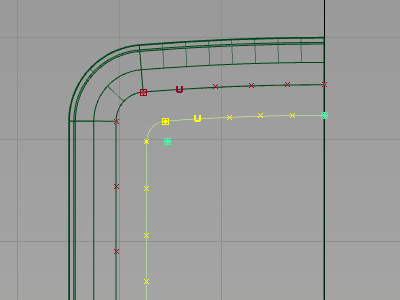
Now duplicate and mirror the top curve to create the lower curve.
This time, use a different technique for mirroring. The Edit > Duplicate > Mirror tool always mirrors across a grid axis. Use the Edit > Duplicate > Object tool to mirror across the pivot point of an object.
So first, set the pivot for the curve.
Choose Pick > Object
and select the upper curve. Both the upper and the left curves are selected because the offset grouped them.
- Choose Edit > Ungroup
 and click the left curve to deselect it. Now only the top curve is selected.
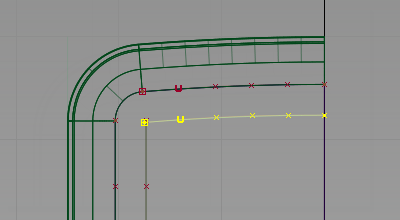
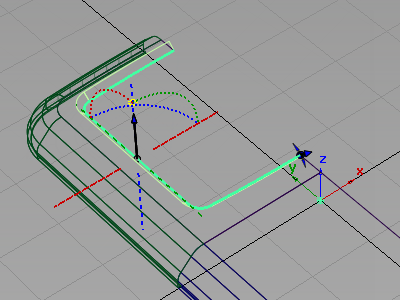
- Choose Transform > Local > Set Pivot
 and use the
  (Windows) or
  (Mac) key to snap the pivot point to the end of the curve.
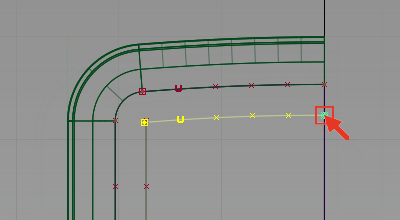
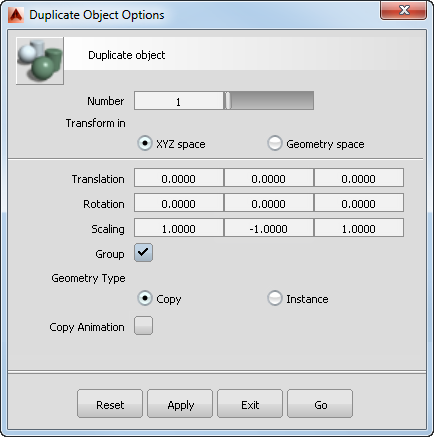
- Choose Edit > Duplicate > Object

 to open the option window.
 Change the Scaling in the y-direction to -1.
 Tip:
Tip:The Duplicate Object tool is used to duplicate and transform objects in one operation. It is useful for creating patterns of many duplicates. You use it later in the tutorial to create the pattern of control buttons.
Click Go to create a copy of the curve, scaled in the Y-direction.
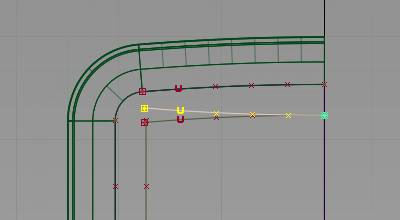
- Choose Transform > Move
 and type 0, -28 and press Enter to move the curve downward.
 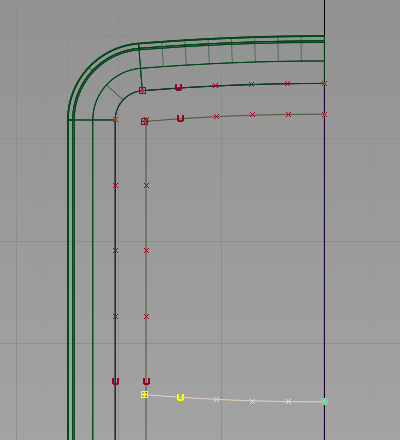 Tip: Make sure the move type is REL (relative), and not ABS (absolute).
 - Choose Curve Edit > Create > Fillet Curves
 to open the option window. Set the fillet radius to 2.0 mm and click Go. Follow the prompts to create fillets between the curves.
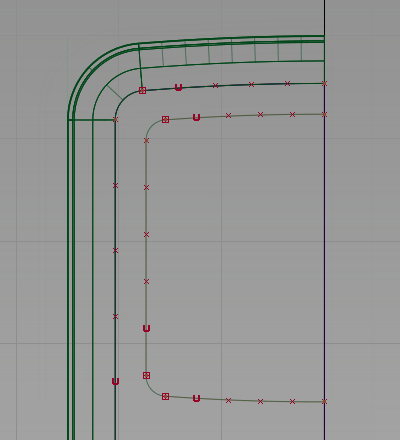
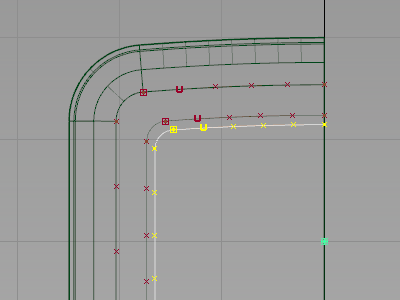
Duplicate the screen curves
- Choose Pick > Component
 and choose the Curves option so that it is the only component type selected and click Go.
 - Drag a pick box over the screen outline curves you created to select them.
- Choose Edit > Group to group the curves together.
- Choose Edit > Duplicate > Object to open the option window.
Change the Scaling in the y-direction to 1.
Click Go to create a copy of the curves.
- Choose Transform > Local > Set Pivot and use the
 and (Windows) or
  and (Mac) keys to snap the pivot point to the grid. Release the keys and with the pivot point still selected, drag the point along the axis using the left-mouse button to the position shown.
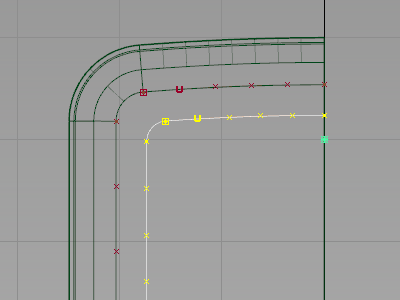
- Choose Transform > Non-p Scale and drag using the left mouse button to resize the curves group as shown.
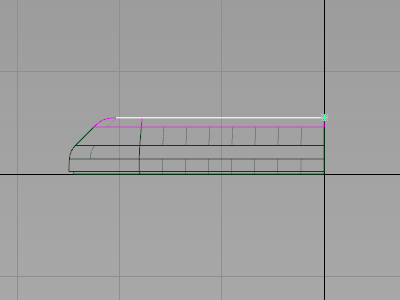
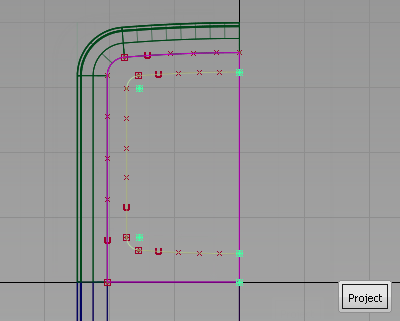
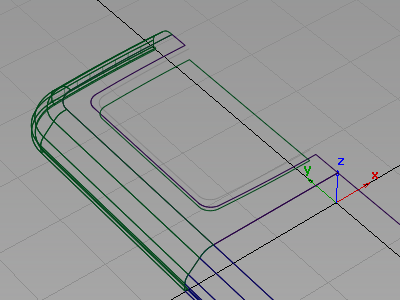
Project the screen curves
NextProject the curves onto the front surface and offset surface to cut out the screen shape.
The active window determines the direction of projection: the curves are projected perpendicular to the active window.
Working in the Top window sets the direction of projection correctly.
- Choose Surface Edit > Create CurvesOnSurface > Project
 .
. -
You are prompted to select a surface. Click the edge of the plane and pick the offset surface.
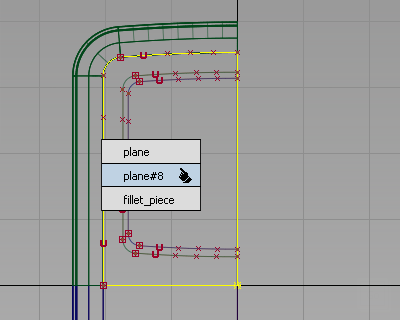
Click Go.
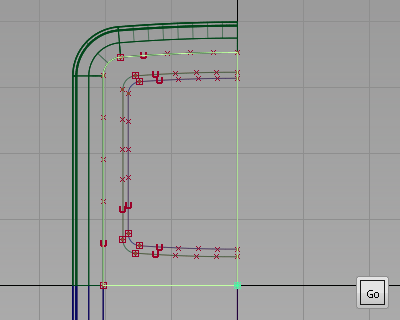
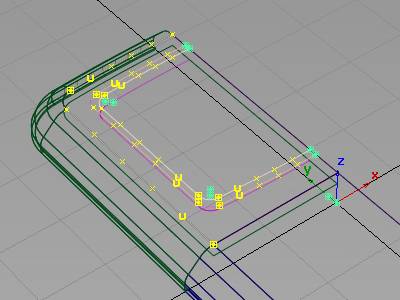
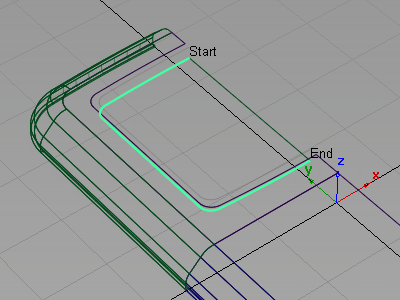
- You are then prompted to select the curves to project. Click each of the inner outline curves you created to select them, as shown.
- Click Project to project the curves.
- Now project the outer set of curves onto the top plane. Click the plane surface to select it and click Go.
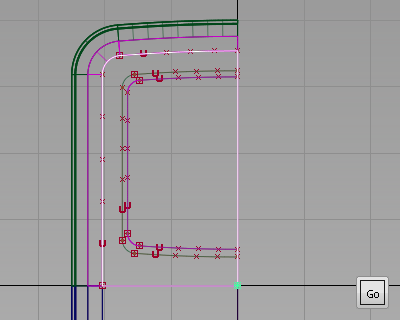
- Select the outer outline curves and click Project.
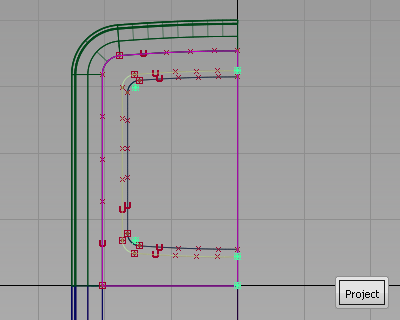
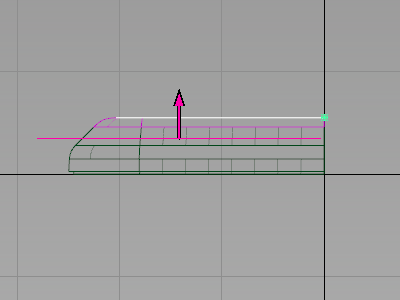
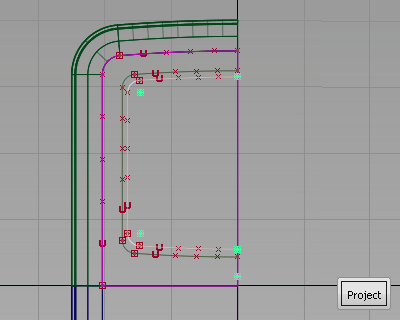
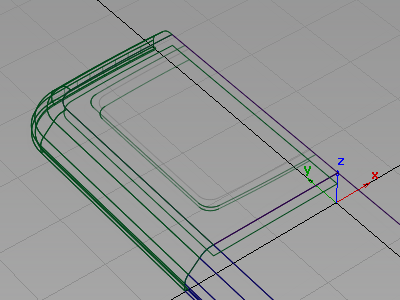
- Maximize the Perspective window and tumble the view.
Now template the curves, so that you can see the curves-on-surface more easily.
- Choose Pick > Component and choose the Curves option so that it is the only component type selected and click Go.
-
Drag a pick box over all the curves to select them.
- Choose ObjectDisplay > Template
 to template the curves.
 Now you can see the curves-on-surface created by projecting.
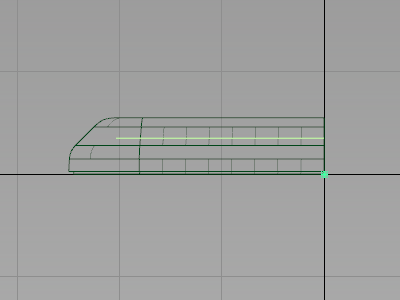
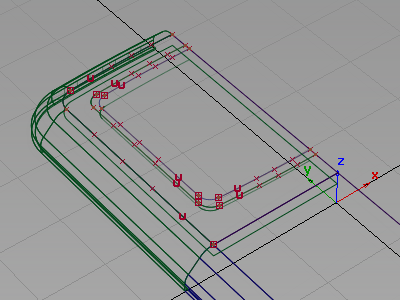
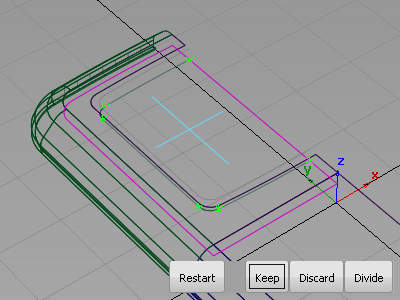
Next trim the front face of the casing to create the opening for the screen.
- Choose Surface Edit > Trim > Trim Surface
 . You are prompted to select a surface to trim.
 Pick the plane surface.
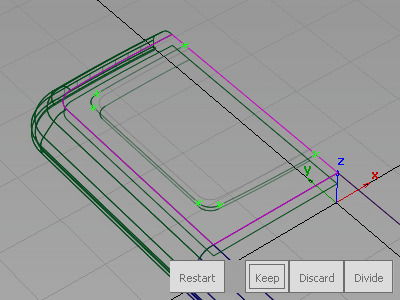
- You are then prompted to select a region.
Click the plane surface, outside the screen area.

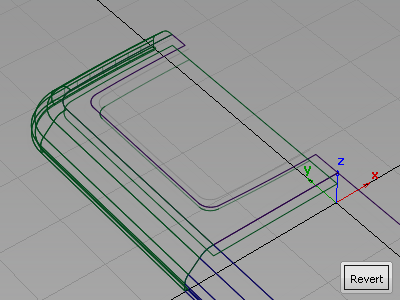
- Click Keep to trim the surface.
Create the screen surfaces
Now create a chamfered edge for the screen, and a screen surface.
- Next trim the offset surface to create the screen. With the Surface Edit > Trim > Trim Surface tool still selected, select the offset surface.

- You are then prompted to select a region.
Click the screen surface.
- Click Keep to trim the surface.
- Choose Surfaces > Skin Surfaces > Skin
 . Double-click the icon to open the option window.
 - Turn on Chain Select and turn off Continuity Check.
- Select the edges of the screen.
- Select the edges of the casing to build the surface.
- Assign all the surfaces to the Front Casing layer.
You now have lots of curves, so it is a good idea to organize them onto a separate layer.
- Choose Layers > New
 to create a layer.
 - Change the layer name to Curves.

- Use Pick > Template
 to select the templated curves, and Assign them to the new Curves layer.
 - Use Pick > Component to pick any remaining curves and Assign them to the Curves layer.
- Make the Curves layer invisible.
- Turn on Symmetry for Front Casing layer, and use diagnostic shading to evaluate the design.
(If you want, use the Show menu in the window title bar to turn off the Model and Grid for a better view.)
Save your work
Save your work in the wire folder of the Lessons project. Name your file myMP3Player4.wire.