Use these controls for creating and editing flows. You can create a flow on any surface; its vertical position is set by where you begin the flow.
If you move a flow or flow segment vertically so that it's near another flow, it will snap to the other flow to create a valid intersection. For this to happen, the angle between the two must be between 45 and 135 degrees and the intersection should be a reasonable distance from a flow point (corner). The same applies when creating or editing a ramp: If valid, an intersection is created between the ramp landing and a crossing segment of a different flow.
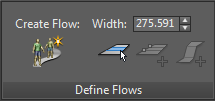
 Create Flow
 - Enables creating segmented pathways for the simulated humans to walk along. To create the first segment, click at the starting point, then move the mouse and click a second point. The starting point can be on the home grid or any surface.
To continue a flow, after creating the first segment, keep moving the mouse and clicking at each turning point. As you move the mouse, the segment you're creating responds in real time. If the angle between the new segment and the previous one is too small, all segments in the flow are blank and orange outlines appear on the flow. These signify an invalid flow, with which Populate does not work. If the angle is permissible, lines indicating lanes of pedestrian traffic appear on all segments.
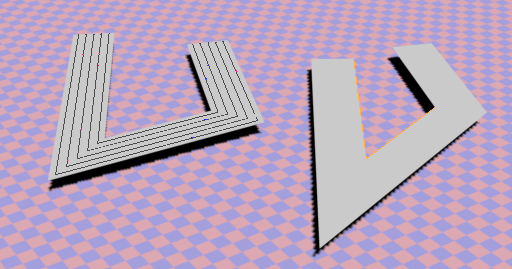
Left: Valid flow; Right: Invalid flow
To complete creation of a flow, do either of the following:
- Right-click: Ends creation of the flow and deletes the current segment.
- Press
 : Completes the current segment as if you clicked at the cursor location and then ends creation of the flow.
Where two flows intersect at angles between 45 and 135 degrees, a green four-way-arrow (three-way if the intersection is near a flow endpoint) symbol appears, as in the following illustration. The symbol indicates that walkers can randomly change direction at the intersection.
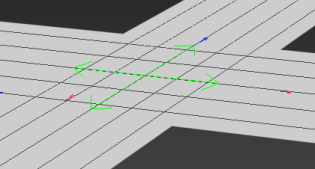 If the arrow does not appear, walkers might intersect each other. To resolve this, adjust the angle between the flows and make sure the intersection is not close to a flow point. Also, the direction change cannot take place on ramps, but it can on ramp landings.
If both flows are unidirectional (that is, either Forward or Backward: see Flow Rollout (Populate)), then the angle can be more acute than it is between bidirectional flows.
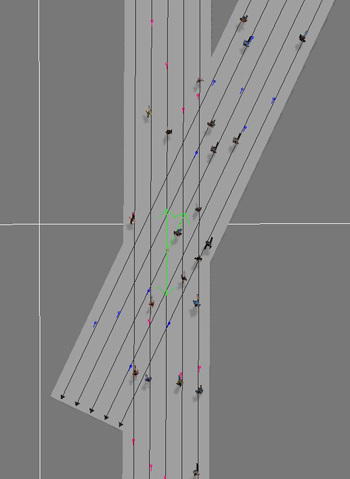
Intersecting unidirectional flows
After creating a flow, you can modify properties such as the number of people and their behavior with the Flow rollout settings.
When creating a flow, you can connect the new flow segment to an existing flow. Position the mouse cursor over the flow point at the end of another flow and a small, square, green outline appears around the flow point. Click to connect the two and exit Create Flow.
To see an example of this feature, play the following video:
- Width
- Sets the width of the next flow to be created. This setting does not affect existing flows; to modify the size of an existing, selected flow, use the Width setting on the Flow rollout.
See also: Lane Spacing.
Populate flows and people do not support the standard 3ds Max scaling tools. To change the size of a flow, select it and change the Width setting on the Flows rollout.
To change the size of the people and the area of the flows they can use, use the following MAXScript command:pop.realworldscale = N
where N is a multiplier with the default value of 1.0. Note that this also affects the number of people, so you get more pedestrians with smaller values and fewer with larger values.
For example, to make the people half their default size, creating consequently more people, use:
pop.realworldscale = 0.5
 Edit Flow
 - Enables adjusting the flow by moving flow points and flow segments. When Edit Flow is active, you can switch interactively between moving flow points and flow segments.
To move a flow point, drag it. To move a flow segment, first click the segment centerline to select it, release the mouse button, then drag the centerline. Alternatively, you can choose the sub-object level (Flow Points or Flow Segments) on the modifier stack.
In effect, moving a flow segment is the same as moving both of its flow points.

Left: selected flow point; Right: selected flow segment
Note: You can move points and flow segments only in the XY plane; attempting to move them vertically (that is, on the Z axis) moves the entire flow. To add inclined and declined sections to a flow segment, use Create Ramp (see following).To view a demonstration of editing flow points and flow segments interactively, play the following video:
You can also delete flow segments in Edit Flow mode. Select one or more segments or flow points and then press
 .
.  Add to Flow
 - Extends the selected flow at either end, or subdivides segments within the flow. Available only when Edit Flow is active.
To extend a flow, position the mouse cursor over a flow point at either end of the flow until a small, square, green outline appears around the flow point. Click to create a new flow segment that's attached to the one you clicked, then move the mouse to set the endpoint of the new segment and click again. To add more segments, continue moving and clicking the mouse.
Note: When extending a flow, you can connect the new flow segment to an existing flow. Position the mouse cursor over the flow point at the end of another flow and a small, square, green outline appears around the flow point. Click to connect the two and exit Add To Flow. For a video demonstration of this feature, see the Create Flow description, above.To subdivide a segment, position the mouse cursor over the segment, near the centerline. A green line across the segment shows where the split will occur. Move the mouse if necessary and then click to perform the subdivision.
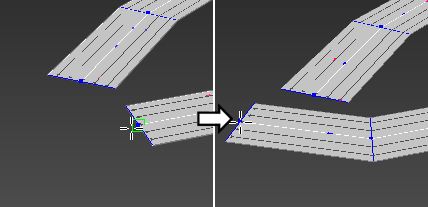
Extending a flow with Add To Flow
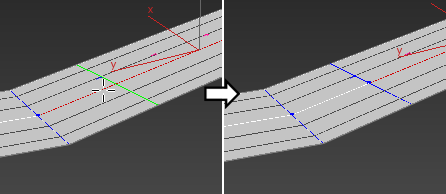
Subdividing a flow segment with Add To Flow
 Create Ramp
 - Enables creating inclined and declined sections in a flow segment. Available only when Edit Flow is active and one or more flow segments are selected.
To create a ramp, select one or more flow segments and then click Create Ramp. This adds two new edges to the segment, subdividing the segment into three sub-segments. The center sub-segment is the ramp, as indicated by arrows at each end, while the two adjacent sub-segments are landings.
Next, select one or more of the sub-segment edges and then move them upward or downward a short distance. If you move it too far, the pedestrian lanes disappear and the flow is rendered invalid.
Note: You can change the ramp length by moving the edges at either end of the ramp along the length of the segment.To view an example of creating a ramp, play this video:
Note: Create Ramp can be applied only once to each original flow segment.