You can import a 3D model into one or several geometry nodes. You can also import multiple 3D models into a single animated geometry node.
To import a 3D model:
- Do one of the following:
- Drag the Import node from the node bin and place it in the schematic.
- Drag the Import node from the node bin and place it where you want it in Result view.
- Double-click the Import node. You do not need to be in Schematic view to add a node in this manner.
The Import menu and file browser appear.
Note: When selecting Paint, GMask, or Photoshop, the subsequent controls described in this section do not apply. When selecting FBX, other controls appear. See Importing the FBX Format. - From the Import Type box, select the import format.
- If the file you want to import has a file extension different from the one specified, type a file extension.
- Set any Import Settings, as needed.
- Select the file to import from the file browser.
- Click Load.
The 3D model (Geom node) and axis is added to the scene. SVG files appear as Action 3D Shape nodes.
You can change the 3D model's colour, specular highlight, shine, and other material properties. See 3D Geometry Menu Settings.
To import multiple 3D models into an animated sequence:
- Follow the same steps for adding a single 3D model, but from the Import file browser, select multiple 3D models by holding the Shift or Ctrl key.
- Once the models are selected, click Load.
The selected 3D models are loaded to the same line in the Media list.
- Double-click the Geometry node in the schematic to access the Geometry menu, then click the Timing tab.
Importing Photoshop Files into Action
You also have the option of automatically importing all the layers at their native resolution. Each layer is parented by an axis that gives it the correct offset in the X and Y axes. Hidden layers are imported, but will remain hidden. Photoshop blend modes are maintained for each layer.
To import a PSD file into Action:
- From the Action Node bin, double-click the Import node.
The file browser appears.
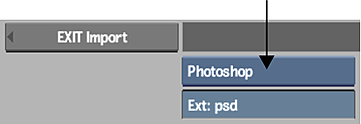
- From the Import Type box, select the Photoshop format.

- Select a .psd format file.
- Click Load.
The Photoshop file is loaded into Action. Each layer is parented by an axis, and blend modes are maintained. A Batch reel is created to house the images imported in the layers. It is closed by default.