Generate a PRM file from custom process parameters.
Video length (5:00).
Videos are not available in the offline help. Refer to the online help to watch the video.
A process parameter (PRM) file records machine process parameters and material properties. A moving heat source is applied to the material on a small-scale analysis. The PRM file stores the mechanical response of the material to the machine parameter setting. This can be extrapolated to a full part. For each new material or processing parameter set, a new PRM generation must be completed. However the resulting PRM file can be reused for any future simulation using the same combination of material and processing parameters.
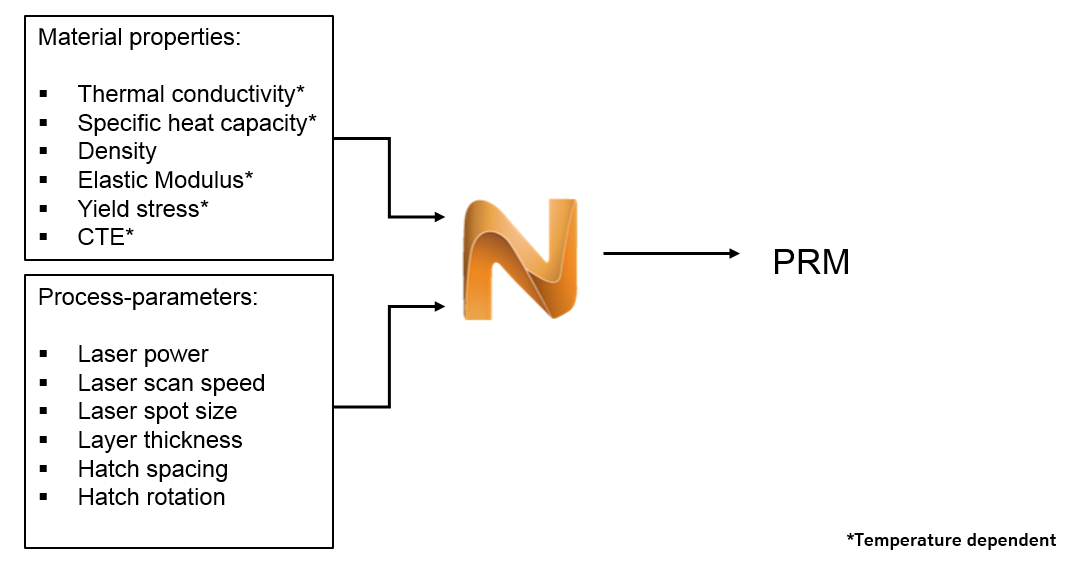
Follow the step-by-step instructions shown in the video.
- In the Simulation Utility window, click
 .
.
The Processing Parameters dialog box opens, showing the available library of PRM files.
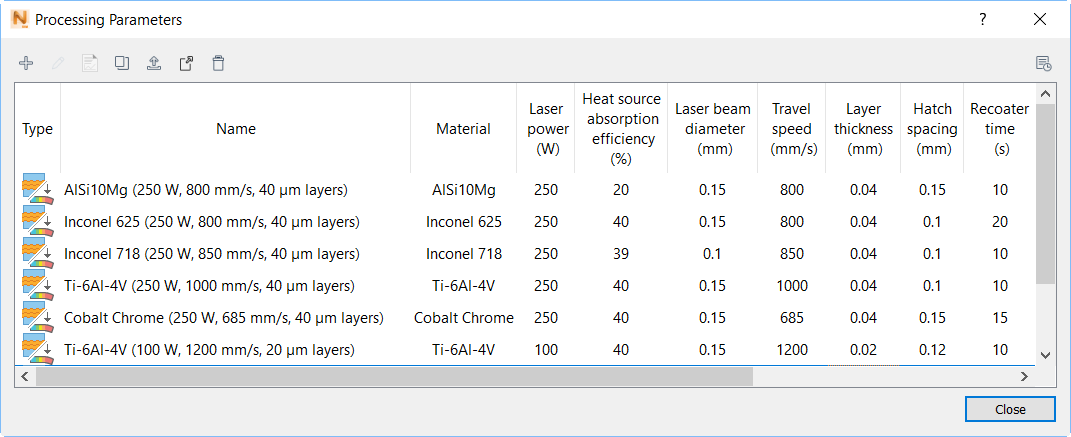
This dialog supports many management functions for PRM files, using the icons along the top of the dialog, and a right-click menu from a selected file. For more information, see Processing Parameters.
- In this example, we want to simulate the creation of a new PRM file; in the upper left of the dialog, click
New
 to open the
New Process Parameters dialog, which is used to set processing parameters. For this example, custom process parameters will be used.
to open the
New Process Parameters dialog, which is used to set processing parameters. For this example, custom process parameters will be used.
- Adjust the values to match the parameters shown below. You may need to change your Settings to Metric to enter values below in millimeters rather than meters. If so, see the
Netfabb Simulation Settings Help topic.
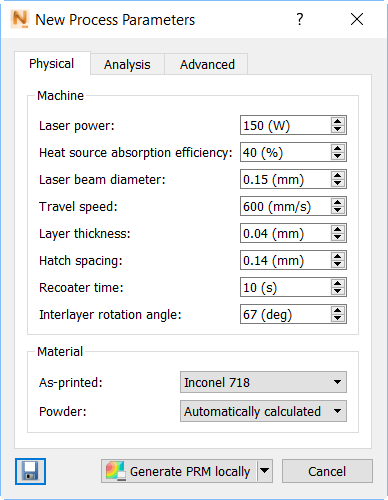
If a new material is ever required, it can be added temporarily in this dialog, using the Material As-printed menu, or permanently by creating a new material in the Materials Library. PRM files are encoded with the material properties used to generate them. For this example, choose the Inconel 718 properties included with the software.
- Click OK.
A dialog indicates a path and name for the new PRM file. The file name can be changed here, but if you want to change the library path, go to .
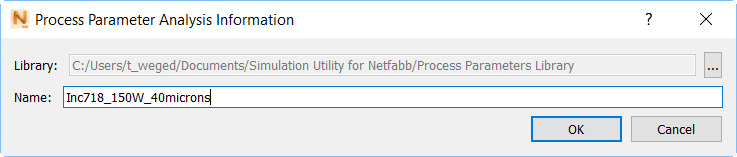
Choose a descriptive name that will identify the PRM file for future use. As soon as the OK button is pressed the simulation starts running. Because this process could take several hours to complete, you may want to cancel the solve.
- Click OK to close the Process Parameter dialogs.
- To ensure the simulation is running properly, select
Job Manager
 from the
Home tab. This brings up the list of past and current job runs, as shown here:
from the
Home tab. This brings up the list of past and current job runs, as shown here:
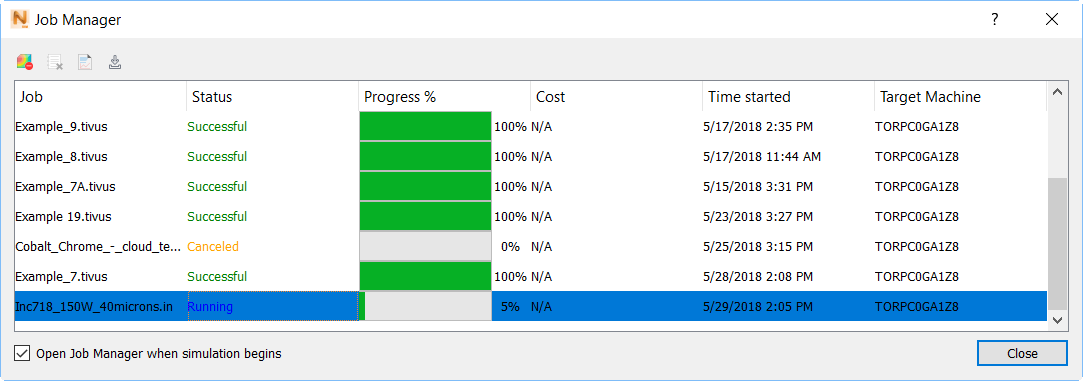
You can click the View Logs
 button in the upper left of the
Job Manager from time to time to see the process in action. To cancel the solve, select the job, and then click
Cancel
button in the upper left of the
Job Manager from time to time to see the process in action. To cancel the solve, select the job, and then click
Cancel
 in the upper left of the dialog.
Depending on system resources, the time required to generate this PRM file can vary widely. However, this process needs to be completed only once for each combination of material and process parameters.
When the simulation is complete the following prompt opens:
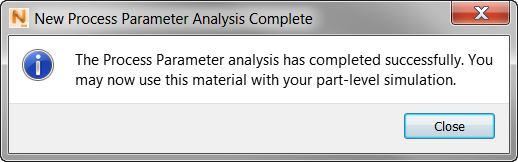
When you click , your new PRM file appears in the library.
If you did not take the time to generate the PRM file, the package of sample files for use with the tutorials (available on the Download Page) includes a copy of the PRM file configured in this tutorial, inside the Example 2 folder. You can import it into your Process Parameters Library folder, and it will show up with the others:
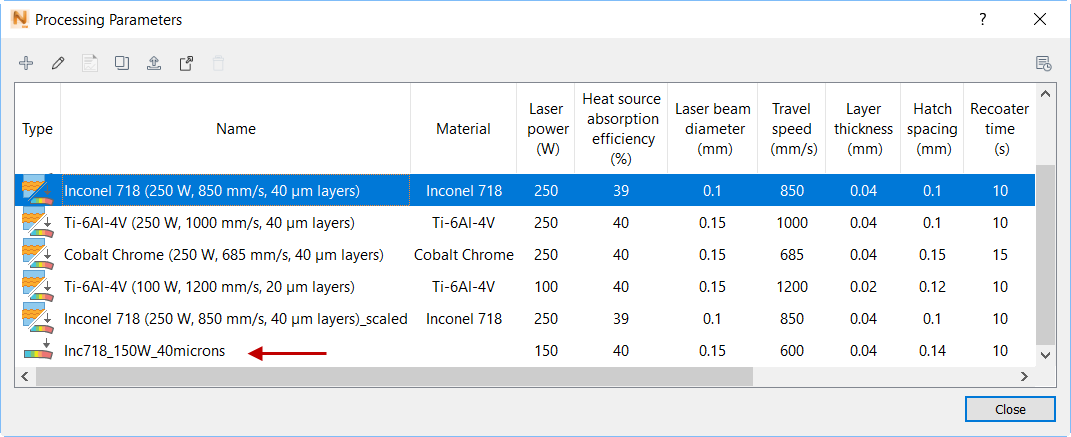
The icon for this PRM file indicates that it is designed specifically for stress and distortion analysis, whereas the other PRM files shown here are designed for a combination of stress, distortion, lack of fusion, and hotspot analysis.