The workflow to modify elements with Site Designer is different from the typical workflow in Revit.
The following is a general outline of the steps to modify elements in Site Designer. Use this workflow to make the following types of changes to site elements: move, rotate, change elevation, change type, change a boundary (add/delete vertices), and change view scale. Some site elements allow additional types of changes.
To modify a site element
- Click
Site Designer tab
 Modify panel, and click the tool for the element to modify.
- In the view, select the site element to modify: Use the cursor to point to a boundary edge or the host line of the site element, and press Tab until the status bar indicates that you have selected the line (not the Topography: Surface); then click to select it.
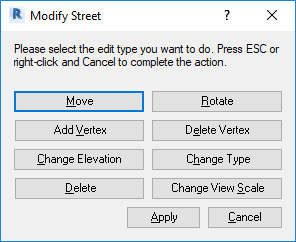
- In the Modify dialog, select the desired tool.
The following image shows the Modify Street dialog. The Modify dialog for some Site Designer tools is slightly different.

- In the view, manipulate the site element to make the desired changes.
- To save the changes:
- Right-click in the view, and click Cancel.
- In the Modify dialog, click Apply.
Site Designer updates the site elements as appropriate. Check a 3D view and a section view to understand the results of the changes.