Learn to define and modify view arrangement strategies.
The arrangement of views on shop drawings is dependent on a set of rules in the drawing style and further influenced by a default value set in the Management Tools application.
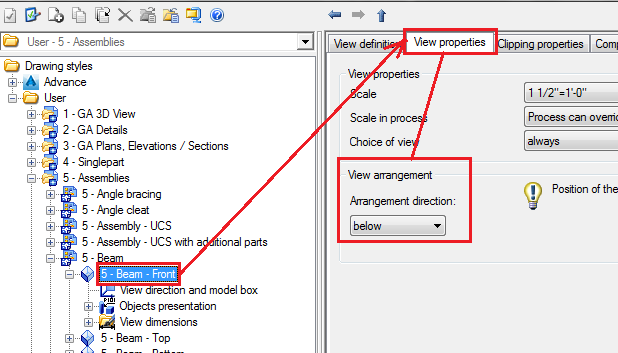
The view arrangement strategies are located in the View properties tab, of the view definition:

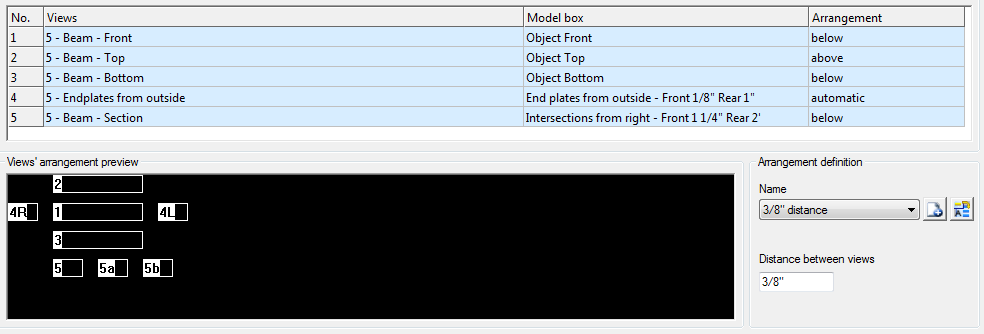
Defining a distance between views (always measured from the extreme object of the detail view) avoids overlapping of individual views on the drawing.
Several predefined distances are available for use.
Two functions are available for adding new strategies and modifying existing strategies.
| Button | Function |
|---|---|
|
|
Define a new strategy. |
|
|
Rename a strategy. |
Add a new strategy
- On the properties panel, click
 (New).
- Enter a name for the new strategy.
- Enter the distance between views for this strategy.
Rename a strategy
- Select a strategy to rename.
- Click
 (Rename).
- Enter a new name for the selected strategy.
Types of View Arrangement Strategies
There are two types of view arrangement strategies available in the Drawing Style Manager:
-
Manual settings
Each view is positioned in relative position to the main view. The options here include below, left and right that are all relative positions to the main view in the paper space.
For example, in a beam drawing style, the top view can be arranged at the top, but when considering the same beam drawing style for a column with a vertical layout, the same top view will be placed to the left of the main view arranged on the left setting. The schematic preview below the view list determines where each view will be placed in relative position to the main view:

-
Automatic settings
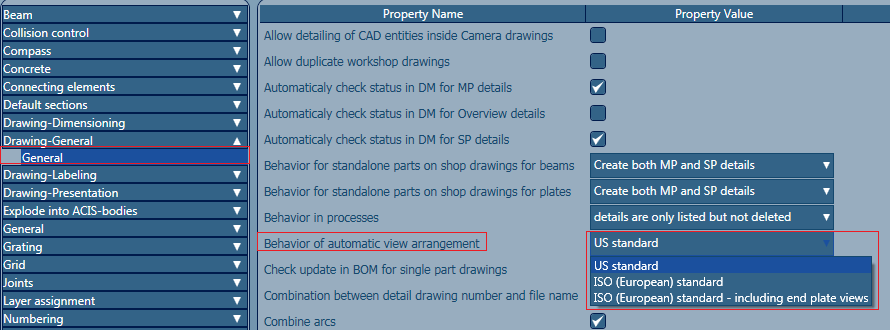
This is configured by setting all the views on an automatic arrangement. The automatic layout of the views is done based on the third or first angle rules. The method used here is set by a global default value available in the Management Tools application
 Defaults category
  Drawing-General:

- US Standard uses the third angle project arrangement method, where:
- The top view is placed above the front view.
- The bottom view is placed below the front view.
- The end plate for the left hand side end of the beam in the front view is placed on the left of the main view.
- The end plate for the right hand side end of the beam in the front view is placed on the right of the main view.
- ISO (European) standard uses the first angle project arrangement method, where:
- The top view is placed below the front view.
- The bottom view is placed above the front view.
- The end plate for the left hand side end of the beam in the front view is placed on the left of the main view.
- The end plate for the right hand side end of the beam in the front view is placed on the right of the main view.
ISO (European) standard includes end plate views using the same method to arrange the views: first angle projection. It does also switch the position of the end plate views with the left hand side end of the beam end plate view placed on the right side of the main view.