A format (.set) file preformats reports.
Use on a Single Report
- Do one of the following:
- Click
 . Find
 - Click . Find
- Click
- Click Format.
- Browse to and select the .set file.
Note: Only format files for the selected report name are shown.
Use in Automatic Reports
-
Click . Find
- Select the report name from the schematic or panel report list.
- Specify the format file to use for the selected report. Click Format File Setup to create, edit, and save a format file. Note: The format files must define file output, table output, or both since the reports are not displayed on the screen.
- Click Add to add the report to the Selected Reports list. The Add button is not active until both a report name and format file are selected.
- Continue adding more reports to the Selected Reports list.
- If any of the selected reports have table output, specify:
- First Drawing Name. File name and location for the fist drawing needed for new report tables. Subsequent drawing names are generated by incrementing the file name.
- Template. Drawing template used to create drawings for new report tables.
- Click OK to generate the report output for each selected report. Note: New drawings are added to the active project.
Create or Edit Using Change Report Format
- Generate a report.
- In the Report Generator dialog box, select Change Report Format.
- Make any necessary changes to the fields to report, field order, field labels, and justification.
- Do one of the following:
- Click OK to save the format to the default format file name. Each report type has its own default format file name.
- Click OK+Save As to enter a name for the format file.
Create or Edit Using Report Format Setup
Options vary based on the report name selected.
-
Click . Find
Note: You can also open this dialog box by clicking Format File Setup on the Automatic Report Selection dialog box.
- Select a report name.
- To edit an existing format file, click Open Format File and browse to the .set file. Note: Only format files for the selected report name are shown.
- Specify any report options.
- Select installation or location codes to extract.
- All. Extracts all components regardless of value.
- Blank. Extracts only those components that do not have a value.
- Named Location\Named Installation. Extracts only those components that have a value matching the value entered in the box. Wild-card characters are supported.
- (Optional) Select to add special break values to the report. Special breaks sort and break the report into sections based on the selected values.
- Select any of the following options to include in the format file. Tip: If you are going to use the format file in automatic reports you should define the Save Report to File options, Put on Drawing options, or both.
- Save Report to File: Opens a dialog box where you can define the settings used when you save a report to a file. Select the type of output, any options within the file type, and the output file name. You can define multiple file outputs.
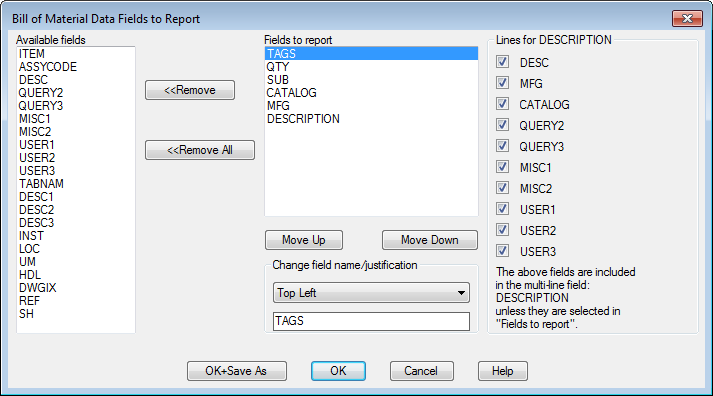
- Change Report Fields: Opens a dialog box where you specify the fields to include in the report, field order, field labels, and text justification.
- Put on Drawing: Opens a dialog box where you can specify settings used when inserting the report as a table.
- Sort Fields: Controls the sorting order of fields in the report.
-
User Post: Opens the Report Data Post-processing Options dialog box where you specify which options to run when the report is generated. Note: User Post options included in the format file are run before the report is displayed in the Report Generator dialog box.
- Save the format file.
- Click Done.