You can import a 3D model into one or several geometry nodes. You can also import multiple 3D models into a single animated geometry node.
To import a 3D model:
- Do one of the following:
- Right-click the schematic and select Import.
- Drag the Import node from the node bin and place it in the schematic.
- Drag the Import node from the node bin and place it where you want it in Result view.
- Double-click the Import node. You do not need to be in Schematic view to add a node in this manner.
The Import menu and file browser appear.
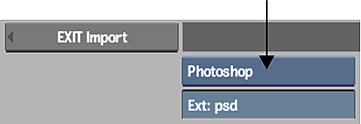
Note: When selecting Paint, GMask, or Photoshop, the subsequent settings described in this section do not apply. - From the Import Type box, select the import format.
If you select FBX or Alembic, you can then choose an Import Type:
- Action Objects: to create local copies of the FBX or Alembic files, without any connection to the source file (similar to a hard import). This option can impact auto-save time and space in the file system for large geometries.
- Read File: to create an FBX or Alembic Scene node, similar to a soft-imported Group node, with added functionality. This option maintains a live link to the source file, insuring a constant update with file changes, as well as having no impact on auto-save time and file system disk space.
Note: Make sure that you have write permissions to the folder where the FBX file is located, as Flame decompresses the textures embedded in the FBX to an .fbm folder co-located with the FBX file. - If the file you want to import has a file extension different from the one specified, type a file extension.
- Set any Import Settings, as needed.
- Select the file to import from the file browser. You can set the default Action geometry import path (or use Python hooks to configure customized Setup paths) in the Preferences menu.
- Click Load.
The 3D model (Geom node) and axis is added to the scene. SVG files appear as Action 3D Shape nodes. For FBX and Alembic geometries, depending on your selection in the Import Type box, you may see a Scene Node, or all of the component nodes of the geometry.
You can change the 3D model's colour, specular highlight, shine, and other material properties. See 3D Geometry Menu Settings.
To import multiple 3D models into an animated sequence:
- Follow the same steps for adding a single 3D model, but from the Import file browser, select multiple 3D models by holding the Shift or Ctrl key.
- Once the models are selected, click Load.
The selected 3D models are loaded to the same line in the Media list.
- Double-click the Geometry node in the schematic to access the Geometry menu, then click the Timing tab.
 To replace a model with another one:
- Select the model in the schematic.
- From the contextual menu, select Import And Replace.
- In the file browser, select the new geometry.
Connections are restored based by matching names between the original model and its replacement, and shouldn't change on load. This feature works best for iterative work, where one model replaces a previous version of the same model.
Importing Photoshop Files into Action
You also have the option of automatically importing all the layers at their native resolution. Each layer is parented by an axis that gives it the correct offset in the X and Y axes. Hidden layers are imported, but will remain hidden. Photoshop blend modes are maintained for each layer.
To import a PSD file into Action:
- From the Action Node bin, double-click the Import node.
The file browser appears.
- From the Import Type box, select the Photoshop format.
- Select a .psd format file.
- Click Load.
The Photoshop file is loaded into Action. Each layer is parented by an axis, and blend modes are maintained. A Batch reel is created to house the images imported in the layers. It is closed by default.
Support for Stingray PBS Shading on Import
Using FBX import in Action, Flame supports Stingray PBS shading from Maya, 3DS Max and Stingray. This ensures physically based rendering parity and assets exchange between these applications.
Flame supports the default configuration of Stingray PBS, supporting the following maps:
- BaseColor
- Roughness
- Metallic
- AO
- Emissive
Flame also supports individual colour values and float values when no maps are used.
Each setting or map is imported in Action in a matching texture maps or shader/material node value.