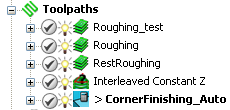
Use the Toolpaths menu to create and manage toolpaths in the current project.
To display the menu, in the Explorer, right-click Toolpaths.
Toolpaths — This is the name of this menu.
Create Toolpath — Select to display the Strategy Selector dialog so you can create a new toolpath. See Toolpath Strategies for information on the different toolpaths available.
Toolpath Names — Select to specify the template used to name new toolpaths.
This controls the naming convention used when creating multiple entities.
-
Rename — Select to display the
Enter Template
dialog, which enables you to specify a new template.
Enter the name of the template prefix you want to insert and click
 . This displays the prefix on the menu. New toolpaths use this prefix.
Toolpath Names > Rename: None — When displayed, does not add a prefix to new toolpath names.
Toolpath Names > Rename: prefix — When displayed, adds a prefix to new toolpath names.
- Off — Select to remove the template so that all new toolpaths do not use a template. Existing toolpath names remain unchanged. Selecting this option changes the rename option to Toolpath Names > Rename: None.
Folder Names — Select to specify the template used for all new folders.
These menu options control the naming convention used when creating multiple folders.
-
Rename — Select to display the
Enter Template
dialog, which enables you to specify a new template.
Enter the name of the template prefix you want to insert, and then click
 . This displays the prefixon the menu and all new folders use this prefix.
Folder Names > Rename: None — When displayed, PowerMill does not add a prefix to new folder names.
Folder Names > Rename: prefix— When displayed, PowerMill adds the prefix to new folder names.
- Off — Select to remove the template so that all new folders do not use a template. Existing folder names remain unchanged. Selecting this option changes the rename option to Folder Names > Rename: None.
Batch Process — Select to process the batch toolpaths marked
 .
.
When you create a batch toolpath PowerMill generates a file containing all the relevant parameters to create the toolpath at a later date. It is fully defined in the sense that it can be selected and saved to session files, however, it does not calculate cutting moves.
Invalidate All — Select to invalidate calculated toolpaths.
This changes the toolpaths to batch toolpaths marked with a
 . When the toolpath is locked by a
Stock Model you have to unlock the
Stock Model
before invalidating the toolpaths.
This can be useful if you have created a set of toolpaths for one model and require a similar set of toolpaths for a similar model.
For more information see Updating Toolpaths when a Model Changes.
Deactivate — Select to deactivate the currently active toolpath.
Draw All — Select to display all toolpaths ( indicates the toolpath is drawn).

Undraw All — Select to hide all the toolpaths ( indicates the toolpath is not drawn).

Draw Links All — Select to display all toolpath links.
Undraw Links All — Select to hide all toolpath links.
Draw Leads All — Select to display all toolpath leads.
Undraw Leads All — Select to hide all toolpath leads.
Thickness — Select to display the Component Thickness dialog. Use the dialog to give different components, such as surfaces or models, different thicknesses (Axial and Radial). The dialog also enables you to give a single component different thicknesses for different toolpaths.
The Component Thickness dialog enables you to apply different thicknesses (Axial and Radial) to different components (such as surfaces or models). It also enables you to give a single component different thicknesses for different toolpaths. Most of the dialog is unavailable until you select a thickness set from the list.
For more information on radial and axial thickness see Thickness.
Statistics — Select to display the length and time of all the leads, links, and cutting moves, as well as the number of lifts, in the selected toolpath.
Create NC Program — Select to display the NC Program dialog. Use the dialog to create a new NC program. Type in an appropriate Name and then click Accept if you are happy with the default values. This NC Program is now the active NC program and the toolpaths that you create are displayed in the NC Programs list as well as in the Toolpaths list. For more information on this dialog see NC Program Dialog. For more information see Creating toolpaths in an NC program.
Create Individual NC Programs — Select to automatically create an NC program for each toolpath selected. Each NC program is given the same name as its associated toolpath. For more information see Creating an NC program for each toolpath.
Add to NC Program — Select to add all the existing toolpaths to the currently active NC program.
Create Folder — Select to create a folder so you can organise entities in the Explorer. You can rename a folder in the normal way and drag and drop entities into it. See Explorer for more information.
Delete All — Select to delete all the toolpaths.